
There are many ways to connect to your application remotely using any Secure Shell (SSH) or Secure File Transfer Protocol (SFTP) clients. Using the SSH protocol supports encryption and other security methods used to protect file transfers better. The sensitive information will be encrypted and made unreadable when transferred between the client and the server.
Let’s begin with the details.
1) Overview of SSH
SSH, also known as Secure Shell or Secure Socket Shell, is a network protocol that allows users, particularly system administrators, to access a computer securely remotely. SSH is a set of utilities that implements the SSH protocol. It allows for strong password and/or public-key authentication and encrypted data communications between two computers connected via an open network, such as the internet.
2) Overview of SFTP
SFTP, which stands for SSH File Transfer Protocol, or Secure File Transfer Protocol, is a separate protocol packaged with SSH that works similarly but over a secure connection. SFTP is preferable to FTP in almost all cases because of its underlying security features and ability to piggyback on an SSH connection.
3) What is Server User?
Being a primary owner/administrator of your Devrims server, you have all the permissions to access the server remotely via SSH and SFTP. Server User is the most secure and critical credentials of a server. It gives you access to all the web applications installed on your server.
4) What is an Application User?
If you are a digital agency or have a team of different developers working on different projects, then Application User is handy. If you want to give access to a particular application(s) to your developer(s) or any of your team member(s), they will have access to only those application(s) to which you have given access. This feature will allow you to keep an eye on who is doing what.
5) Connect Application via SSH using Server User
To connect the web application, you must know the following:
- Server User OR Application User
- Server IP
- Port Number
- Application folder name
- Login to the Devrims dashboard using your credentials.
- Go to your desired server from the main server listing of Devrims Dashboard.
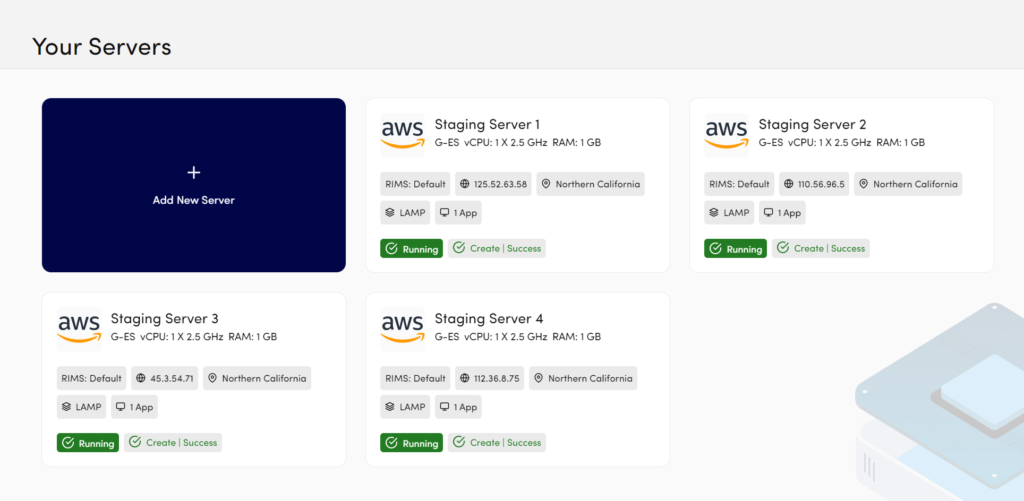
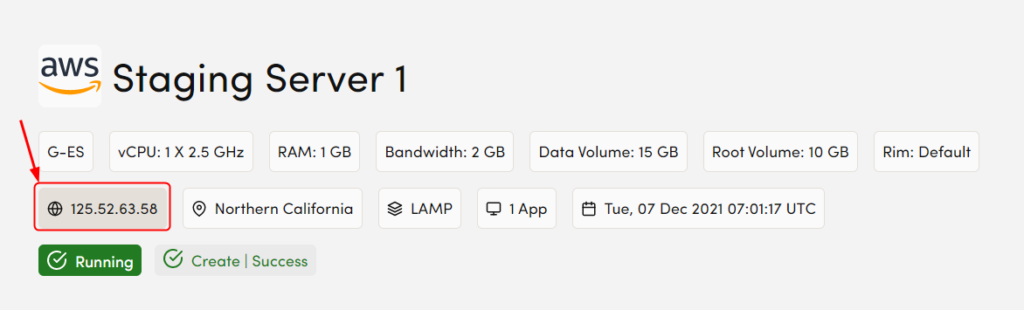
- Server User: On the Access Details tab, you can find Server User.

- Server IP can be found on the top of the same screen. Just click on IP to copy to the clipboard.
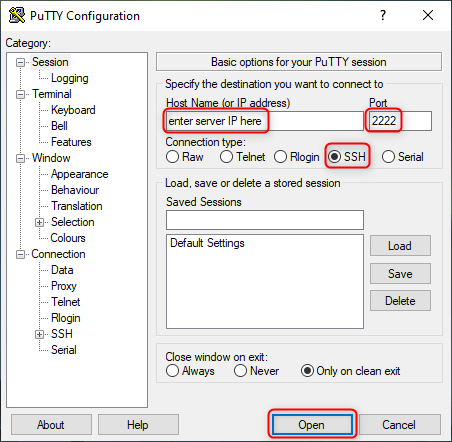
Now you have noted all the details, let’s move to the next phase to download a third-party client, i.e., PuTTY, to connect to SSH.
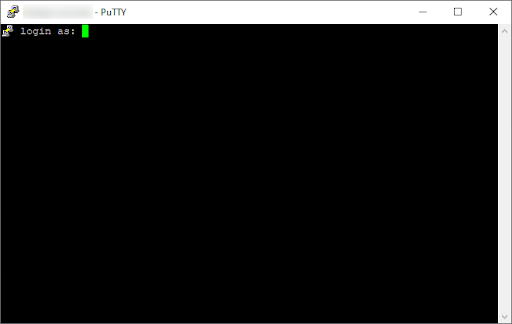
- Download the PuTTY client and then Launch the executable file.
- In the Hostname (or IP Address) field, enter your Devrims server IP.
- Enter Port 2222
- Select SSH in the Connection Type field
- Click Open
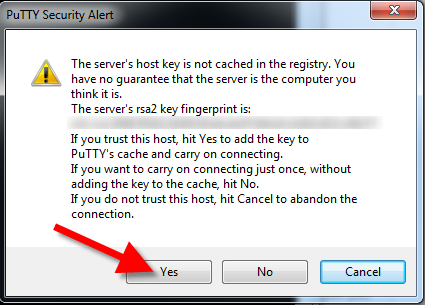
If you are attempting for the first time, you will get PuTTY Security Alert; click on “Yes” to open the username and password screen.
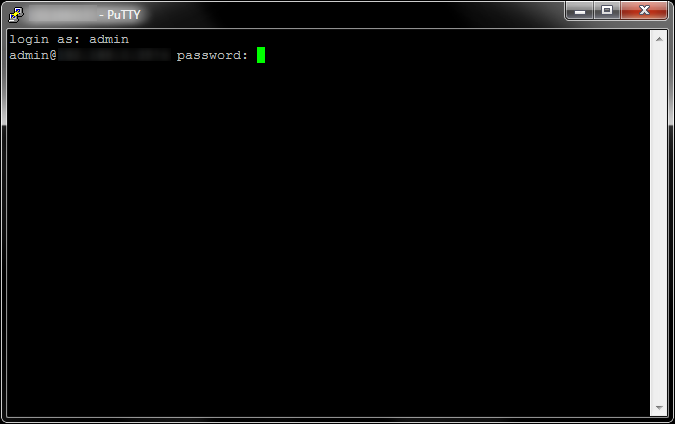
In the next window, enter the server user/application user and password to connect the server remotely.
Copy the username from the Devrims Dashboard and paste it on the PuTTY window by clicking on the right mouse button once and hit Enter from the keyboard.
In the following line, you will need to enter the password. Copy the password the way you copied the username and click the right mouse button to paste and hit Enter. Keep that in mind; you will not be able to see any character due to security reasons.
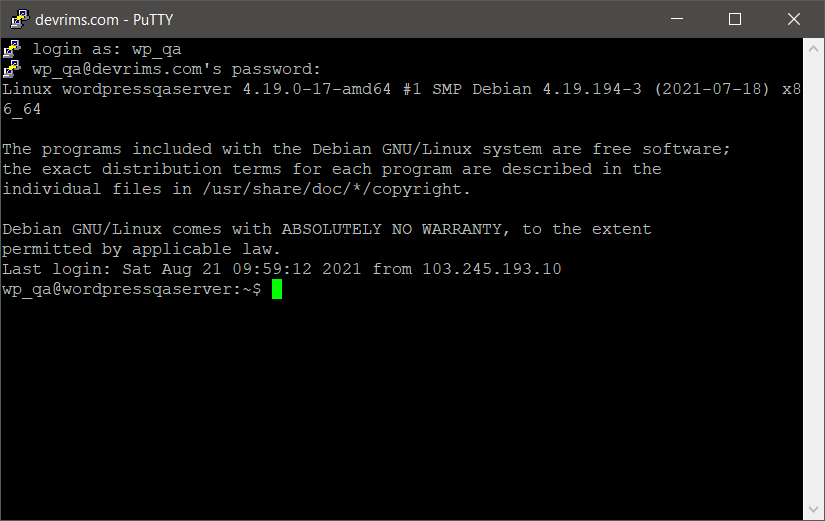
You are now connected to your server via SSH.
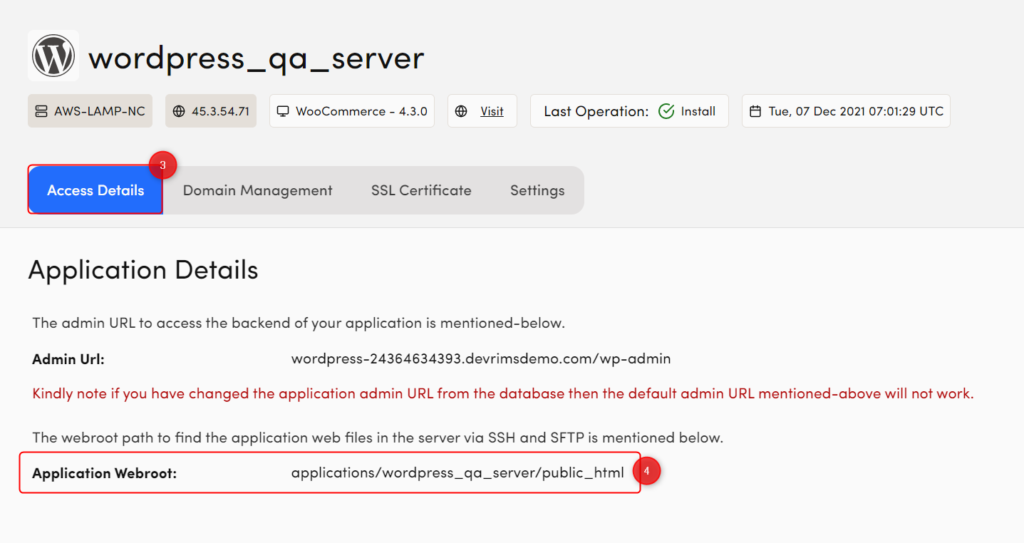
All the web applications have their own unique folder name. To find the specific application folder name, click on Application from the left bar and click on your desired application.
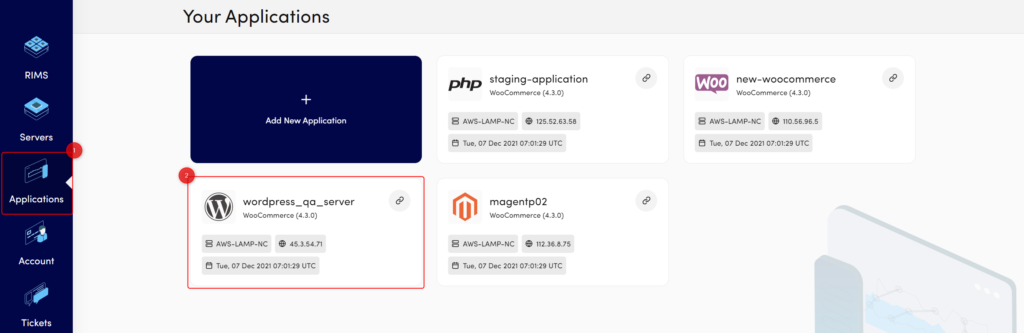
In the Access Details tab, you will see the application folder name.
- Go to the PuTTY screen and type cd applications.
- Type ls or ls -al to view all web applications’ folder names.
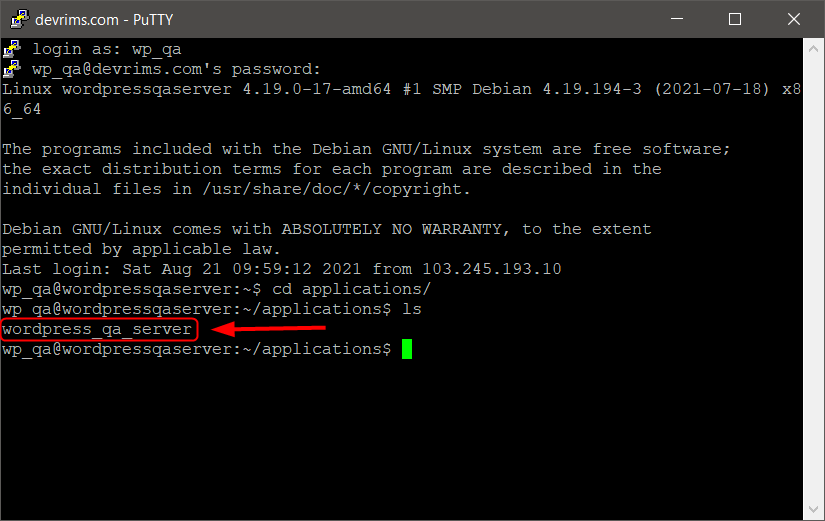
- To go into the webroot of your web application, type
cd wordpress_qa_server/public_html - Type ls or ls -al to view all the files and folders as a list view.
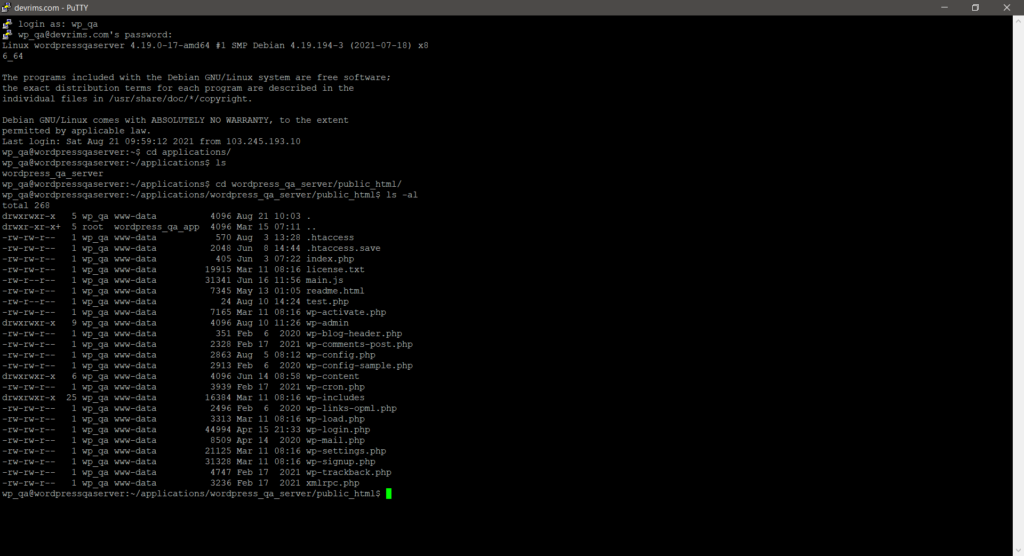
Now you are in the webroot of your web application using Server User.
6) Connect Application via SSH using Application User
To connect your server via SSH using application user, you need to create an application-level SSH/SFTP user by clicking on “Add SSH/SFTP User” on the same screen of Access Details.
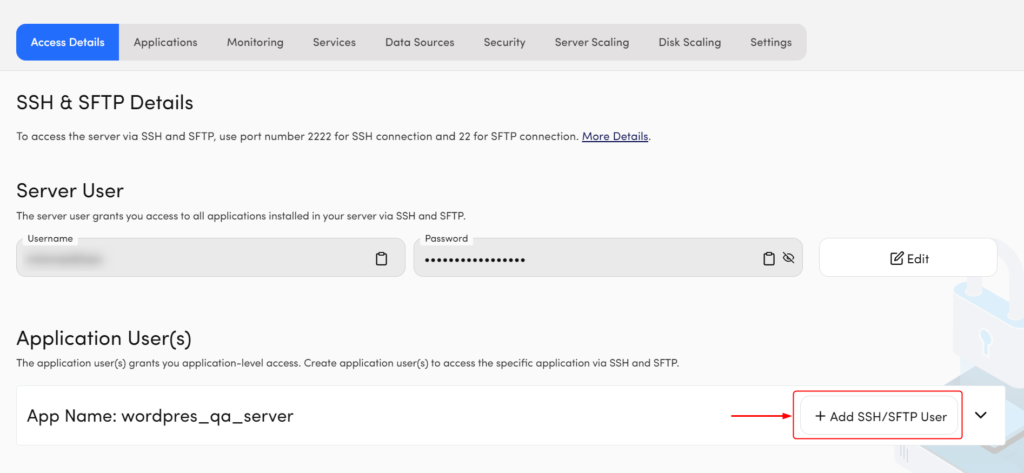
Furthermore, there is no restriction in creating application users. You can create an unlimited application user for different purposes. If you are the primary owner/administrator of your server, you can use Server User. If you want to give access to a particular application to your developer or any of your team members, share Application User to keep an eye on who is doing what.
To connect a web application via SSH using Application User, use Application User and Password instead of Server User. The rest of the steps are the same as mentioned in Step 5.
ADD SCREENSHOT OF SSH USING APPLICATION USER
7) Connect Application via SFTP
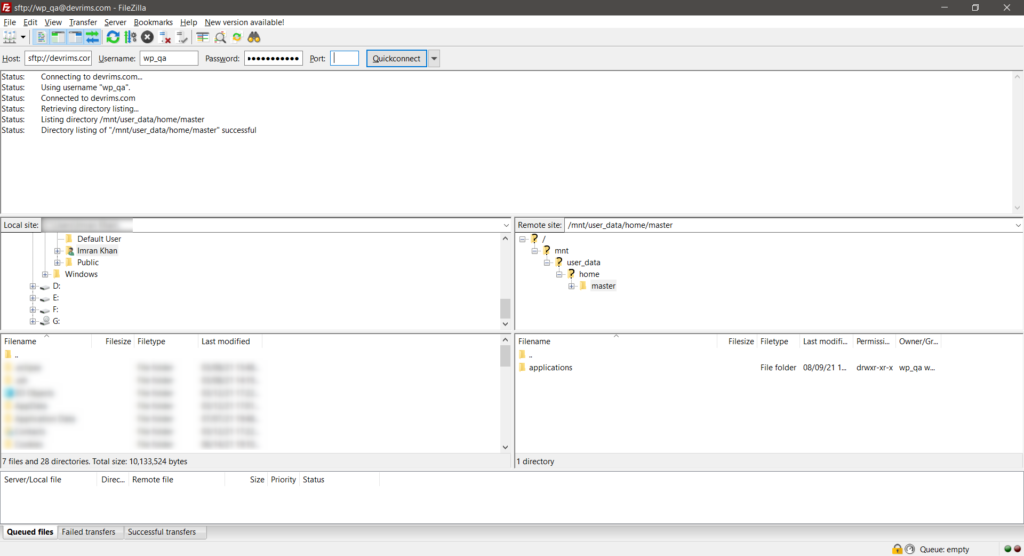
- Download the FileZilla client and then launch the software after installing.
- In the Host field, enter your server IP.
- In the Username field, enter Server or Application user.
- In the Password field, enter Server or Application password.
- Enter Port 22
- Click Quickconnect

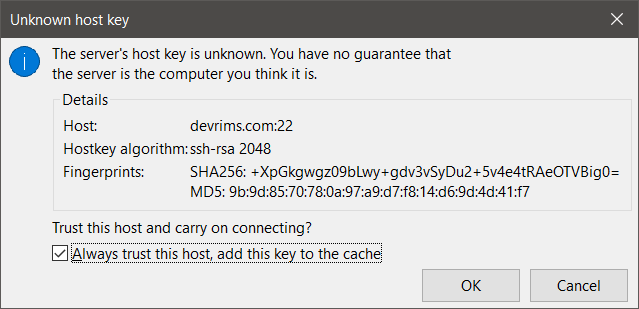
OPTIONAL: If you are attempting for the first time, you will get Security Alert; click the check box “Always trust this host, add this key to the cache” and click OK.
You are now connected to your server via SFTP. Now, you can navigate your files and directories from the right column.
To connect web applications via SFTP using Application User, use Application User and Password instead of Server User. The rest of the steps are the same as mentioned in Step 7.
Note: If you have any trouble adding using SSH or SFTP or need further help, kindly contact our support on Live Chat or create a ticket from Devrims Dashboard.