In this knowledge base article, you will learn the steps to install a web application to your server.
- Login to your Devrims Dashboard and click on Add Application button from the top bar.
You will be redirected to the “Add Application” page. There are seven different types of web applications in the list ready to be installed.
- You can choose any option in the Select Server drop-down list, i.e., Existing Server or Install Application in New Server.

- Install Application in New Server: Select this option to install an application on an entirely new server in the same account. Furthermore, adding a new server will also add a cost to your billing depending on the size of the server you choose. For further guidance, kindly read our KB on how to create a server on Devrims.
Existing Server: Select your desired server from the drop-down list where you want to install the application. Please ensure you have enough server memory and disk space to install a new application on an existing server. To check the server stats, navigate to the Monitoring section on the Devrims Dashboard for a detailed summary.
- After selecting the server, choose your desired application and its version.

In the next option, our system auto-suggests the best combination of software services based on installed TECH Stack. In this section, you have the freedom to select different PHP versions as per your web application requirement.
The best part is that our platform allows you to run multi-version PHP application(s) simultaneously on a single server.

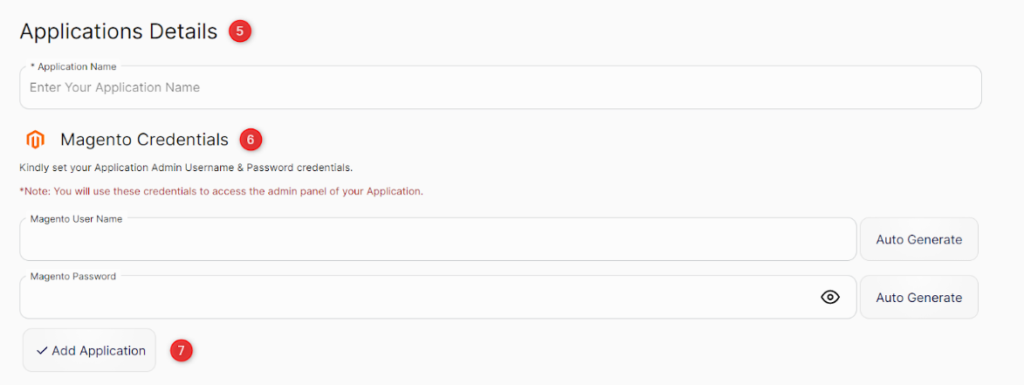
In the next section, add the following details:
- Type application name
- Type application user and password or click on the Auto Generate button.
- Click on Add Application.

Application installation will take a couple of minutes to complete the process.
That’s it! If you face any issue or need further help, then contact our support on Live Chat.

