
Caching is very important to increase the performance of websites. To speed up your website and reduce page load time, Devrims offers different types of server-level caching services.
Cache services act as a server that stores web pages or other content locally for reuse by placing the previously requested information in temporary storage. This helps keep the hosted server from overloading and loading the web page quickly and efficiently.
This knowledge base article will explain two server-level caching services, Redis and Memcached. Both cache services are best based on certain conditions, so it can be challenging to determine which caching solution is the best for your use case. For WordPress, WooCommerce, and Magento CMS, Redis is a good solution, but for Raw Php and Php Laravel applications, the use of cache service depends on your requirement.
Table of Content:
1) What is Redis Cache?
- Redis is a storage and database system that operates exclusively in memory written in C and optimized for speed. It is open-source under the BSD license. Redis is an acronym for “REmote DIctionary S“
- Redis is mainly used as a cache to frequently access data in memory, enabling programs to respond quickly to users. Redis allows a collection of intelligent caching patterns by allowing you to decide how long you want to hold data and which data to revoke first.
- Most websites make use of Redis as a cache. Redis was also voted the most popular database technology by developers in the last four years of the study.
2) What is Memcached?
- Memcached is a distributed memory object caching framework that makes dynamic Web applications run faster by reducing database load.
- To decrease the number of times an external database or API (application programming interface) must be accessed, the device caches data and objects in memory.
- Each object contains a key, an expiration period, optional flags, and raw data in the Memcached method. Memcached checks the expiration period to ensure it remains relevant until returning an object to the client. By ensuring that the cache and database are modified simultaneously, the cache can be easily merged with the program.
Devrims don’t limit or restrict you from using server-level caching for your websites according to your requirement. You can choose any pre-configured caching services to install on a server level for improved performance while creating a server. If you wish to install the cache service later, kindly follow our knowledge base article on How to manage Software Services on Devrims.
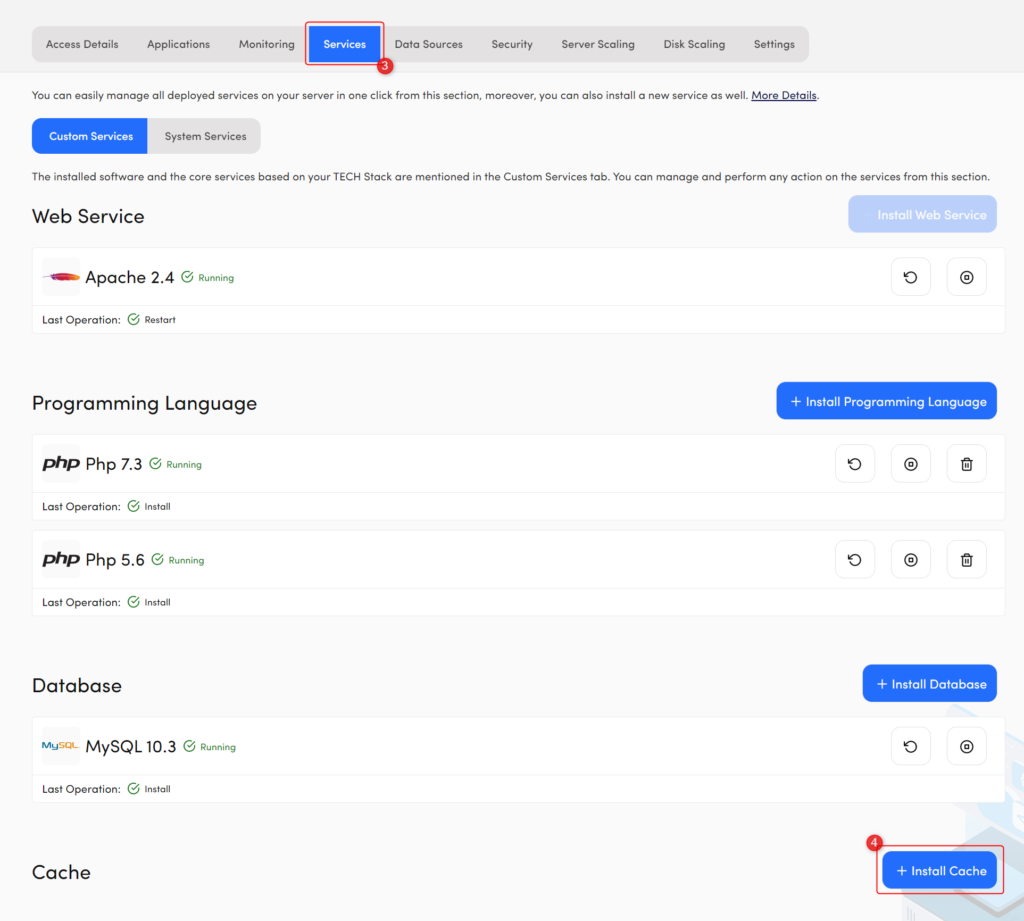
3) How To Install Cache Service?
This section will explain the step-by-step procedure to install cache service in your server.
- Login to the Devrims dashboard using your account credentials.
- Select a server from the server listing screen.
- Click on the Service.
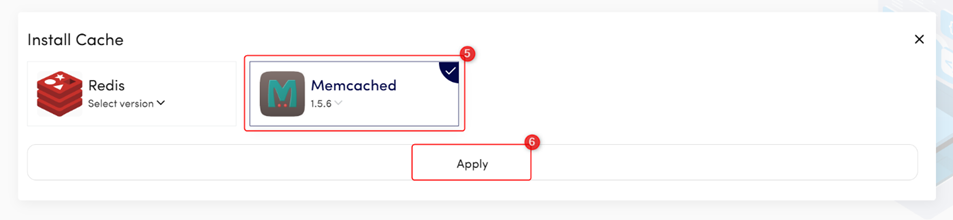
- Scroll down to the Cache section and click on the + Install Cache.
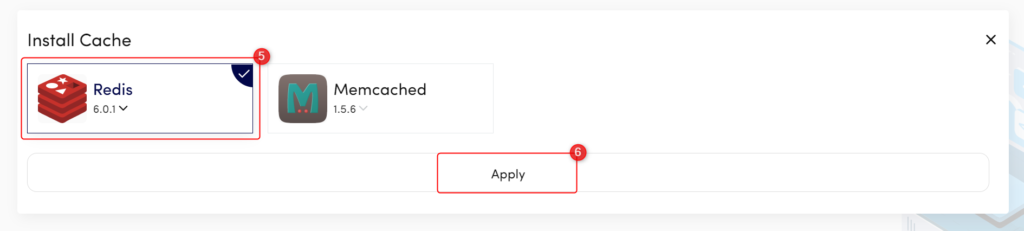
- Choose your desired cache service and its version.
- Click Apply.
Once the cache service is installed, now it’s time to integrate it with your website(s). This article will explain the integration of Redis and Memcached cache service with WordPress, WooCommerce, and Magento applications.
4) How to integrate Redis with WordPress and WooCommerce?
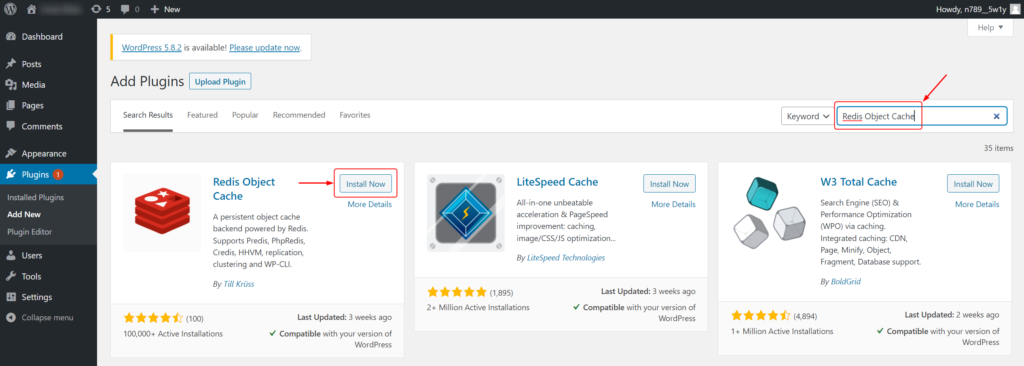
To integrate Redis with WordPress and WooCommerce CMS App, you must install the “Redis Object Cache” Plugin.
- Login to your WordPress admin dashboard.
- Navigate to Plugins → Add New.
- Search for “Redis Object Cache”.
- Click on Install Now button, then click on Activate.
IMPORTANT NOTE:
In case if you get a pop-up screen asking for FTP credentials while installing a plugin, kindly follow our knowledge base article on Fix FTP Credentials issue in WordPress to resolve the issue.
Before Redis starts caching your site, you must connect the plugin to the server.
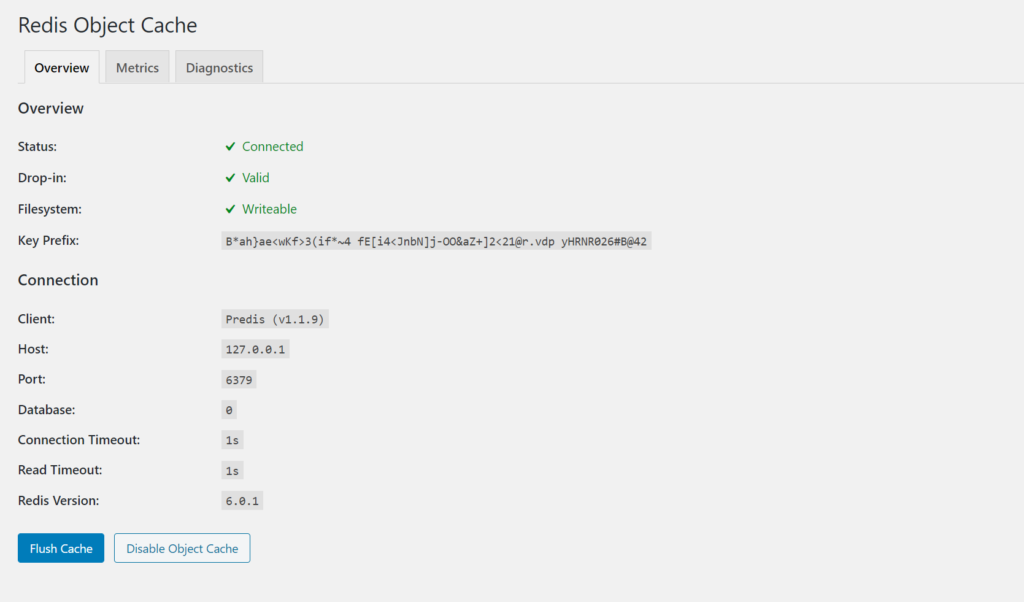
- Once the plugin is activated, the page will redirect to Redis Object Cache settings, where you need to click on Enable Object Cache.
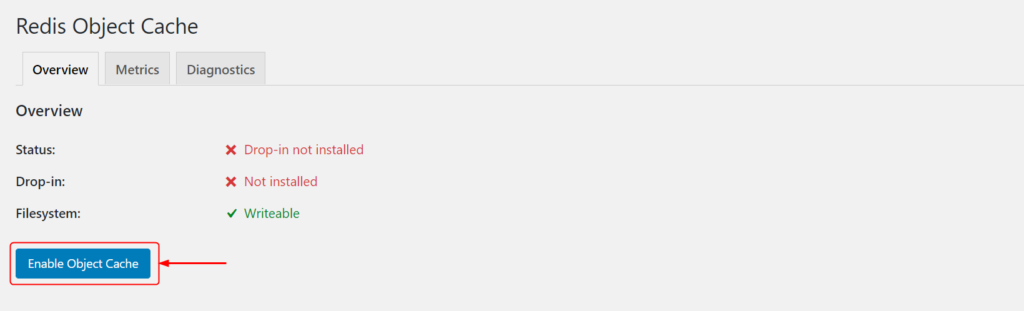
Now you can see the Redis Object Cache is connected.
You can also test the Redis Object Cache response via CLI. To do that, connect the application via SSH using Server User or Application SSH User.
Note: For further guidance, please follow our KB on how to connect your application via SSH/SFTP.
Once you are connected via SSH, go to the webroot of your application, i.e., public_html, and run the following command:
redis-cli monitor
You will get the “OK” message if everything is configured correctly.
5) How to configure Redis with Magento 1?
To integrate Redis with Magento 1, you only need to change two files.
- Go to public_html/app/etc/modules
- Look for the “Cm_RedisSession.xml” file and edit the file in a text editor of your choice.
You will see a default code as mentioned in the below screenshot.
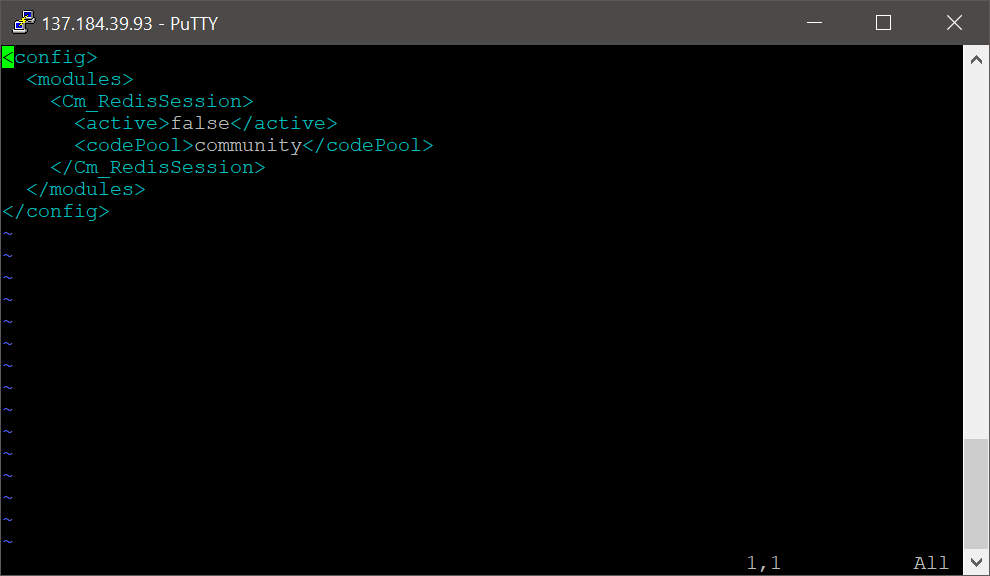
- Change the value of <active> from false to true.
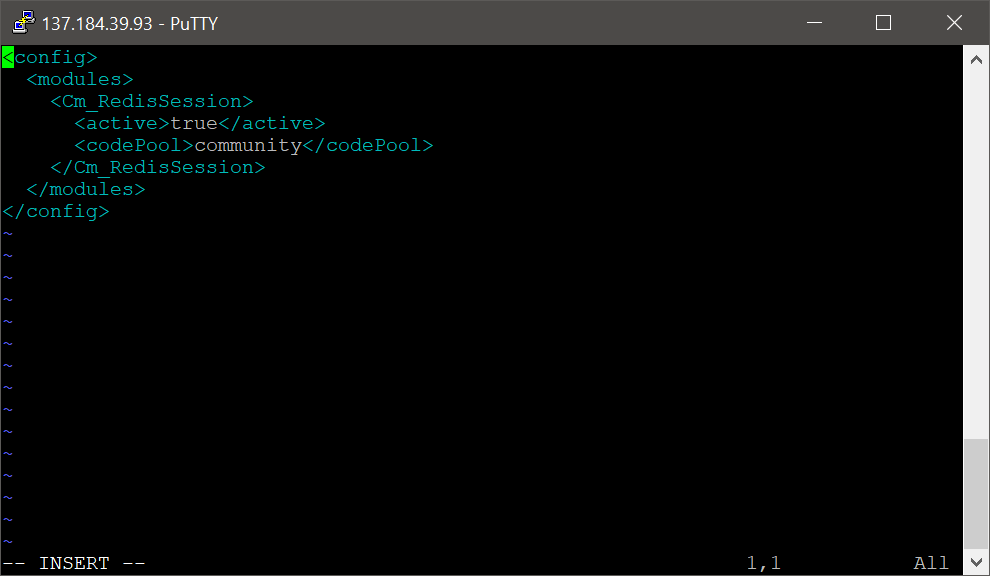
- Save and quit the editor.
Now go to the public_html/app/etc/local.xml file and paste the below-mention code after the <global> tag.
<cache>
<backend>Cm_Cache_Backend_Redis</backend>
<backend_options>
<server>127.0.0.1</server>
<port>6379</port>
<persistent></persistent>
<password></password>
<force_standalone>0</force_standalone>
<connect_retries>1</connect_retries>
<read_timeout>10</read_timeout>
<automatic_cleaning_factor>0</automatic_cleaning_factor>
<compress_data>1</compress_data>
<compress_tags>1</compress_tags>
<compress_threshold>20480</compress_threshold>
<compression_lib>gzip</compression_lib>
<use_lua>0</use_lua>
</backend_options>
</cache>
Below is the screenshot for your reference after adding the code mentioned above:
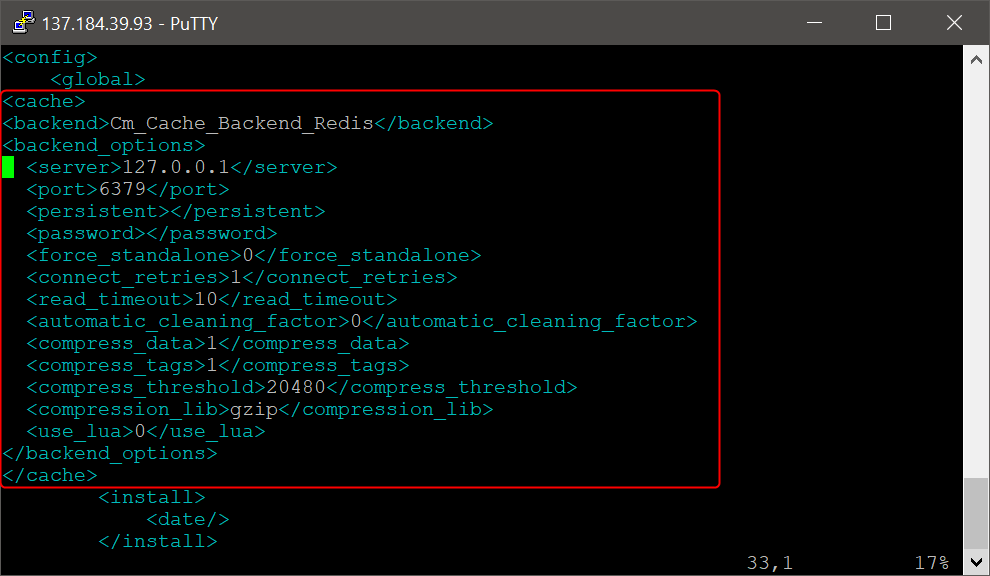
- Save and quit the editor.
To verify whether you have correctly configured Redis services or not, you can use the below-mention command on CLI.
redis-cli monitor
You will get the “OK” message if everything is configured correctly.
redis-cli ping
- To clear the Magento cache, you can use the below-mentioned command:
redis-cli FLUSHALL
An OK response confirms that your cache service is flushed successfully.
6) How to integrate Memcached with WordPress and WooCommerce?
To integrate Memcached with WordPress and WooCommerce CMS App, below are the steps:
- Login to the Devrims dashboard using your account credentials.
- Select a server from the server listing screen.
- Click on the Service
- Scroll down to the Cache section and click on the + Install Cache
- Click on Memcached.
- Click on Apply.
Note: Once the cache service is installed on your server, kindly contact our LiveChat support engineer to install the php-memcached and php-memcache package.
Once the package is installed on your server by the LiveChat support engineer, to verify if Memcached is running, connect your server via SSH and to verify use the below-mentioned command:
telnet localhost 11211 OR telnet 127.0.0.1 11211
If the above command runs successfully, you will get the below result:

Otherwise, you will receive an error.
Type “quit” and hit enter to exit.
Let’s move on to integrate Memcached with your application.
- Login to your WordPress admin dashboard.
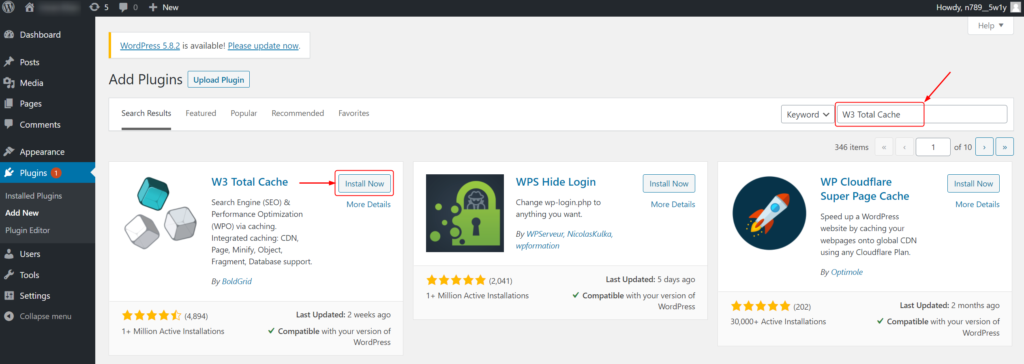
- Navigate toPlugins → Add New.
- Search for “W3 Total Cache”.
- Click on Install Now button, then click on Activate.
IMPORTANT NOTE:
In case if you get a pop-up screen asking for FTP credentials while installing a plugin, kindly follow our knowledge base article on Fix FTP Credentials issue in WordPress to resolve the issue.
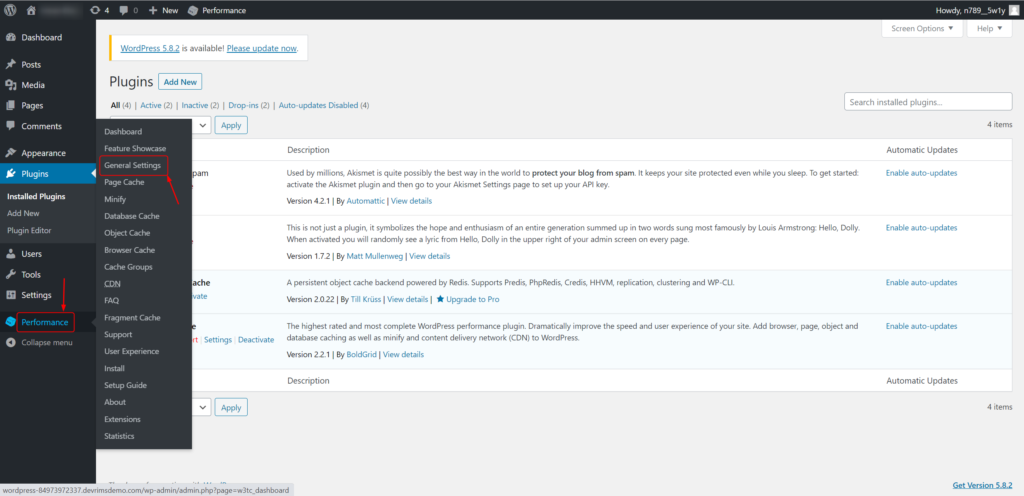
Once the plugin is installed in your application, go to Performance > General Settings.
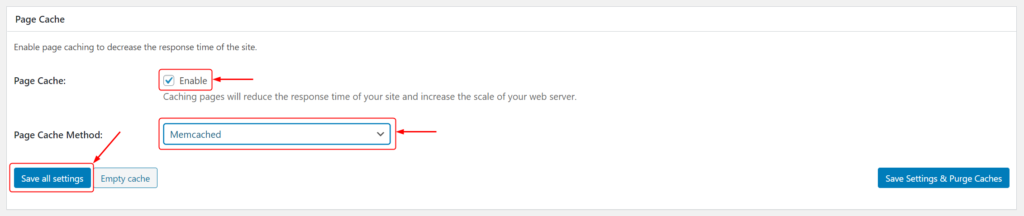
a) Page Cache
- Page Cache: Enable
- Page Cache Method: Memcached
- Click on Save all settings
b) Minify
- Minify: Enable (Be cautious if you are not sure about minification)
- Minify Cache Method: Memcached
- Click on Save all settings

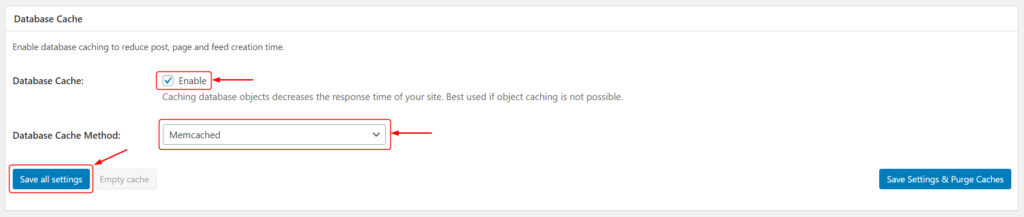
c) Database
- Database Cache: Enable
- Database Cache Method: Memcached
- Click on Save all settings
7) How to integrate Memcached with Magento 2?
- Connect your server via SSH.
- Go to the public_html/app/etc
- Edit env.php in a text editor of your choice.
- Locate the following code:
'session' =>
    'save' => 'files',
),
- Replace with the below-mentioned code.
'session' => [
     array (
     'save' => 'memcached',
     'save_path' => '127.0.0.1:11211'
     ),
],
To verify if Memcached is working with Magento:
Delete the contents of the following directories under your Magento installation directory:
rm -rf var/cache/* var/page_cache/* var/session/*
Now login to the Magento 2 admin panel and browse to several pages. If no errors are displayed, Memcached is working fine!
If any error occurs, such as an HTTP 500 Internal Server Error, enable developer mode and diagnose the issue. Ensure Memcached is running, configured properly, and that env.php has no syntax errors.
I hope this article will help you install and integrate the server-level caching on your application using Devrims Platform. If you faced any issues while integrating caching service or need further help, kindly contact our support on live Chat or create a ticket from Devrims dashboard.