
One of the most common caching and optimization plugins in the WordPress repository is W3 Total Cache. Unlike other WordPress optimization plugins, which have a more fundamental and simplified interface, W3 Total Cache allows you full control over your WordPress platform’s caching setup.
W3 Total Cache (W3TC) helps in website optimization and minimizing page load time using functionality such as content delivery network (CDN) integration.
1) Installing W3 Total Cache
Login to your site’s WordPress admin using the admin credentials to install the W3 Total Cache plugin.
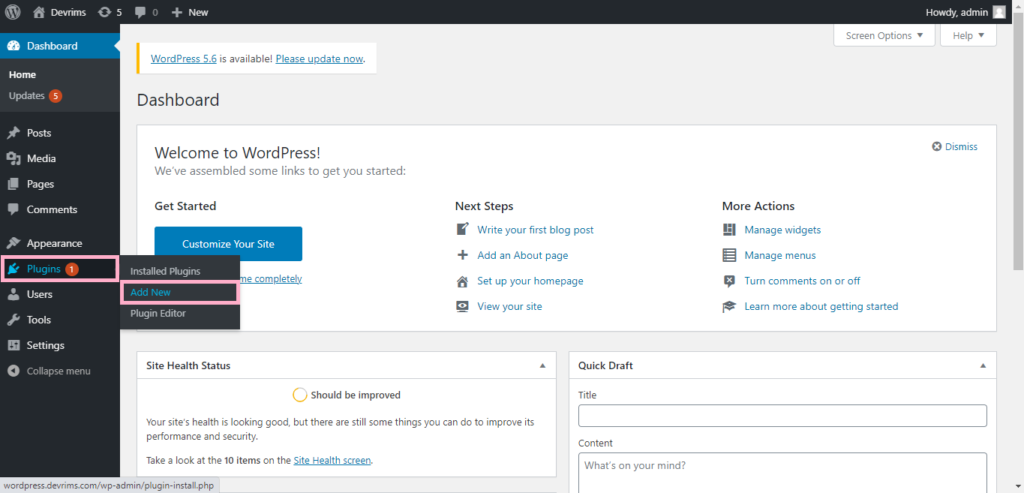
After logging in to your Dashboard, click on the Plugins button on the left menu and click on Add New.
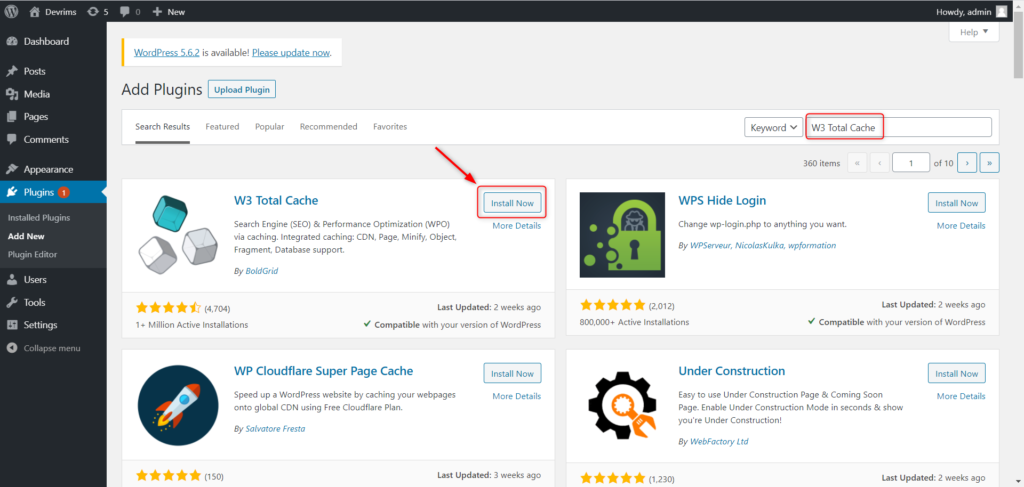
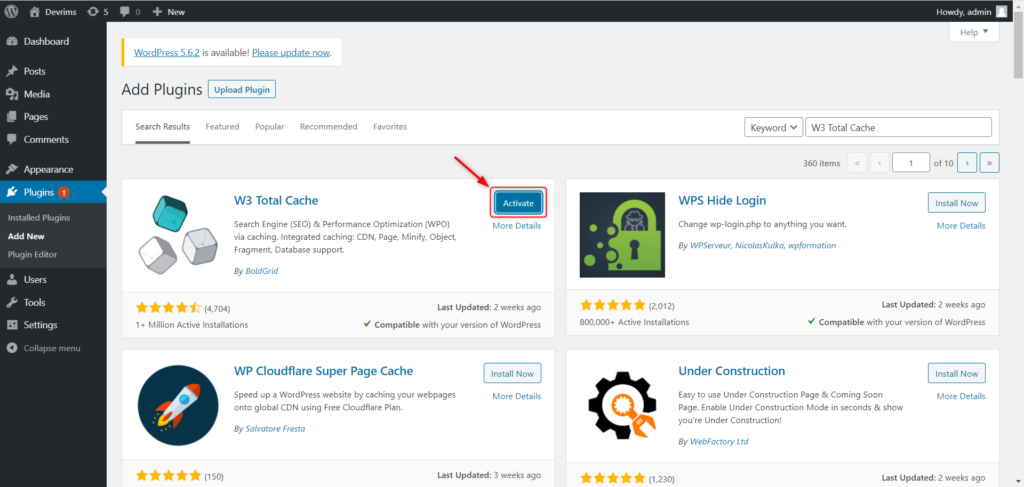
Now on the top right-side search bar, type “W3 Total Cache” and then click on the install now button.
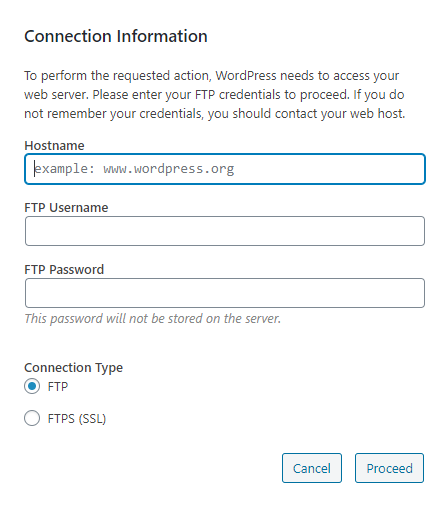
Note: When you click on the install button, and if the below-mentioned popup window appears, follow the KB on Fix FTP Credentials issue in WordPress.
After installation of W3TC, click on Activate button.
Note: Once you have activated the plugin, you may be asked to change the permission to 775 of the wp-content folder.

2) Configuration of W3 Total Cache
On the left panel, click on Performance > General Settings
a) General Settings
- Page Cache
Dynamic rendering is suitable for many types of websites, such as eCommerce shops and discussion boards. However, applying a page caching layer to blogs, news pages, and other sites that don’t need dynamic content will increase efficiency and reduce server load.

Click Disk: Enhanced from the drop-down menu after checking Enable and then Save all settings.
NOTE: In the Page Cache settings, if Memcached is disabled and you want to use it for the optimal performance of your WordPress application, you need to install Memcached on your server after login into Devrims Platform. For further guidance on how to manage software services on Devrims, kindly visit our KB. For application-level assistance on Memcached, kindly contact our LiveChat support engineer. Once it is configured successfully, then you can select Memcached in Page Cache settings.
- Minify
By eliminating excessive whitespace from your HTML, CSS, and JavaScript assets, you will shrink your site’s pages’ total size. Enabling W3 Total Cache’s “Minify” feature and choosing the “Auto” option for “Minify Mode” would suffice for most WordPress pages.

Select all the options mentioned in the above screenshot and then click on Save all settings.
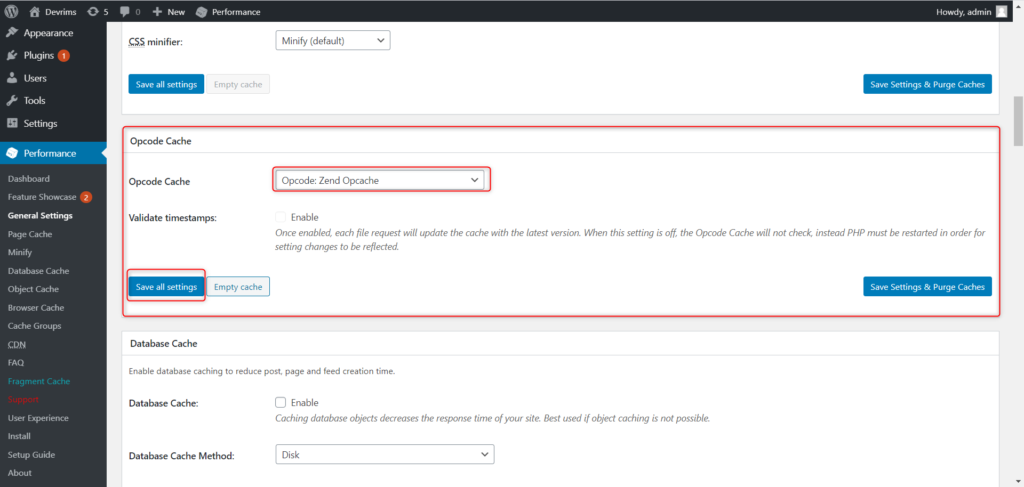
- Opcode Cache
WordPress is a dynamic CMS, which ensures the programming is continuously being executed in PHP’s background. Opcode cache helps the site load quicker by saving compiled PHP code, which speeds up future requests that include the same code.
- Database Cache
The results of MySQL database requests are saved in W3TC’s database. Although this function appears helpful, we suggest keeping it DISABLED and only using an object cache.
- Object Cache
An object cache holds the outcomes of performed database queries in the form of WordPress. While WordPress has an object cache built-in. It only saves data for a single page load, which means that a page load would not waste CPU power running equivalent database queries, resulting in more effective page rendering.
W3TC’s “Object Cache” function installs a custom caching script in your /wp-content directory and modifies WordPress’s object cache activity to keep data permanent (across multiple page loads).
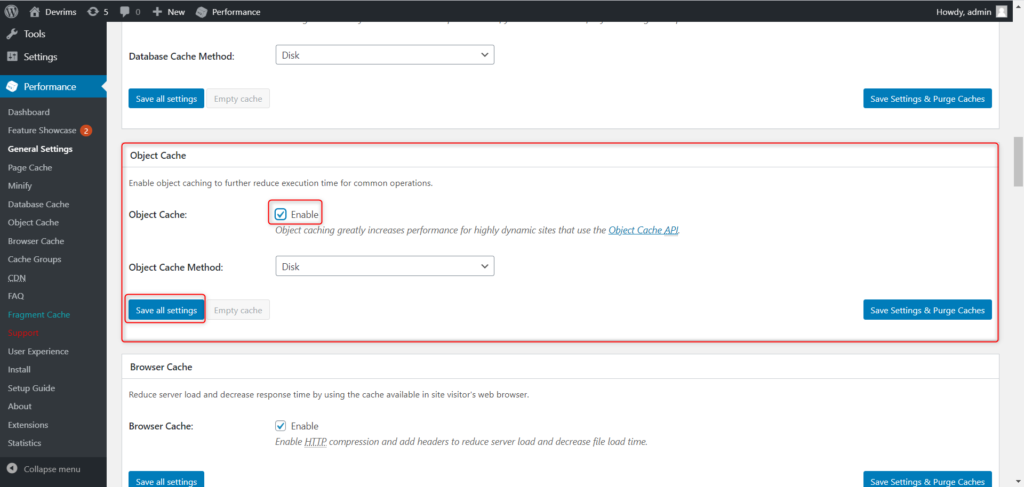
Select “Enable’ and click on Save all settings.
- Browser Cache
By saving static assets including CSS, JavaScript, images, and fonts locally, browser caching will significantly speed up your WordPress pages. An expiration date is used by browser caching to decide how long assets can be cached. For static properties on the digital site, most developers specify a one-year expiration date.
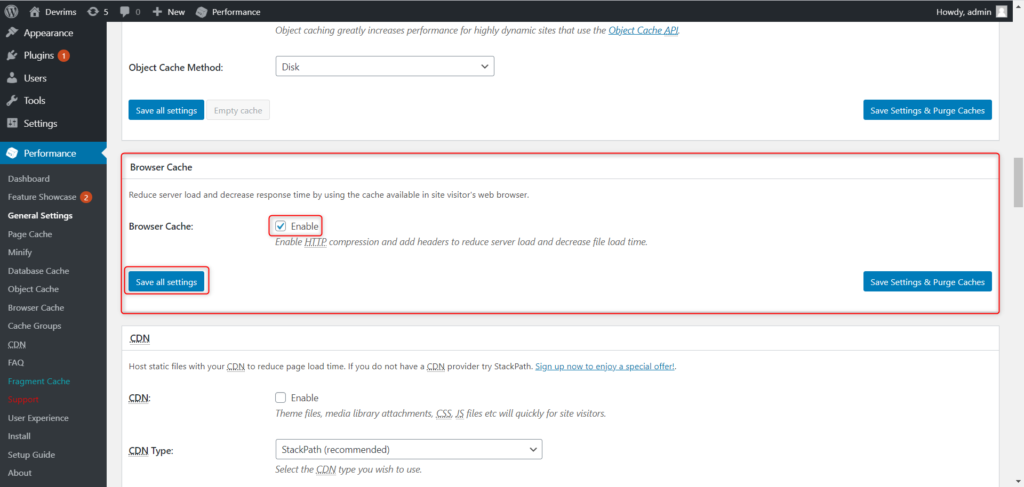
Select “Enable’ and click on Save all settings.
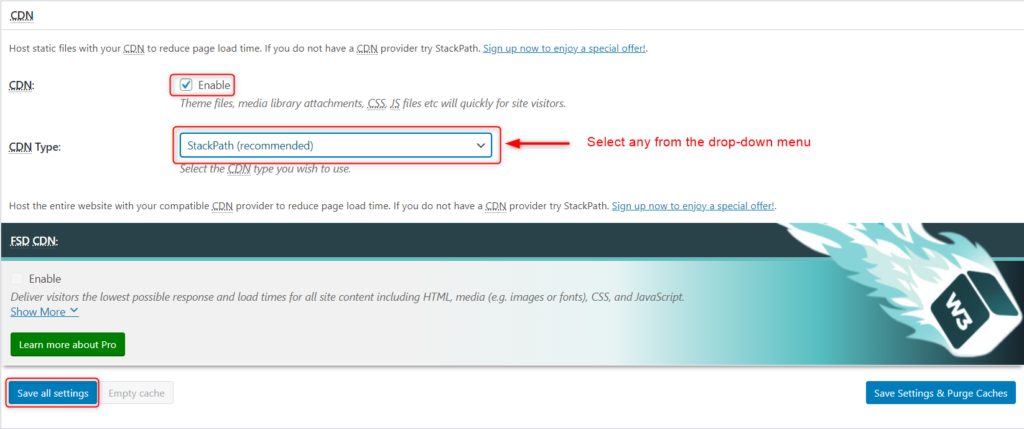
- CDN (Content Delivery Network)
You can use W3 Total Cache to rewrite URLs for “theme folders, media library attachments, CSS, JS,” and more for your CDN hostname if you’re using a CDN to offload static files to data centers across the globe.
You can use W3 Total Cache’s “CDN” functionality to connect your CDN URL.
- Reverse Proxy
A reverse proxy stands between the web server and WordPress, and it can be used to manipulate incoming requests using logic. Varnish, a standard “HTTP accelerator” for caching and serving data to reduce backend load, is supported by W3TC.
Since our infrastructure isn’t compatible with Varnish, DO NOT enable the reverse proxy. Instead of Varnish, we have pre-configured Redis and Memcached, which are both much advanced in caching performance than Varnish.
- User Experience
You can allow lazy loading, disable emojis, and disable the wp-embed.js script with W3TC’s “User Experience” optimization. To speed up page loads, we suggest allowing lazy loading on your WordPress website.
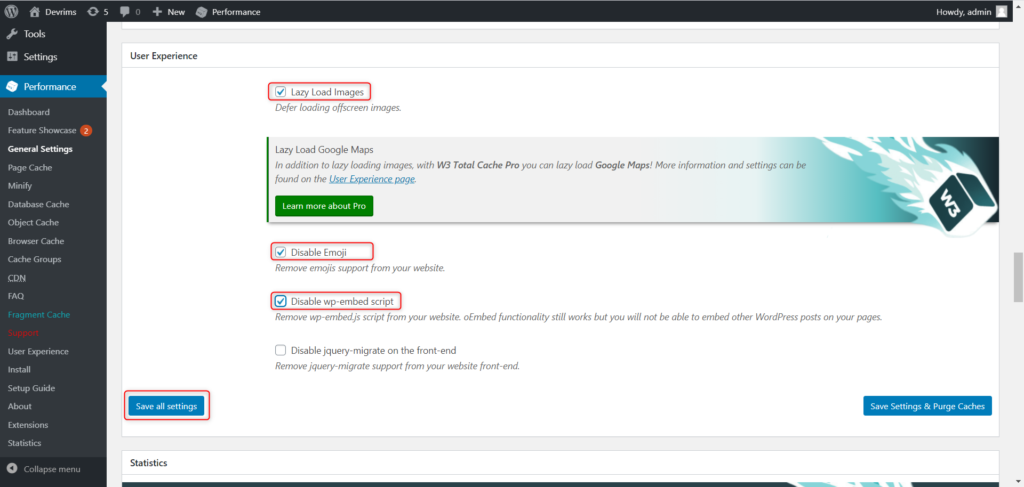
Select the highlighted red boxes and click on Save all settings.
- Miscellaneous
There are a few other settings in W3 Total Cache that you can alter. You can use your Page Speed API key to view a Google Page Speed dashboard widget in WordPress. The Web Speed ranking for each page on the WordPress site can also be shown in the menu bar.
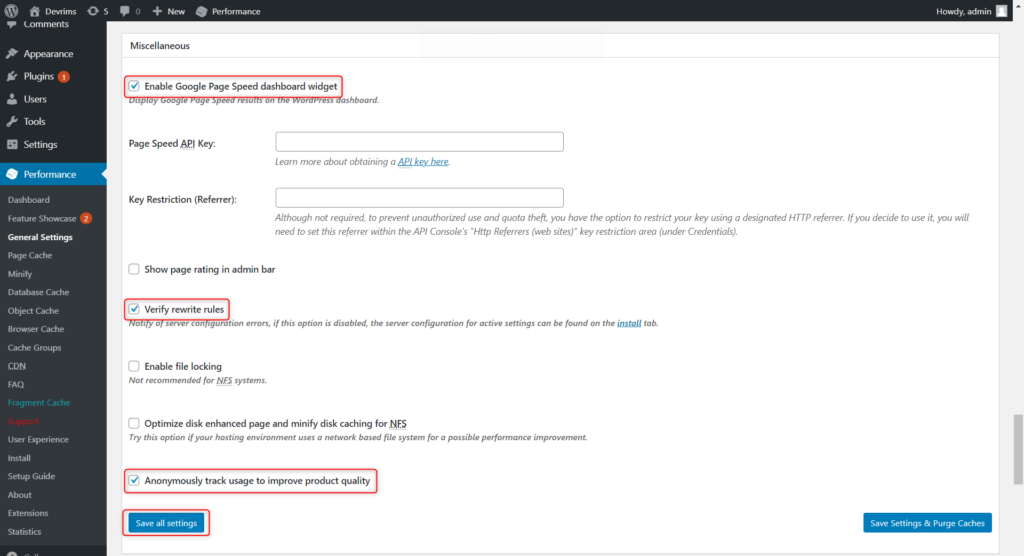
Select the highlighted red boxes and click on Save all settings.
b) Page Cache
- Cache front page: Most websites’ front page is usually the page that gets the most traffic. As a result, we suggest that you enable this option.
- Cache Feeds: WordPress generates various RSS feeds that can be used by third-party applications and utilities such as Feedburner to view the site’s content. Though RSS isn’t as commonplace as it once was, we still recommend that you enable
- Cache SSL(HTTPS) requests: Enabling this setting will improve performance if your web server does not force HTTPS for all incoming requests. There’s no need to enable this if you’re still pushing HTTPS on your web server. (optional)
- Don’t cache pages for logged-in users: This option should be enabled. Users that are logged in are typically editing pages. Users would have to clear the cache regularly if caching was allowed to display website changes.
Note: Leave the rest of the options in their default state as they are.
c) Minify > General
- Rewrite URLstructure: The URL structure of minified resources is affected by this setting. We suggest that you keep it enabled so that your URLs appear “perfect.”
- Disable minify for logged-in users: Disabling minification for logged-in users can be useful if you’re troubleshooting or debugging. Otherwise, we suggest that you leave this feature unchecked.
Minify > HTML & XML
- Inline CSS minification: To delete whitespace in inline CSS, we suggest selecting this function.
- Inline JS minification: To delete whitespace from inline JavaScript, we suggest enabling this function. JS minification can sometimes result in a code error. Disable this feature if it violates the functionality of your site.
Note: Leave the rest of the options unchecked.
Minify > JS
- Configure JS settings here, but it is recommended to leave it to default unless you are confident about what you are doing.
Minify > CSS
- Configure CSS Minification settings here, but it is recommended to leave it to default unless you are confident about what you are doing.
Minify > Advanced
- There are a few more options in the “Advanced” settings to customize minification actions. Once again, leave it to default settings with no changes unless you are confident about what you are doing.
d) Database Cache
Leave it to default settings with no changes unless you are confident about what you are doing.
e) Object Cache
The “Object Cache” settings in W3TC are next on the list. The default settings would suffice for most pages, so leave it to default settings.
f) Browser Cache
W3 Total Cache allows you to configure the caching behavior of your browser further. The default settings for the “General,” “CSS & JS,” “HTML & XML,” and “Media & Other Files” parts of the “Browser Cache” settings are sufficient for most WordPress pages. We suggest working with a developer before making any improvements to browser caching behavior since there are too many options on this list.
g) Cache Groups
- If you need to route traffic depending on a user’s system class, W3 Total Cache’s “Cache Groups and all other options” functionality are useful. E.g., suppose a user visits your site from a smartphone. In that case, you can customize it to make it with a different theme. If your mobile platform is hosted on a separate subdomain, you can even redirect visitors to a different site.
- We don’t see many use cases for this functionality in the era of responsive web design.
- Once again, leave it to default settings with no changes or consult with the developer if any changes are required.
h) CDN
There are many options in the “CDN” settings for most pages; the default selection of file formats should suffice.
i) User Experience
The default settings should suffice for most websites and allows you to customize the lazy loading script’s loading process.
3) W3TC Settings for WooCommerce
WooCommerce is the most common WordPress eCommerce platform. If you’re using W3 Total Cache for your WooCommerce shop, double-check that your settings are right to avoid caching customer information.
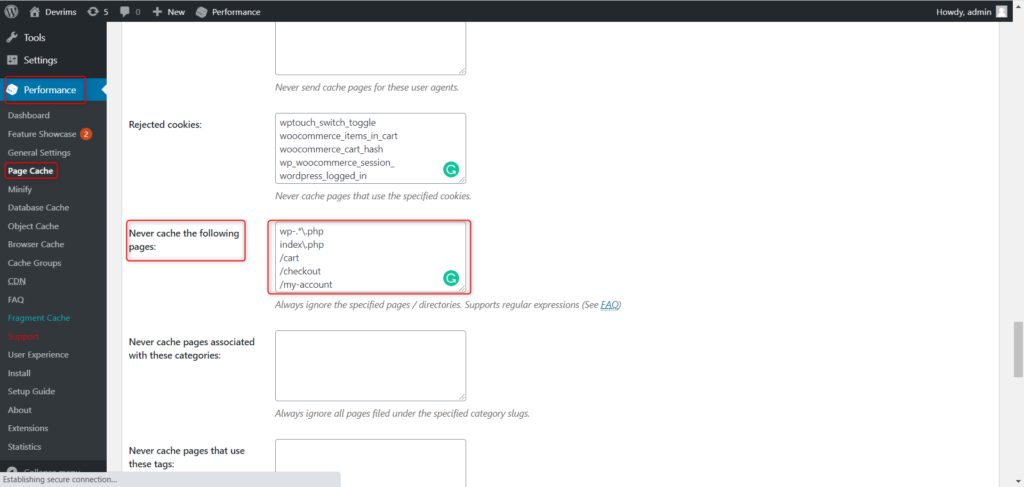
Go to W3TC’s “Page Cache” settings, scroll down to “Rejected Cookies,” and add the four things below to bypass page caching for pages that have WooCommerce-specific cookies.
- woocommerce_items_in_cart
- woocommerce_cart_hash
- wp_woocommerce_session_
- wordpress_logged_in
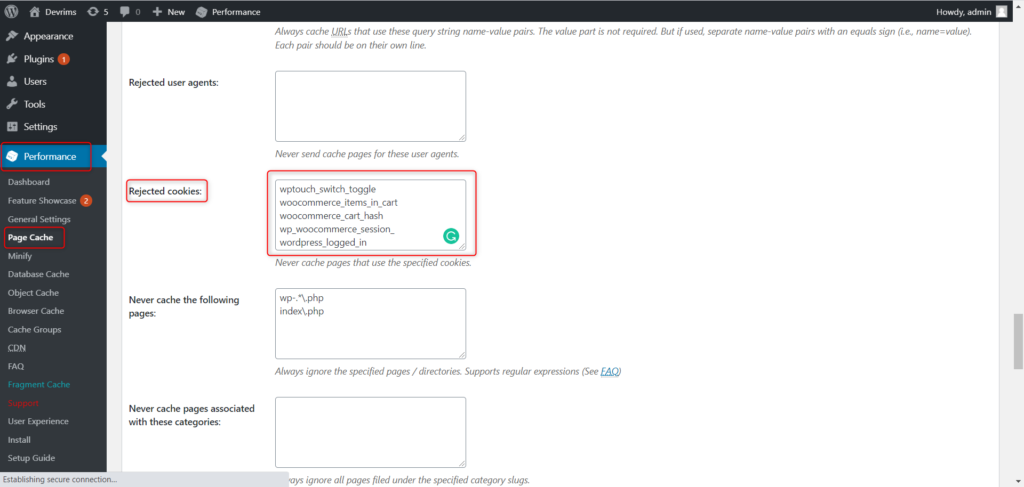
We also recommend avoiding WooCommerce-specific URLs like the cart, checkout, and account pages to be sure. Go to W3TC’s “Page Cache” settings and add the URLs to the “Never Cache the Following Pages” section to prevent these pages from being cached.
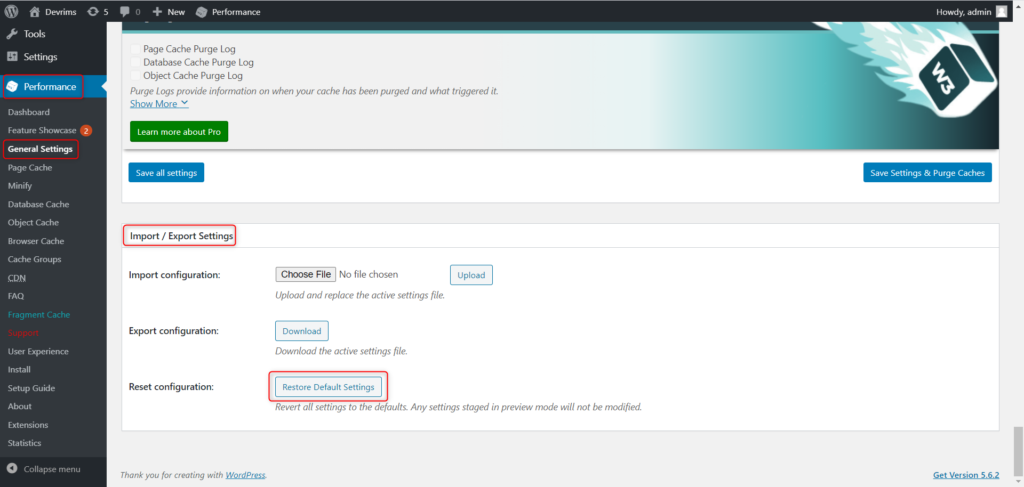
4) Reset W3TC Settings to Default
It’s possible that you’ll have to start over with your W3TC setup in some cases. Here’s how to revert W3 Total Cache’s settings to their defaults. Restore Default Settings by going to W3TC’s “General Settings” menu, scrolling down to the “Import/Export Settings” section, and clicking it.
Conslusion:
We hope that following these steps accurately, you must have configured W3 Total Cache plugin for your WordPress site. If you are still having any issues setting up W3TC for your site, simply head over to our Live Chat and our technical representative can further guide you in this matter.