A store may need to work and update the site for some time. For example, you may want to create new themes, resolve a site issue, or add new plugins that alter your sites’ actions. Your website can appear broken to visitors during this maintenance period. If you have a lot of traffic, it’s safer to keep your website visitors away from seeing the pages or sections of your website that are currently being overhauled.
In these cases, you can reassure your customers that (a) the service disruption is only temporary and (b) include essential details, such as other options available to the customer and an estimated time of return to the site.
Magento offers a clear message by default when you place your site in “Maintenance Mode.”
Let’s move on to the steps to create a Maintenance page for Magento.
The very first thing is to log in to your Magento Dashboard using your Magento Admin Credentials
Once you are successfully logged in, follow the below-mentioned steps:
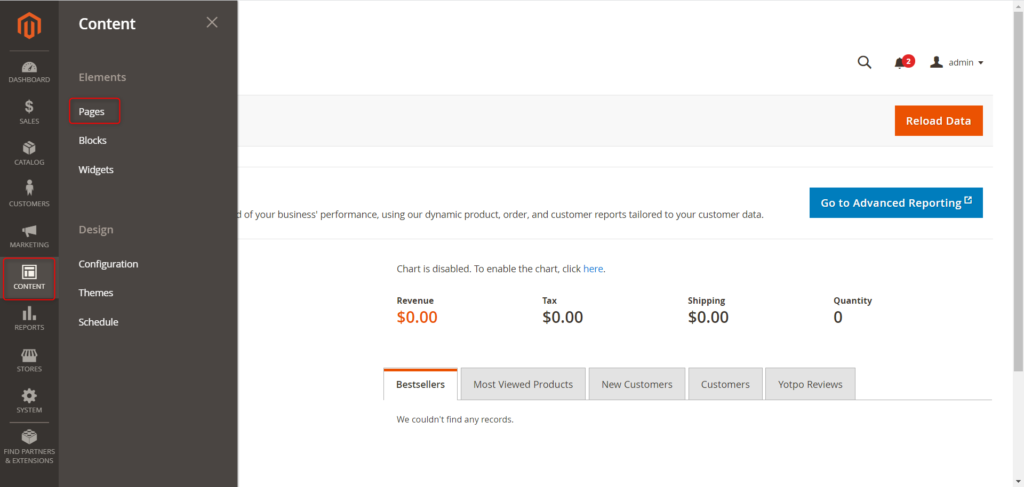
From the right panel, click on Content > Pages to add a new page.
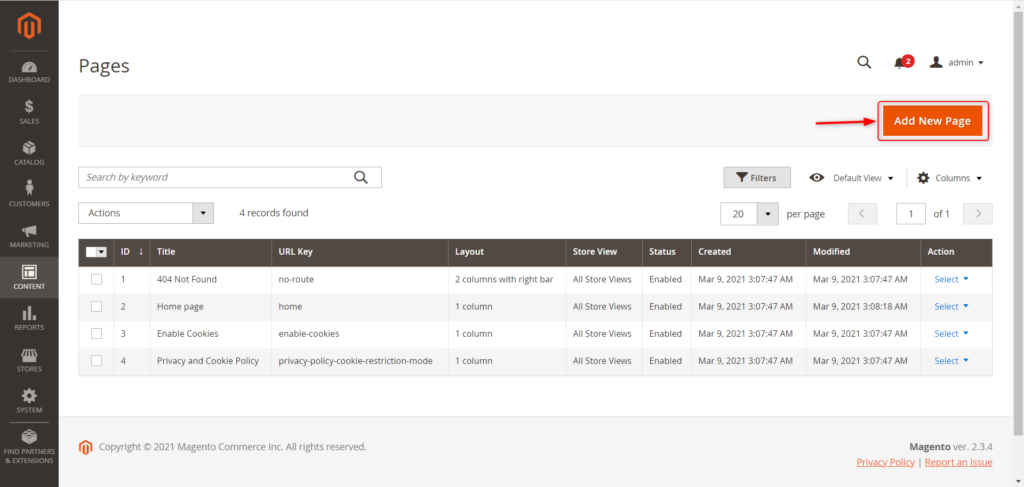
On the next page, click on “Add New Page.”
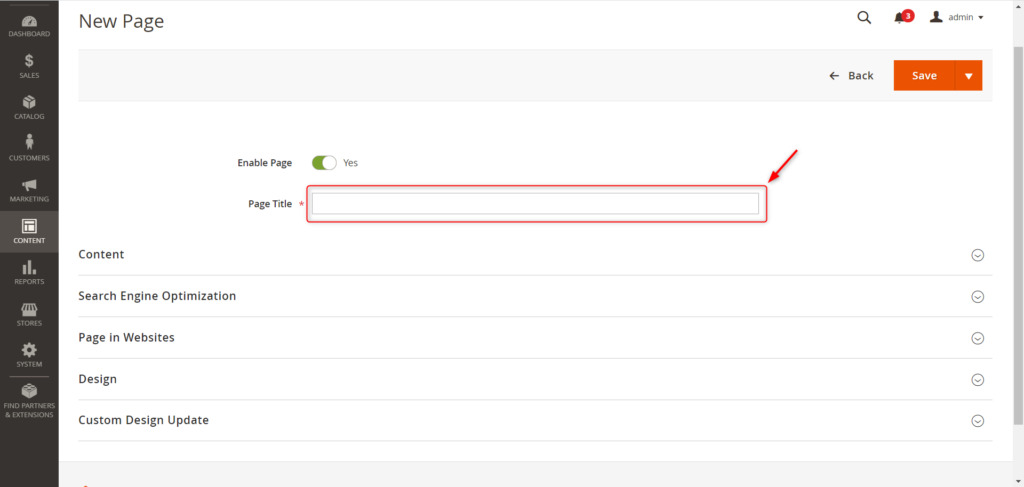
In the next page, enter the “Page Title”
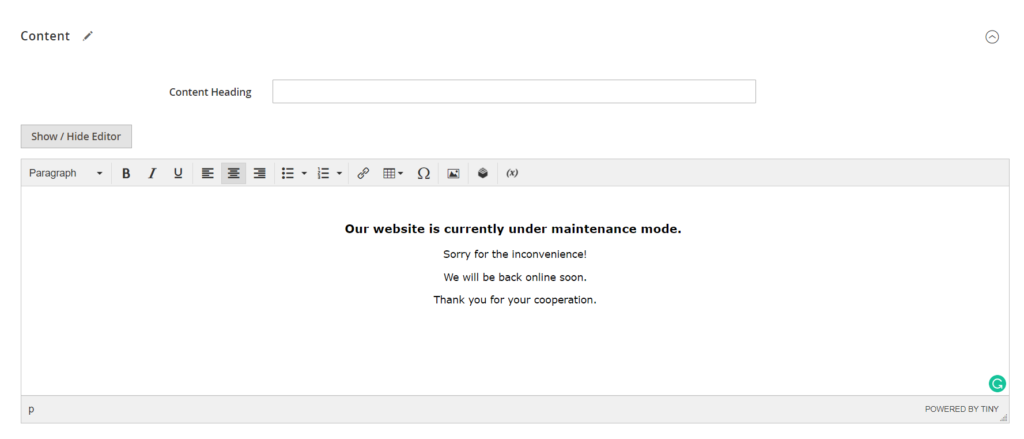
Click on “Content” tab and type the content you want to show to your visitors.
Content Heading is optional. You can leave it blank.
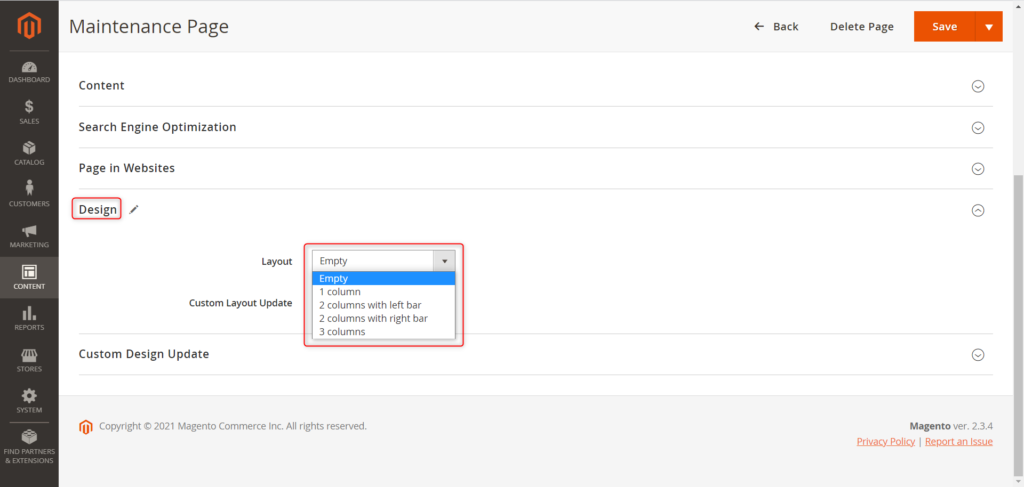
In the next step, click on Design on the same page and select Empty from the Layout drop-down menu.
Click on Save to save the new maintenance page.
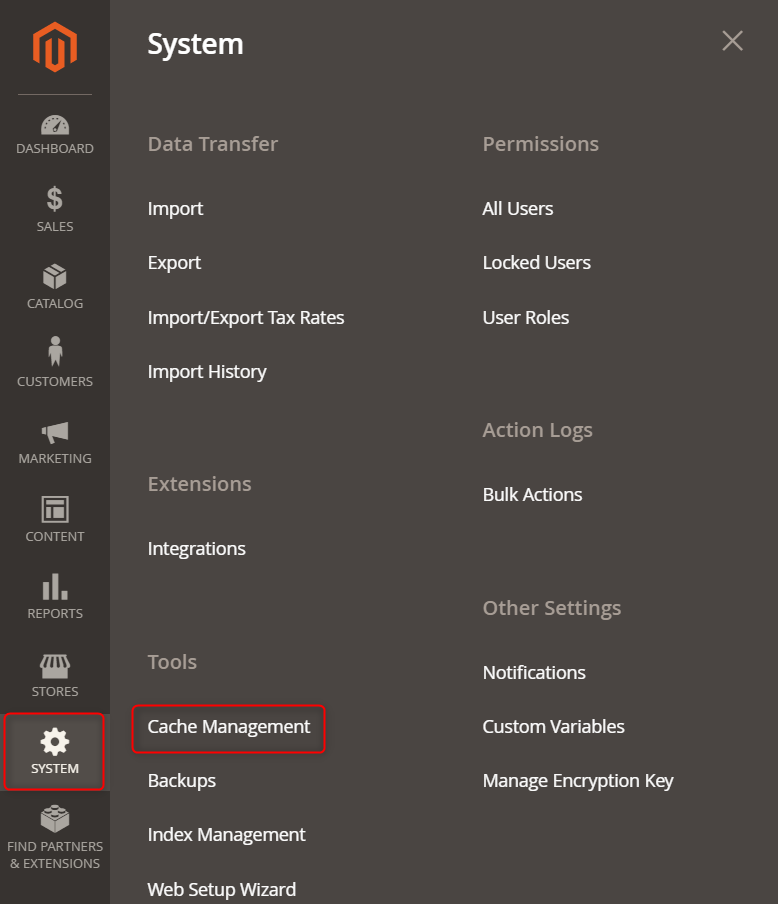
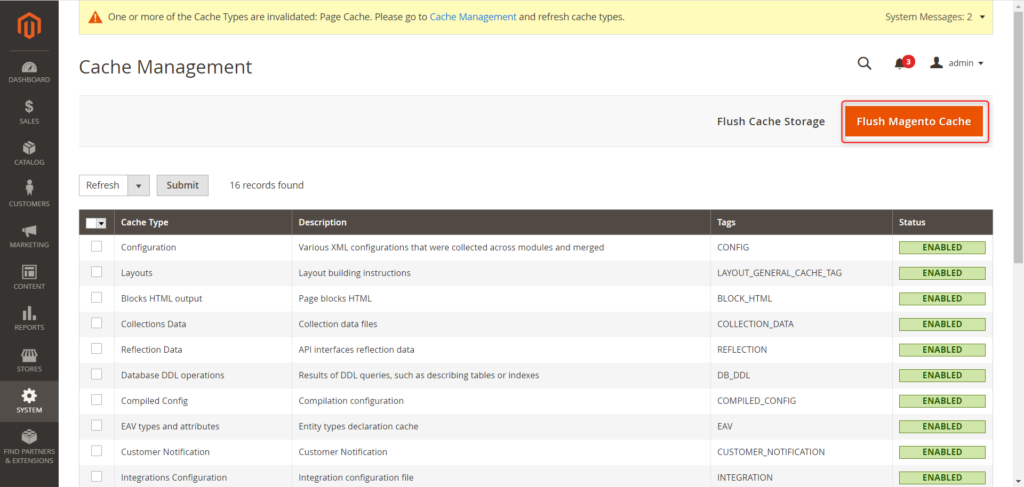
After saving the page, you will need to clear the Magento Cache by going into System > Cache Management
Then click on Flush Magento Cache
Below are the Final steps to enable the Maintenance Page.
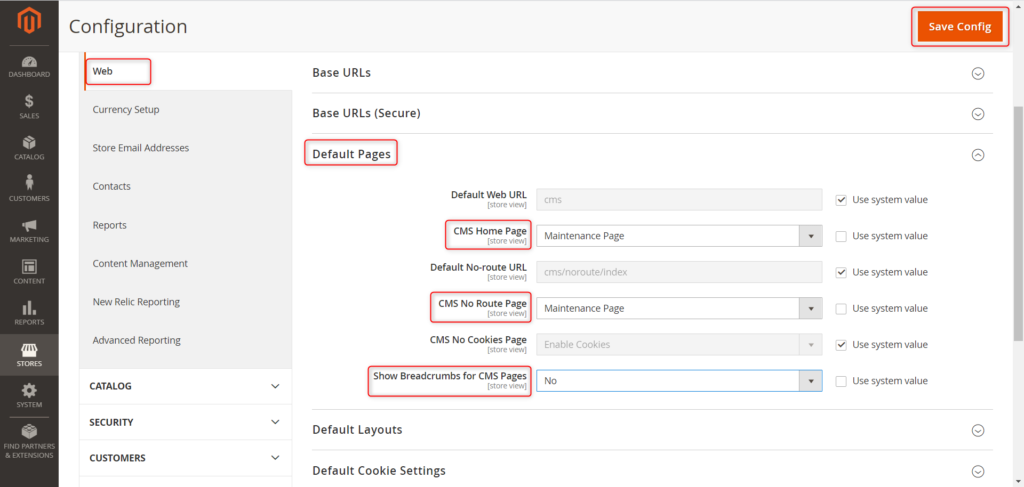
Go to Stores > Configuration
Click on Web > Default Pages
Click on CMS Home Page drop-down menu and select the Maintenance Page you created (un-check Use system value) to select the options
Click on CMS No Route Page and select the same page again
Select No in Show Breadcrumbs for CMS Page
Click on Save
That’s all you need to do! Congrats you have created the Maintenance Page successfully.