WordPress Multisite is a feature that allows you to manage and run multiple WordPress websites through a single dashboard. In other words, you can create a Multisite Network of WordPress websites with one main hub that is your WordPress dashboard.
Multisite gives you the privileges to become a Super Admin managing various sites from one dashboard. The sites in this network can be in the form of subdomains, for example, http://yourname.domain.com or a directory, like http://www.domain.com/yourname/. You can also have an entirely different domain name for each website on your network.
2) How to Install & Configure WP Multisite?
IMPORTANT NOTE: Before proceeding with the steps, keep in mind that all the steps mentioned in this KB are applicable ONLY on LAMP Stack running on Apache. LEMP Stack has different behavior and so the rules. If you follow the steps on LEMP Stack running on Nginx, then it will break the webserver and your website both.
Let’s move on to installing WordPress multisite on LAMP Stack. You have to make changes in two files, i.e., .htaccess and the wp-config.php file. Both are located in the webroot of your web application, i.e., the public_html folder.
Once the application is installed, you need to connect your application via SSH or SFTP.
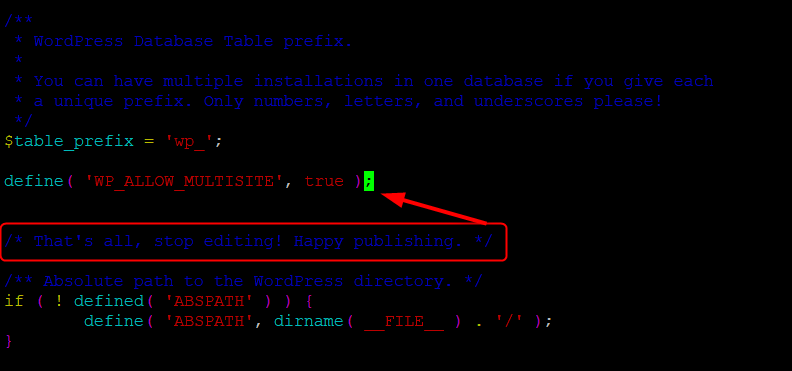
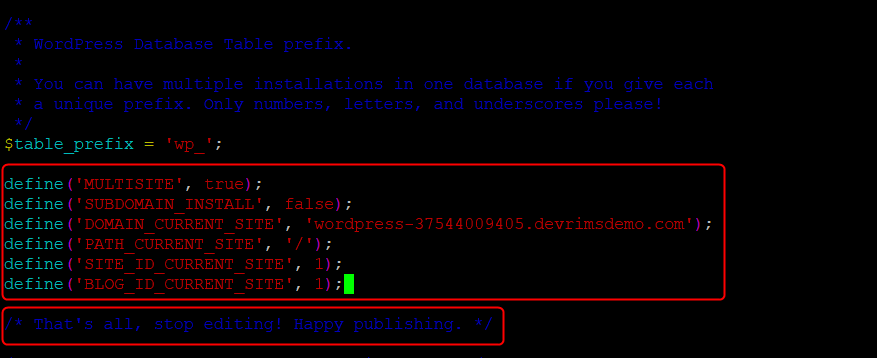
Navigate to the public_html folder and open the wp-config.php file with your preferred editor.
Scroll down the file and insert the following rule before the line says /* That’s all, stop editing! Happy blogging. */
define( 'WP_ALLOW_MULTISITE', true );
Save and exit the file.
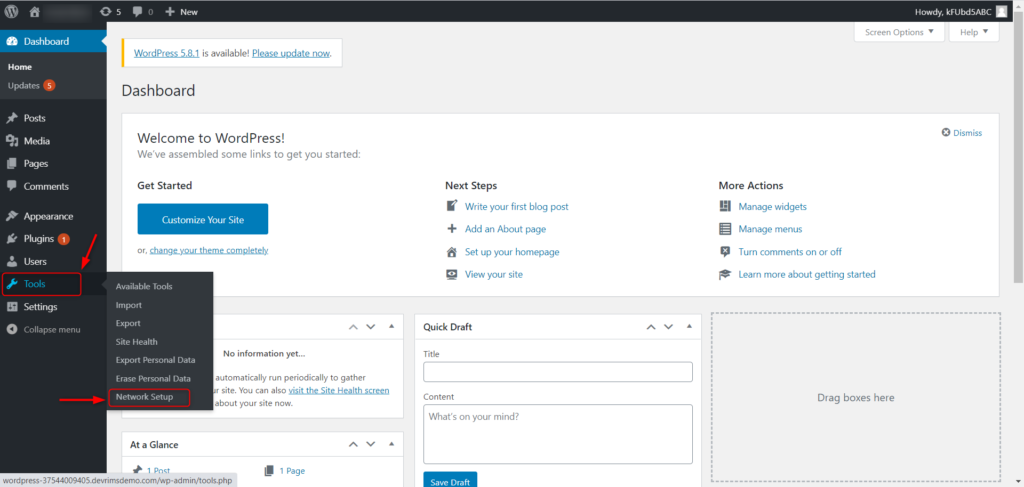
Now login wp-admin
From the left toolbar, go to Tools and select Network setup.
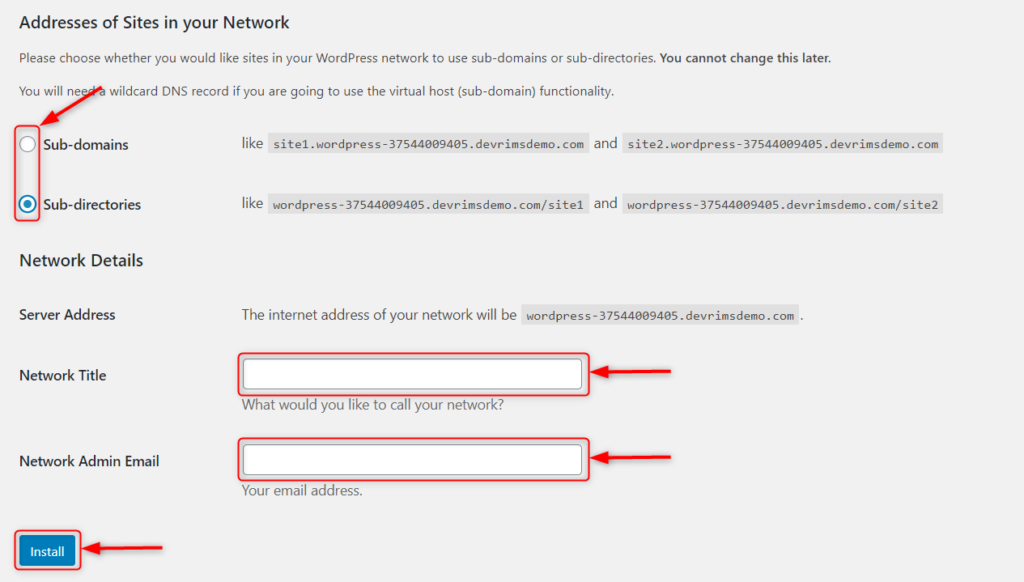
Select between subdomain and subdirectories for each site on your network.
Type the Network Title and Network Admin Email.
Click Install.
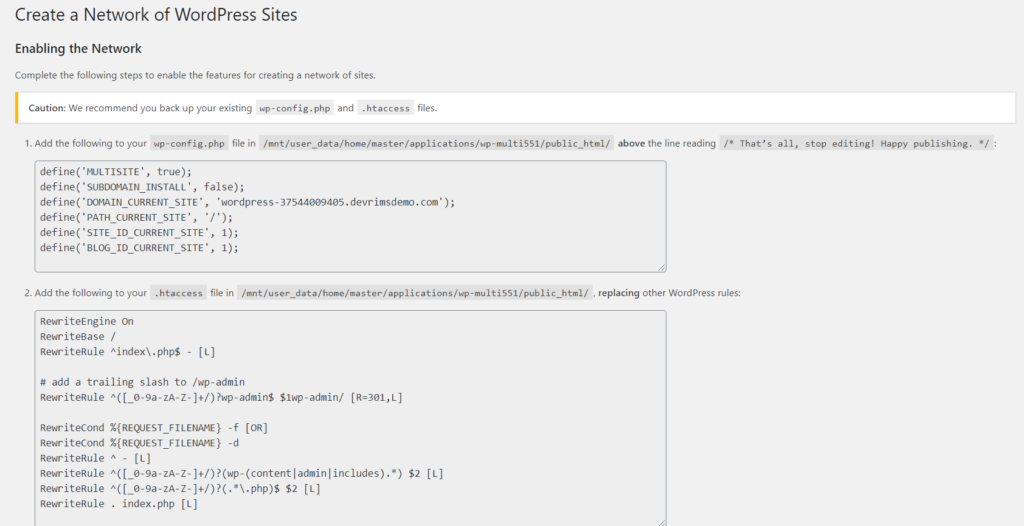
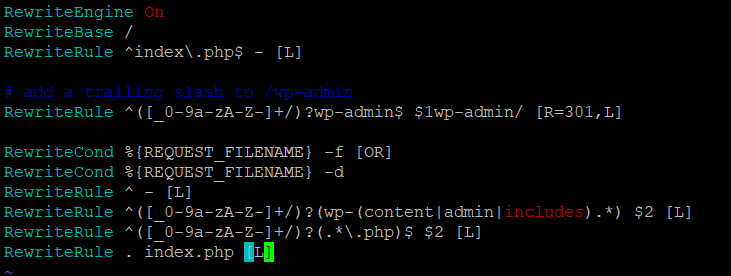
Once you are done with this, WordPress will generate two codes. Copy those codes and enter them into the wp-config.php and .htaccess file.
Note: Code mentioned above is just for reference only, and your code might differ.
wp-config.php
.htaccess
3) How to manage WordPress websites using Multisite?
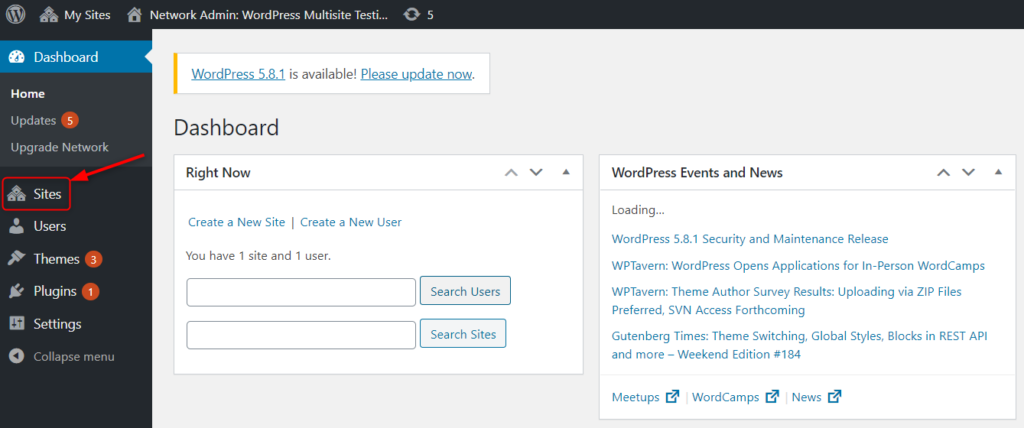
Once you are done with the steps mentioned above, loginto wp-admin once again, and you will have a new dashboard with the Sitesoption enabled.
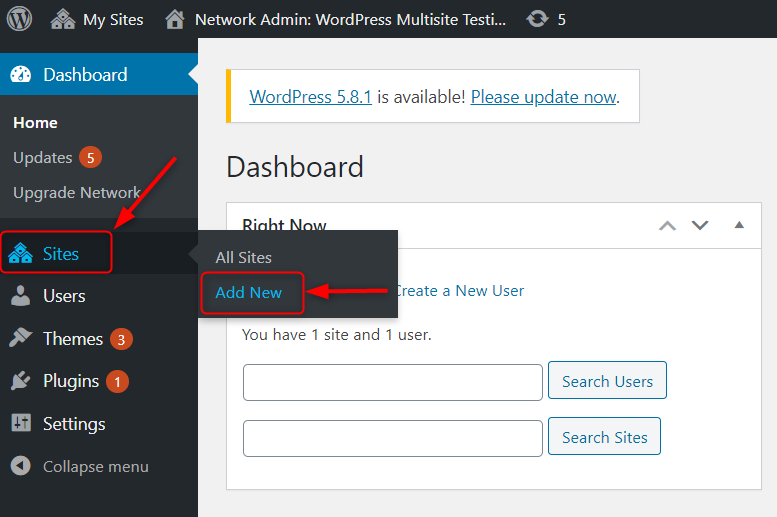
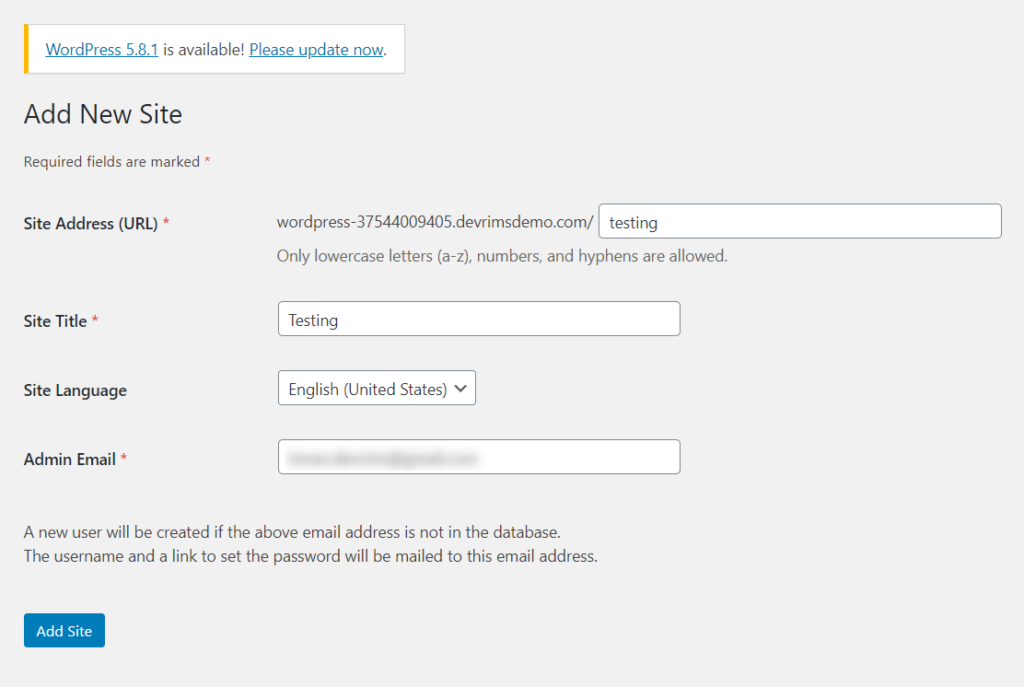
Step 1 = Add New Site
Hover the mouse on Sites and click on Add New.
Type Site Address
Type Site Title
Type New Admin Email
Click Add Site.
A new site will show the results as below:
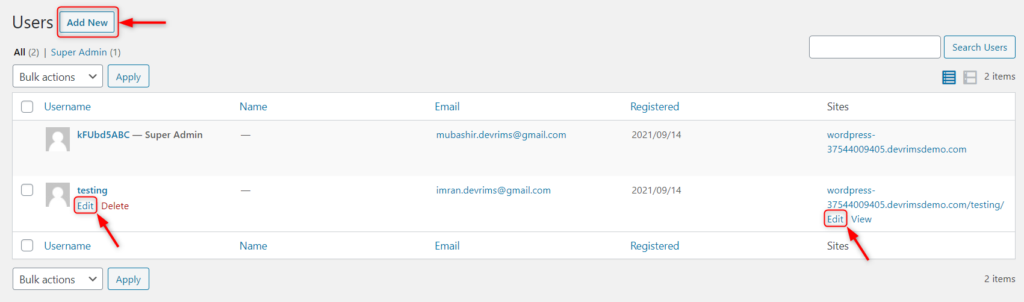
Step 2 = Add New User
When you add a new site, a new admin user will automatically be created for each site. If you want to add another user to the same site, click on Add New button. Also, you can change existing user(s) by clicking on Edit.
Step 3 = Add Themes & Plugins
An individual multisite admin cannot install a theme or plugin. The super admin has all the privileges. Themes and Plugins can be set up as the Network Admin for all the sites, and site admins can choose from the available options.
To install the theme and plugin in a single multisite, the super admin must activate them from the main WordPress dashboard.
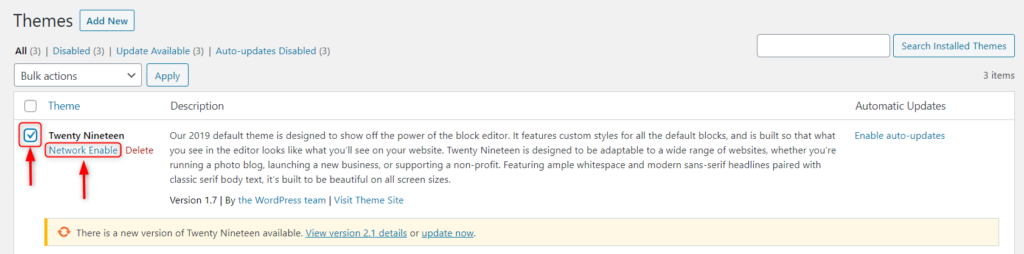
To enable Theme(s) on the network:
Login to wp-admin using the main super admin credentials.
Go to Themes > Installed Themes
Click on the check box to select the Theme
Click Network Enable
The selected theme will be available in the new multisite.
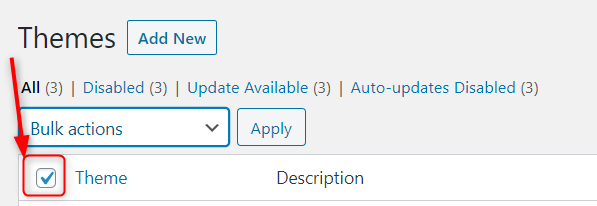
For bulk actions, click on the check box to select all themes.
Click on the Bulk Actions drop-down menu
Select Network Enable
Click Apply
All themes will be available in the new multisite.
To enable Plugin(s) on the network:
Go to Settings
Scroll the page to the bottom
In Menu Settings, click the Plugins check box.
Click Save Changes
The Plugins section will appear in a multisite where a site admin can select the plugin(s).
Conclusion:
We are sure that by now you have learned how to set up a WordPress Multisite. Managing multiple individual sites can be a very hectic job, so WordPress multisite is a highly recommended feature that keeps track of multiple sites in one place, making your life easier.