
Are you having issues with your WordPress site not sending emails? Well! You are not the only one. In this article, we will teach you how to configure an SMTP (Simple Mail Transfer Protocol) service to send emails on a WordPress application. Moreover, this article also teaches you how to set the email headers (From Name and Sender Email, etc.) through WP Mail SMTP plugin.
1) Installation & Activation of WP Mail SMTP Plugin
First, you need to login to your WordPress admin of your site using the admin credentials to install the WP Mail SMTP plugin.
After logging into your Dashboard, click on the Plugins from the left column and click on Add New.
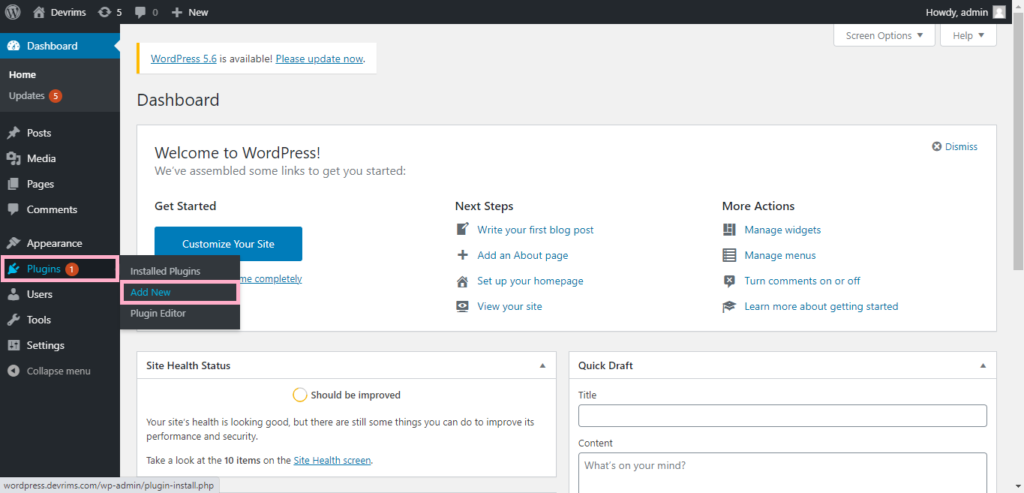
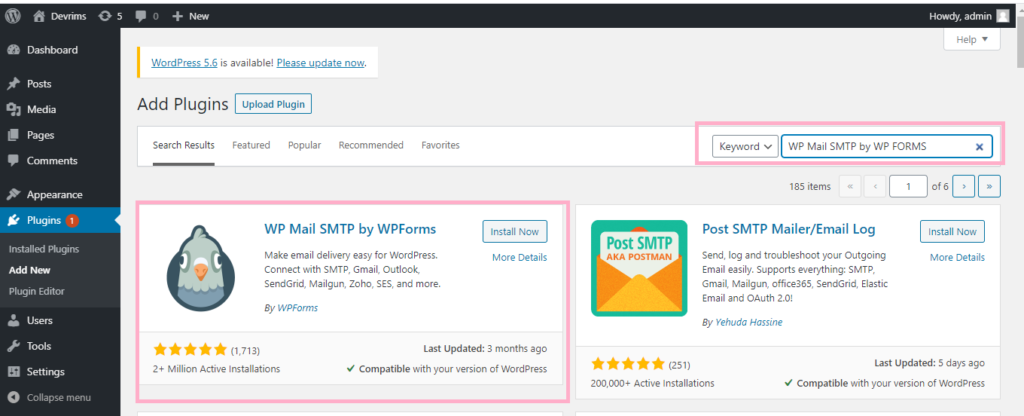
Now on the top right-side search bar, enter “WP Mail SMTP by WP Forms.” and click on the Install Now button.
IMPORTANT NOTE:
When you click on the install button, you might get a popup window asking for FTP credentials to install the plugin. Kindly follow our knowledge base article on Fix FTP Credentials issue in WordPress to resolve the issue.
After following the KB, refresh the same plugin page, you will see Activate button. Click on it to activate the plugin.
2) Configuration of Sender Name and Email Address
To configure, go to the Plugins section in the left admin menu, find the SMTP plugin, and click on Settings.
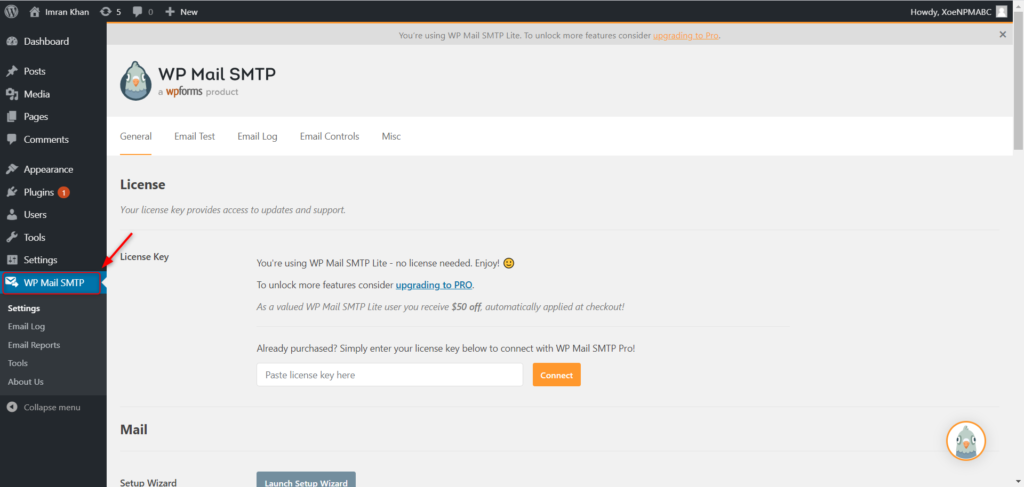
License Key: No need for that. You can still keep on using the free version without any issue.
From Email: Type the Email from which you want to send the emails and click on Force From Email.
From Name: Type the name you want to appear in the from email and click on Force From Name.
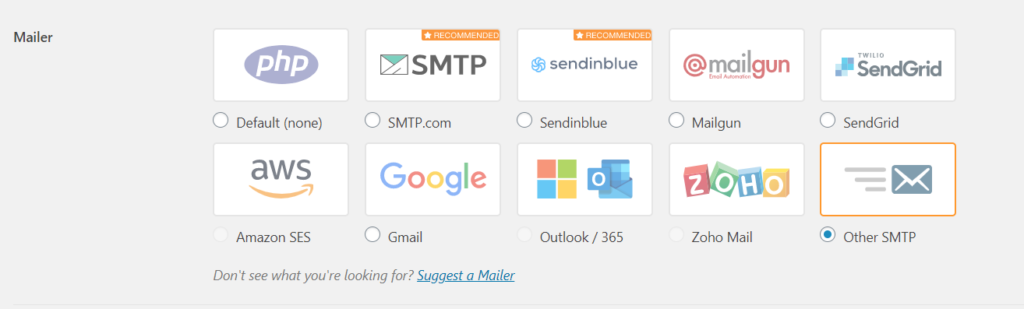
Mailer: There are multiple options available. You can choose any email service provider of your choice or select Other SMTP.
Fill out all the required fields and click on Save Settings.
3) Verification of SMTP Settings
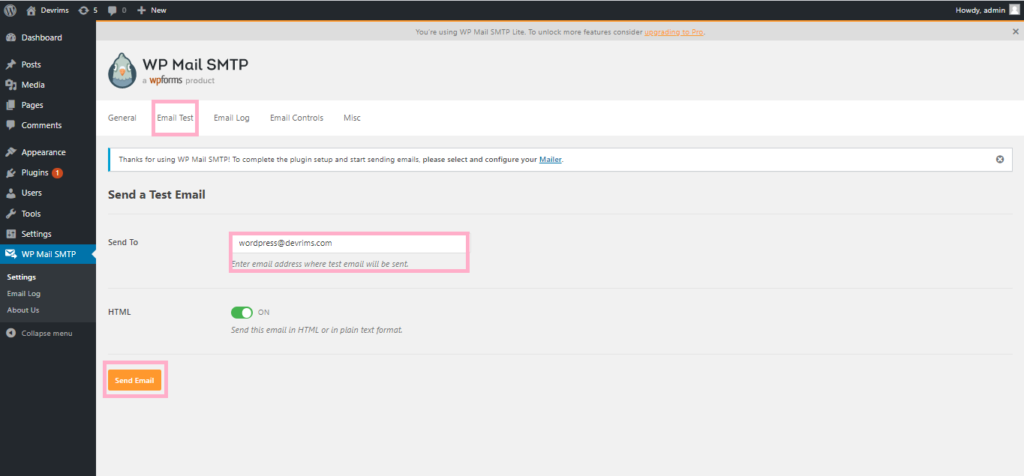
To test the WP Mail SMTP plugin, we will send a test email.
- Click on the Email Test tab.
- In the Send To field, enter a valid email address and click Send Email.
If everything goes right, you will get a success message. Check the inbox of the email you entered to verify the test email.
We have now successfully configured SMTP for your WordPress site. You will now begin to get alerts from your WordPress forms.
4) Adding an SPF Record at Domain Registrar (Recommended)
It is recommended to add an SPF record at your domain registrar to avoid issues with outgoing mails.
To add an SPF record, you need to log into your Domain Registrar.
Type: TXT
Host: Enter @ in the Host area to place the record on your root domain.
TXT Value: Add the SPF record as per your SMTP service provider’s recommendation.
TTL: Choose the lowest value
Click Save to apply the settings.
Conclusion:
If you have followed the steps correctly, we are sure you now must have configured your WP Mail SMTP plugin. If still, you are having issues configuring the plugin, feel free to contact our 24/7 Live Chat and our technical representatives would be happy to assist you.