Secure Sockets Layer (SSL) is a security protocol that establishes an encrypted connection between a web server and a web browser. An SSL certificate is a digital certificate that verifies the identity of a website and allows for secure communication. When an SSL certificate protects a website, HTTPS shows in the URL, ensuring that any data sent between users and websites stay private and safe.
This knowledge base article will explain how to install the Let’s Encrypt SSL Certificate on your application and why it is important.
1) Why Choose Let's Encrypt SSL?
Let’s Encrypt is a CA chain (certificate authority) that is both free and open. Devrims has simplified all of the automation required in acquiring, renewing, and revoking certificates by using a protocol called Automated Certificate Management Environment (ACME).
Install an unlimited number of free Let’s Encrypt SSL certificates for each of your domains absolutely FREE to secure them while also increasing the credibility of your website.
It is relatively easy to deploy the Let’s Encrypt SSL Certificate via Devrims Platform. The steps defined below help you to do it quickly.
Ensure that you do not have a pre-installed SSL certificate. Otherwise, it will overwrite the existing one. There is no space for more than one certificate on a single application.
2) Prerequisites before installing Let’s Encrypt
This is a crucial part. Before installing Let’s Encrypt SSL, you must ensure that you meet all the following criteria or else SSL installation will be failed.
- Domain(s) is/are correctly added in your Devrims Dashboard in the Domain Management section.
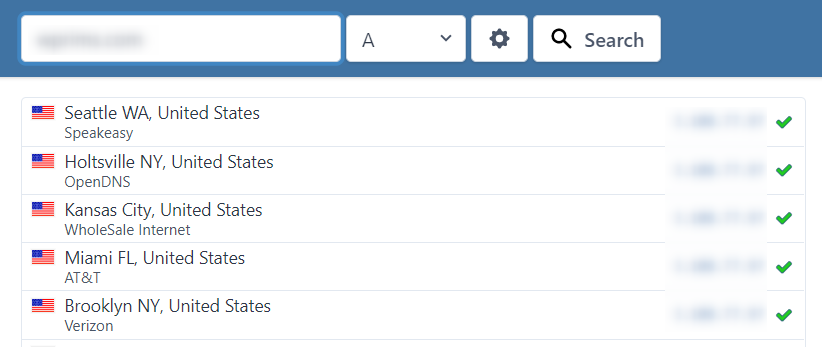
- DNS records of your domain(s) is/are updated adequately to your Devrims server IP and propagated worldwide. Check DNS propagation on https://www.whatsmydns.net/.
- If you are using any WAF (Web Application Firewall) services such as Cloudflare, Sucuri, or any other WAF services, it is mandatory to disable it until the SSL certificate is installed successfully temporarily. But, if you have enabled WAF services due to a DDoS attack, you must take extra precautions before disabling the feature.
- If your .htaccess file is full of rules, there are chances of Let’s Encrypt installation failure. The .htaccess file plays a vital part in installing the Let’s Encrypt SSL. It is advised to rename the original .htaccess file and use the default. Once SSL is installed successfully, revert the .htacess to the original.
3) Install Let’s Encrypt SSL Certificate
- Login to the Devrims dashboard using your credentials.
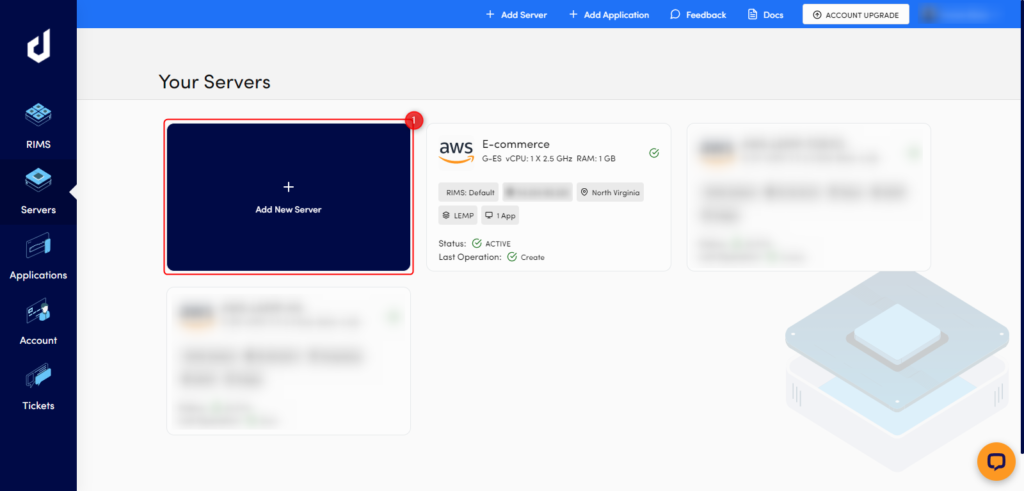
- Go to your desired server from the main server listing on Devrims Dashboard.
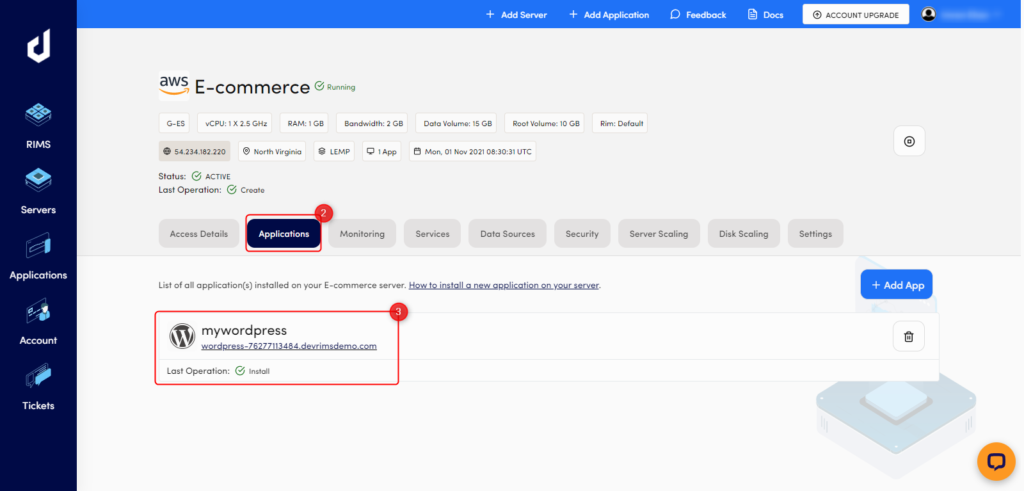
- Click on the Applications tab and choose your desired application.
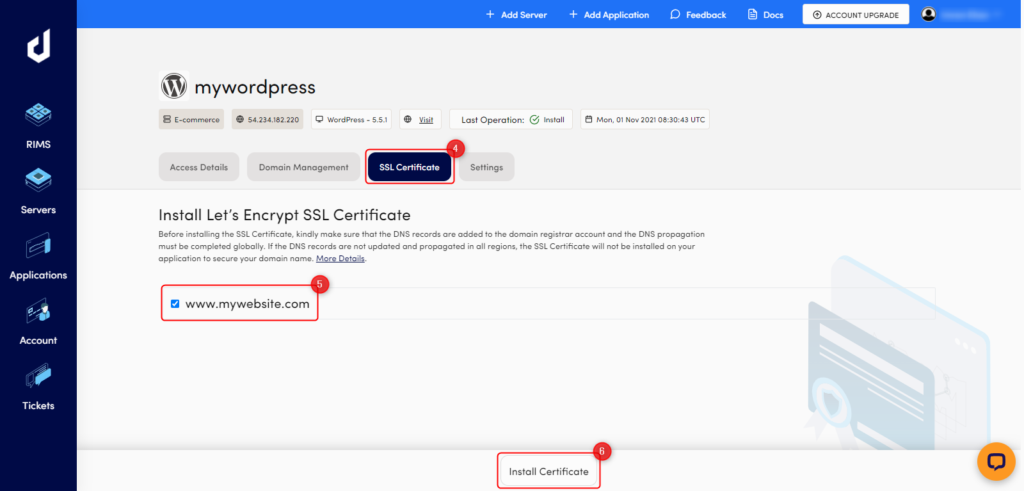
- On the next page, click on the SSL Certificate tab, select the domain name, and click on Install Certificate to install the SSL.
Note: SSL installation will take a couple of minutes to complete the process. If for any reason it is failed, then you must check our Prerequisites steps and give it another try. If still you are unable to install SSL, no worries as we are available 24/7 to resolve your query.
Once you’ve got your SSL certificate all you need is to check with a certificate checker tool. We have a detailed knowledge base article on how to verify after an SSL is installed.
4) HTTPS Redirection
Here comes the main point. Now, it’s time to force HTTPS redirection to ensure that your website always runs on a secured protocol. There are multiple ways that you can use to force HTTPS.
This step will show the steps via the command line whether you are using LAMP or LEMP stack; the steps are the same but different rules.
- To connect your application via SSH using Master User or Application User, visit How to connect your application via SSH and SFTP.
- Navigate to the application webroot, i.e., public_html folder.
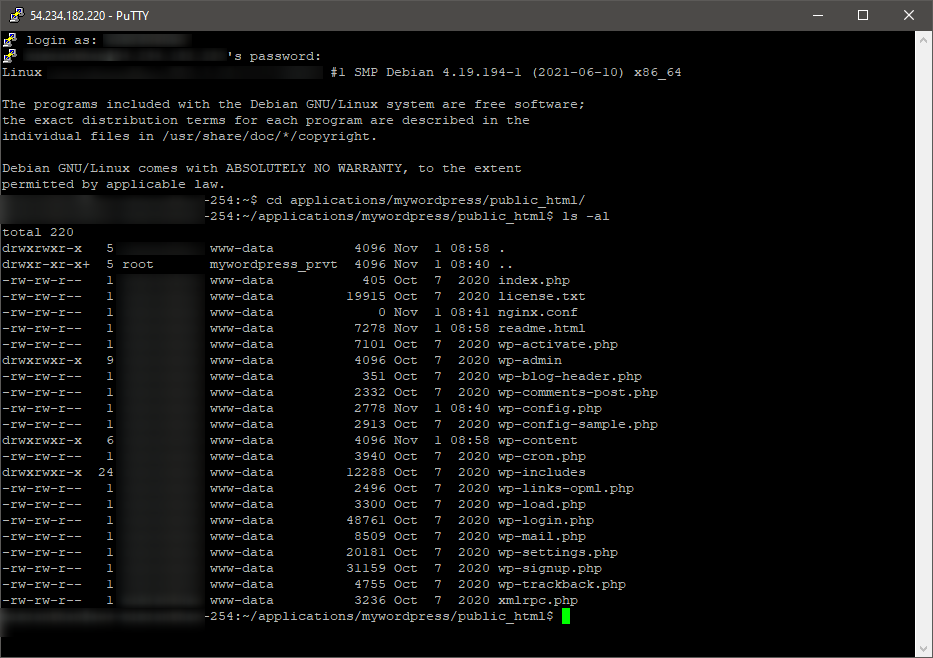
- Open and edit the .htaccess (Lamp Stack) or nginx.conf (Lemp Stack) file.
In this KB, we are giving an example of .htaccess file. - Add the below rule in the top line before # BEGIN WordPress.
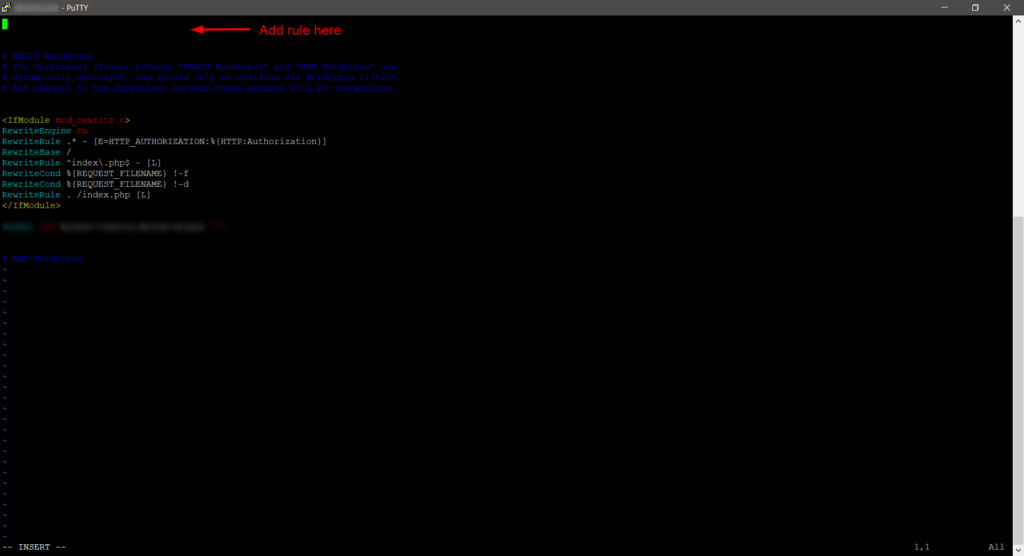
Rule for LAMP Stack
RewriteEngine On
RewriteCond %{HTTP:X-Forwarded-Proto} !https
RewriteRule ^(.*)$ https://%{HTTP_HOST}/$1 [R=301,L]
Rule for LEMP Stack
if ($server_port = 80 ) {
return 301 https://$host$request_uri;
} - Save and exit the .htaccess file.
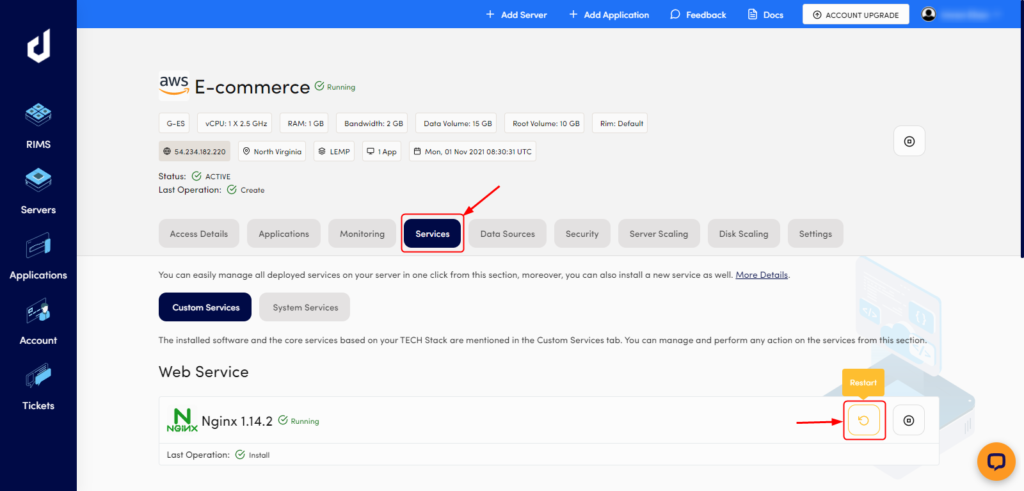
Note: Must restart the Nginx if you are running the LEMP stack. Below is the screenshot for your reference.
5) Enable/Disable Auto-Renewal
Let’s Encrypt SSL Certificate expired after 90 days. This feature is auto-enabled by default so that your domain remains secure and SSL gets renewed automatically before it expires. No further tweaking is needed.

6) Secured/Unsecured Domains
If you have added more than one domain in the Domain Management section, other domains will also appear in the SSL Certificate tab in the “Unsecured Domains” list. You can secure those domain(s) by simply clicking on the “Mark as Secure” button and installing the Let’s Encrypt SSL on all the domain(s) added in the Domain Management tab.

7) Remove Let’s Encrypt Certificate
If you want to install your own custom SSL certificate, it is recommended to remove Let’s Encrypt SSL by clicking on the Delete button and then install another SSL.

Note: If you have any trouble adding the above rule on any stack or need further help, kindly contact our support on Live Chat or create a ticket from Devrims Dashboard.

