
In this knowledge base article, you will learn the steps to install and configure WP Rocket Cache Plugin.
Table of Content:
1) What is WP Rocket Plugin?
WP Rocket is an open-source and popular WordPress application performance cache plugin. Unlike other WordPress caching plugins, WP Rocket Plugin is pretty simple and has the edge over others. It will significantly decrease the load time and improve the performance of the website. WP Rocket provides options that will benefit your website.
- Page Caching
- GZIP Compression
- Cache Preloading
- eCommerce Optimization
- Browser Caching
- Reduce Latency and Improve Availability
These choices implement 80% of web performance methodologies so that you will notice faster loading times immediately.
2) Why use WP Rocket, and how it works?
Nobody enjoys visiting a slow website, and quite often, visitors turn away from the website if it takes too long to load. What WP Rocket Plugin does is load your WordPress website much faster with minimum load time.
WordPress is a dynamic content management system. Once you load a website, the entire data is called from the database. The problem arises when multiple users, a significant number, visit the website at once. The traffic causes a delay in loading the website’s data from your database.
Here WP Rocket Plugin comes in, it stores a static copy of your website in the cache, and the visitors can access the website with a negligible amount of load time.
3) Installation of WP Rocket
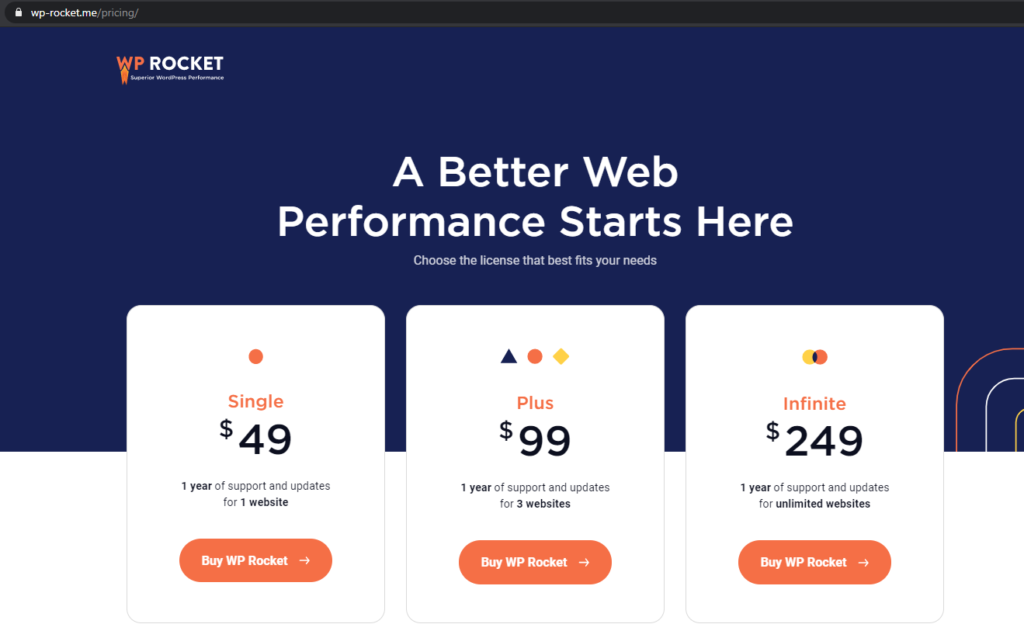
The first step in installing WP Rocket Plugin is downloading the plugin by purchasing your desired plan from the WP Rocket website.
Once you have selected your desired plan, you will receive an email with your WP Rocket login credentials to download the plugin file. After that, you need to head over to your WordPress dashboard, add a plugin, and select upload plugin.
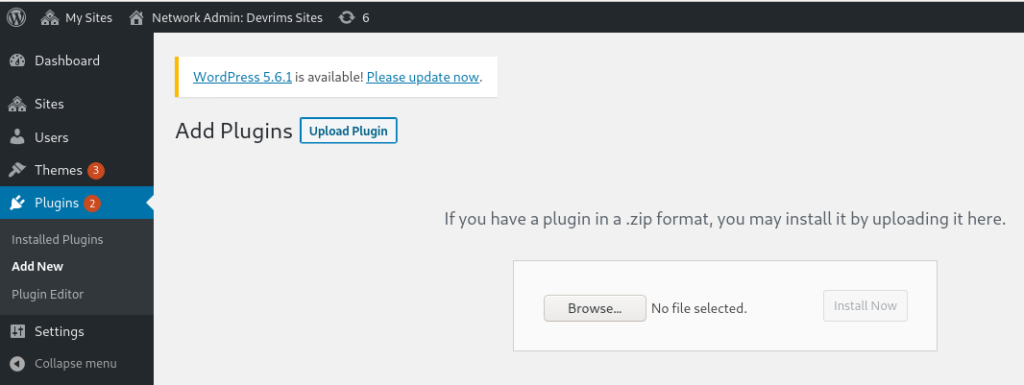
Once you have uploaded the plugin, all you need to do is hit Install Now, and that’s it.
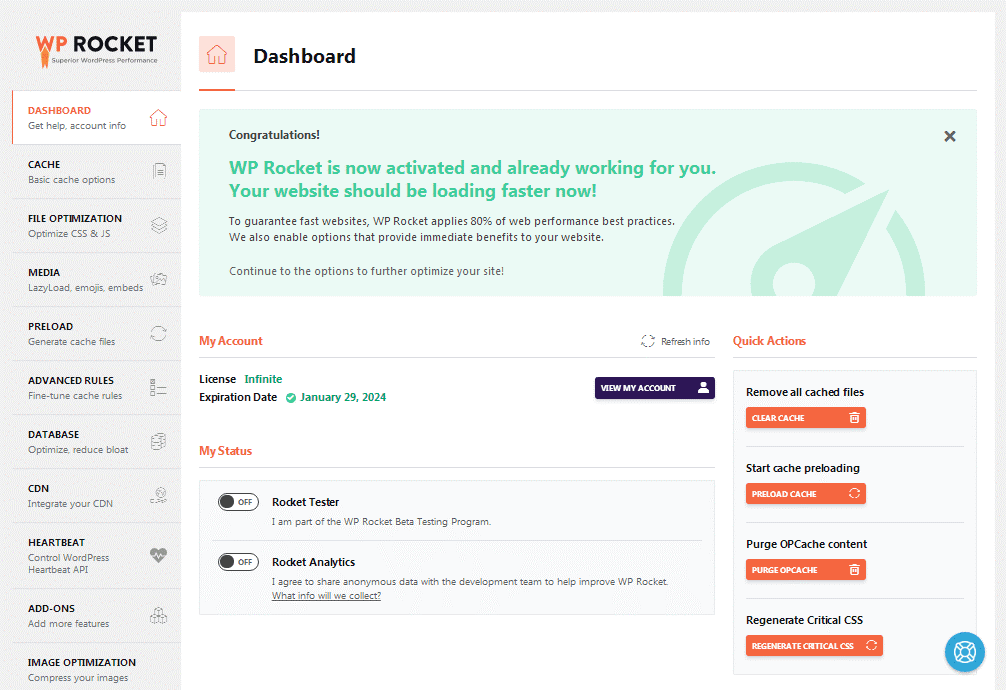
Finally, go to the plugin menu and activate the WP-Rocket Plugin (if it is not activated automatically).
You can further access the WP Rocket Settings from the WP Rocket dashboard. That can help you track the caching process of your website.
4) Configuration of WP Rocket
WP Rocket enables some of the useful options by default like:
- Page Caching
- GZIP Compression
- Cross-origin support for web fonts
- Browser caching
WP Rocket automatically scans and gets familiar with your website’s environment, i.e., Plugins, hosting environments, themes, etc.
WP Rocket plugin’s dashboard is pretty simple and user-friendly as well. You can see WP Rocket’s various services from the dashboards and make tweaks according to your needs. As seen in the dashboard image above, we have:
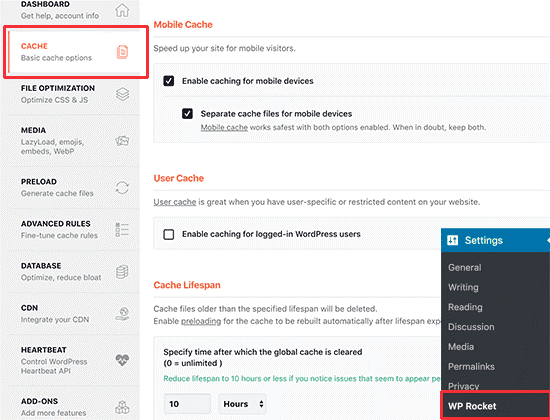
- Basic Cache Settings
WP Rocket has already enabled page caching by default, but you may change the settings to boost your website’s speed even more.
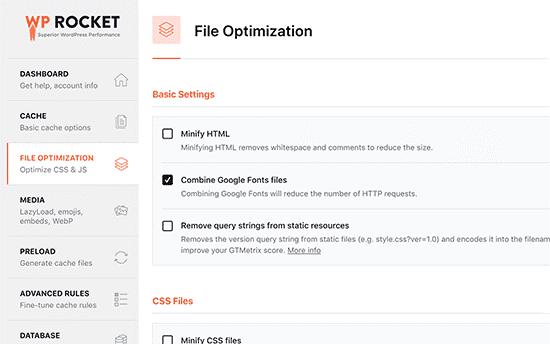
- File Optimization (Minifying files / Combining files)
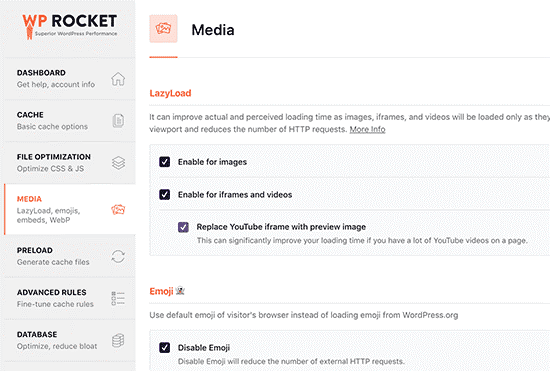
- Media Optimization (Lazy Loading)
WP Rocket includes a lazy loading function by default. Navigate to the Media tab on the plugin’s settings page to allow lazy loading for pictures. Lazy loading can also be enabled for embeds such as YouTube videos and iframes.
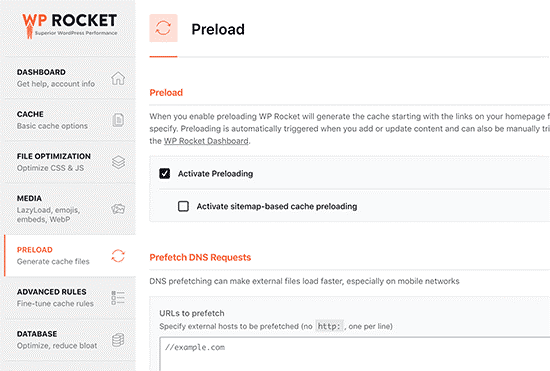
- Cache Preloading
Switch to the ‘Preloading’ tab in WP Rocket to evaluate the preloading settings. To preload cache, the plugin crawls your homepage and follows links by default.
- Advanced Rules (tune how your cache functions)
WP Rocket provides complete control over caching. Navigate to the Advanced Rules tab on the setting page to exclude pages that you do not want cached. You can also exclude cookies, user agents and reload cache when updating specified pages or posts.
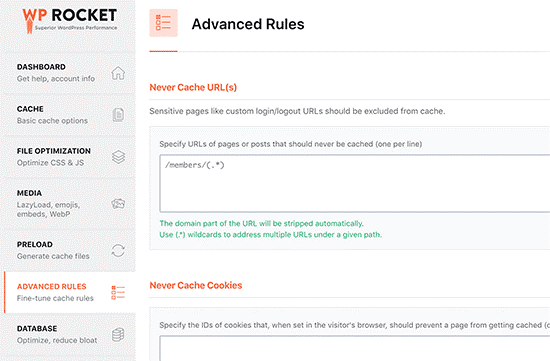
The default settings would suffice for the majority of websites. If you are unsure about any of these options, leave them blank.
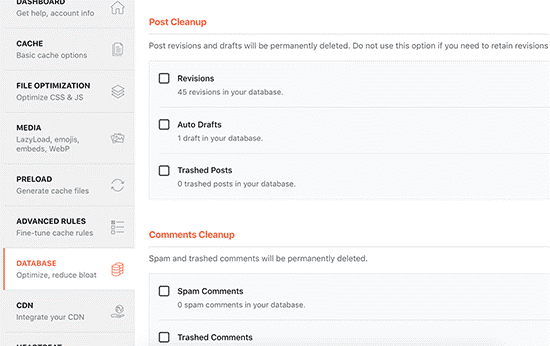
- Database Optimization (clutter-free database for fast data fetching)
WP Rocket also simplifies the process of cleaning out the WordPress database. It has little to no effect on the performance of your website, but you can still look into these choices if you want to.
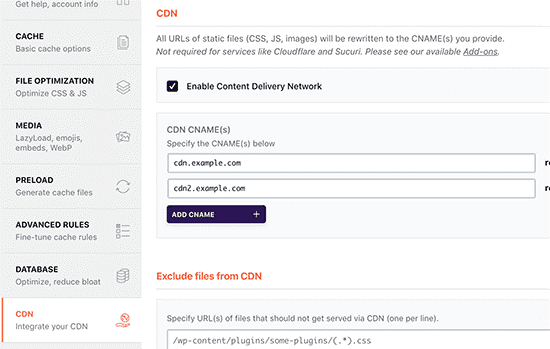
- CDN Integration (Speed up global page load time)
If you use a CDN for your WordPress site, you can configure it to operate with WP Rocket. A CDN, or content delivery network, allows you to offer static files from a global network of servers.
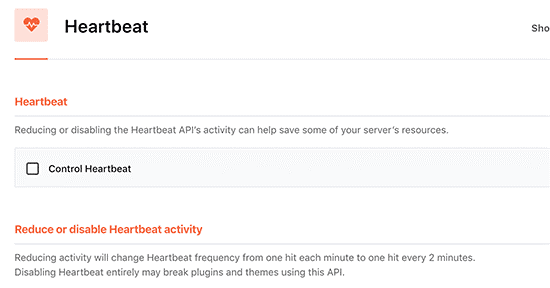
- Heartbeat Control (Constant connection of browser and server)
To regulate this functionality and lower the frequency of the heartbeat API, go to the Heartbeat API tab. It has several convenient functions. You can, however, limit its frequency to optimize performance, particularly on larger sites.
- Add-on (WP Rocket Built-in integrations)
WP Rocket Add-on offers some ready-to-use features such as Google Analytics Addon, Facebook Pixel, Cloudflare, and Sucuri.
You have successfully installed and configured the WP Rocket plugin on your WordPress website, and now your visitors can access your website faster with minimum load time.