
Several reasons may lead you to create a new admin user for your site. The site might have been hacked or you may have forgotten your password, or due to any reason, you may find it challenging to log in to your WordPress site.
You then simply need to create a new admin user for future access to your site. Here I am going to demonstrate step-by-step procedure that how someone can create a new admin user for his site with ease.
In this guide, we will show you how to add a new WordPress admin user via “PhpMyAdmin,” an administrative tool to manage a WordPress site’s database without having access to your dashboard.
To install the PhpMyAdmin on your Devrims server, we have a detailed KB on How to install and connect phpMyAdmin.
STEP#1:
Open “phpMyAdmin” through your browser and type https://www.your-domain.com/phpmyadmin or the directory name you have created during the installation of phpMyAdmin as mentioned in the above knowledge base.
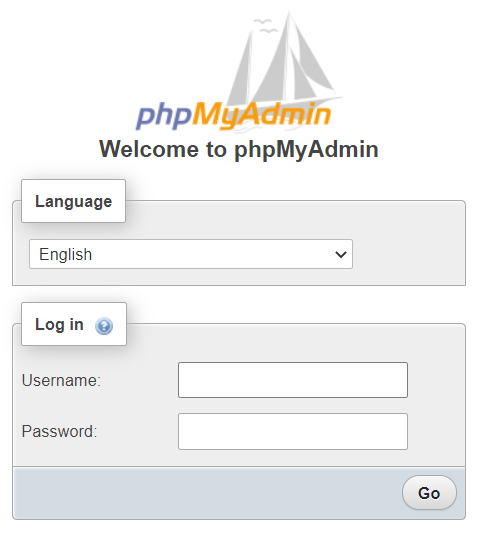
Login PhpMyAdmin using your database credentials.
STEP#2:
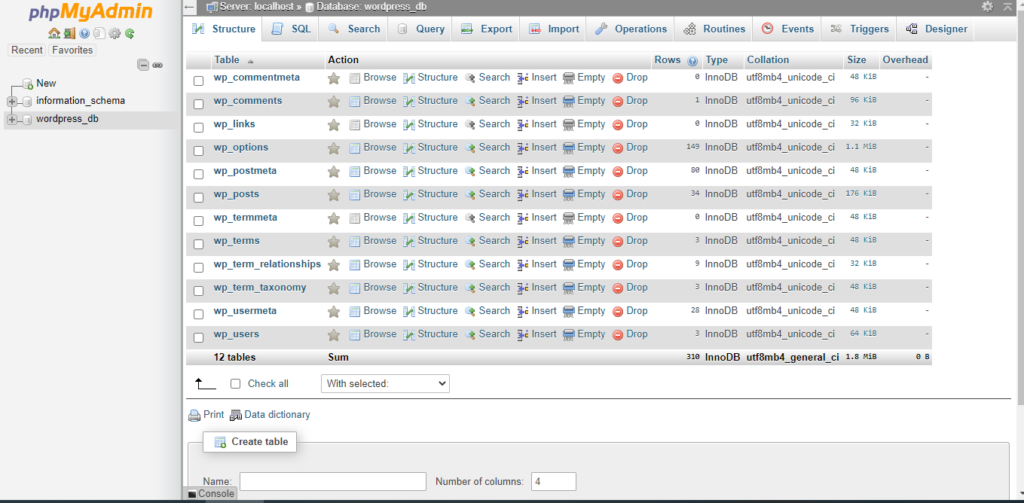
Select your respective database whose admin user you want to create. You might see different databases at the left of the panel. Select the right one.
STEP#3:
After selecting your desired database, you will see a table of contents at the left of the panel.
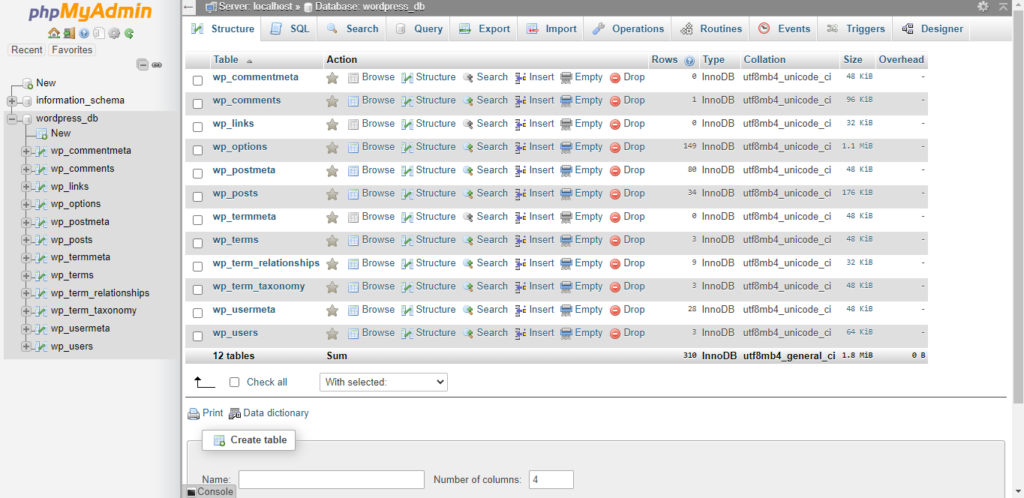
Click on the wp_users table that is usually placed at the bottom of the content chart, and click on the Insert tab. Immediately following this, you’ll see a form:
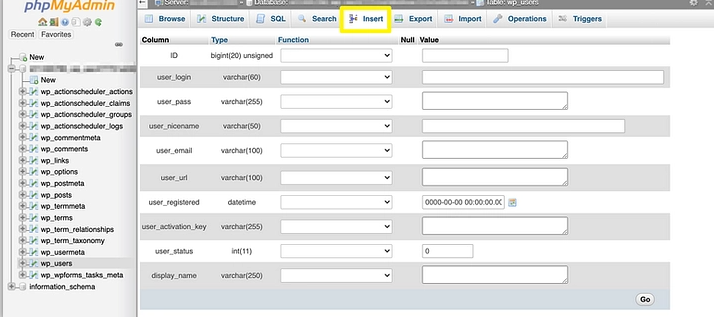
You will see a form opening that will ask you to add some of your core details like ID, user_login, user_pass, user_email, user_registered and user_status. You may ignore some of the other fields except for those mentioned here.
Note: You can enter the Id as per your own choice, but make sure that the ID you are entering is not previously allocated to any other user.
You can confirm this by checking the wp_users table. There you will see whether any existing user has the same id or not. You can also ignore writing the Id. In that case, ID will be allocated to your new user automatically.
- user_login: Enter the username you want to use to log in to the WordPress Dashboard.
- user_pass: Add a password and choose MD5 from the Function drop-down menu.
- user_email: Add the email you want to associate with this account.
- user_registered: Select a day and time for this user to be registered.
- user_status: Set this value to 0.
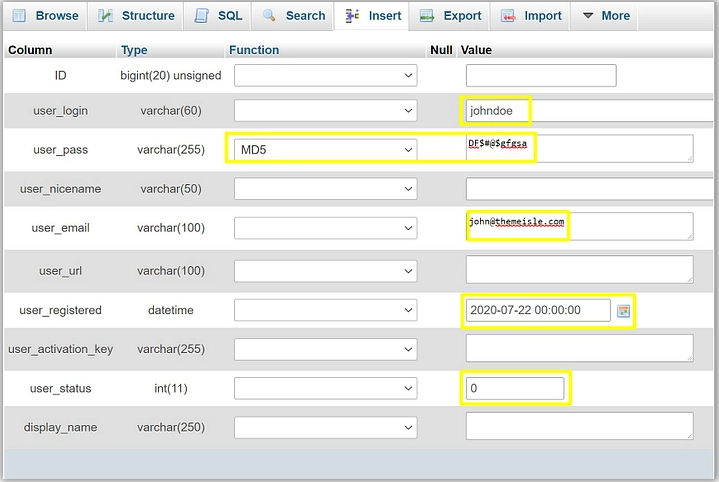
Leave other fields empty. Once you’ve filled out the fields, scroll to the bottom and click Go.
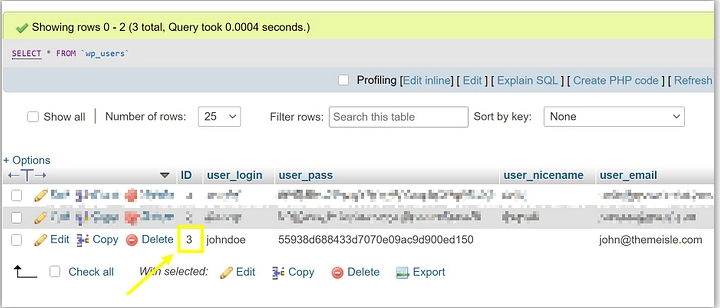
After clicking Go, you should see a success screen. If you go back to the wp_users table, you should see your new user. Pay attention to the value in the ID column as you’ll need this in the next step:
STEP#4:
To finish things out, go to the wp_usermeta table and click on Insert.
Then, fill in the below values and leave other fields blank.
- user_id: Fill in the user ID you created in the last step.
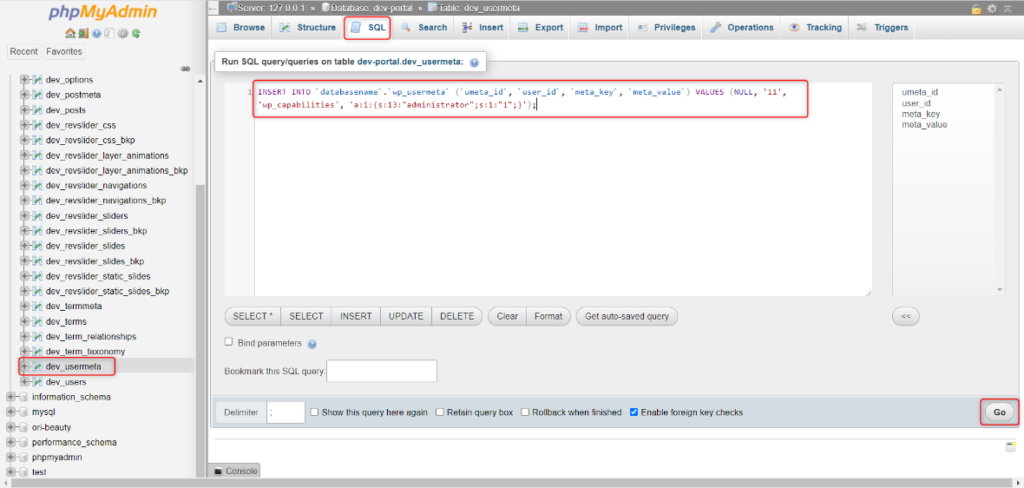
- meta_key: Enter wp_capabilities
- meta_value: Fill the field with a:1:{s:13:”administrator”;s:1:”1″;}
NOTE: In the above field, i.e., meta_value, you can assign your user with either administrator role or any particular role as per your choice or requirement. In that case, you need to replace “administrator” with either of the roles like “author,” “subscriber,” or “developer.” Different roles possess different privileges and have their limitations when operating the site through the admin panel. Here I would like to demonstrate different roles with their respective privileges.
- Administrator
The Administrator user account is the most powerful on a standard WordPress installation. Users with the administrator role can create new posts, amend existing posts, and even delete them.
meta_value: a:1:{s:13:"administrator";s:1:"1";}- Editor Role
Users with the Editor power in WordPress have complete access to your website’s content sections. They can add, modify, publish, and delete any post on a WordPress site, including those published by others.
meta_value: a:1:{s:5:"editor";s:1:"1";}- Author Role
As the name suggests, users with author rights can write, edit, and publish their posts.
meta_value: a:1:{s:6:"author";s:1:"1";}- Contributor Role
Contributors can add new and edit their posts, but they cannot publish any posts, not even their own.
meta_value: a:1:{s:11:"contributor";s:1:"1";}- Subscriber Role
Users having subscriber role can log in and edit their user profiles on your WordPress site. If they choose, they can change their passwords.
meta_value: a:1:{s:10:"subscriber";s:1:"1";} 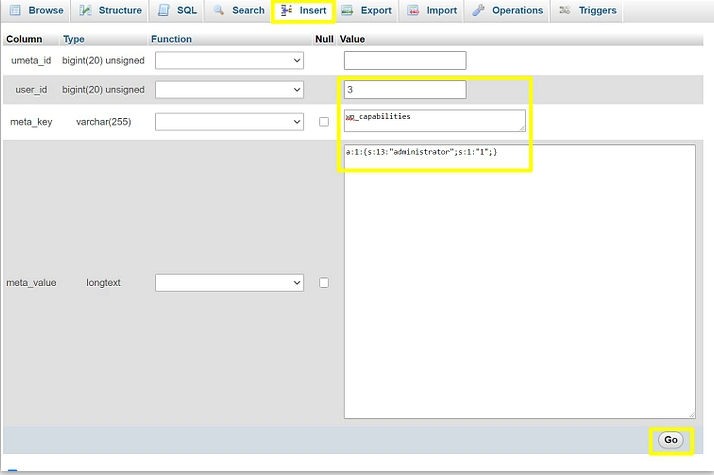
After assigning the respective role to your user, click on Go to complete the user creation process. Now your user can log in to your WordPress site using these credentials
CHANGE THE USER’S ROLE
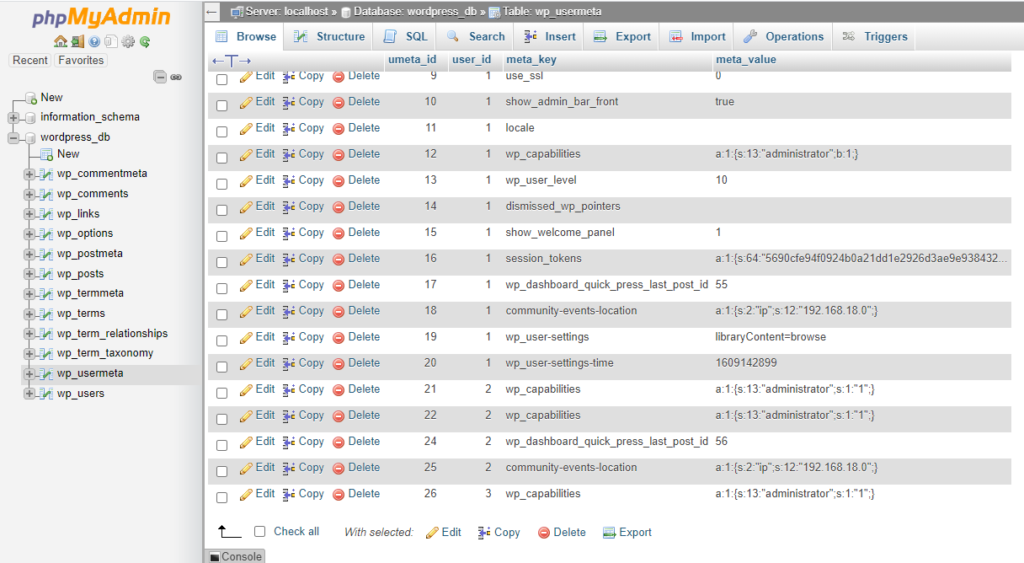
You also change the user’s role later in case of any particular requirement or need to your site. For that, You need to enter into the wp_usermeta table and identify your user through ID and then click on Edit so that you can change the role of your existing user and press GO to execute changes.
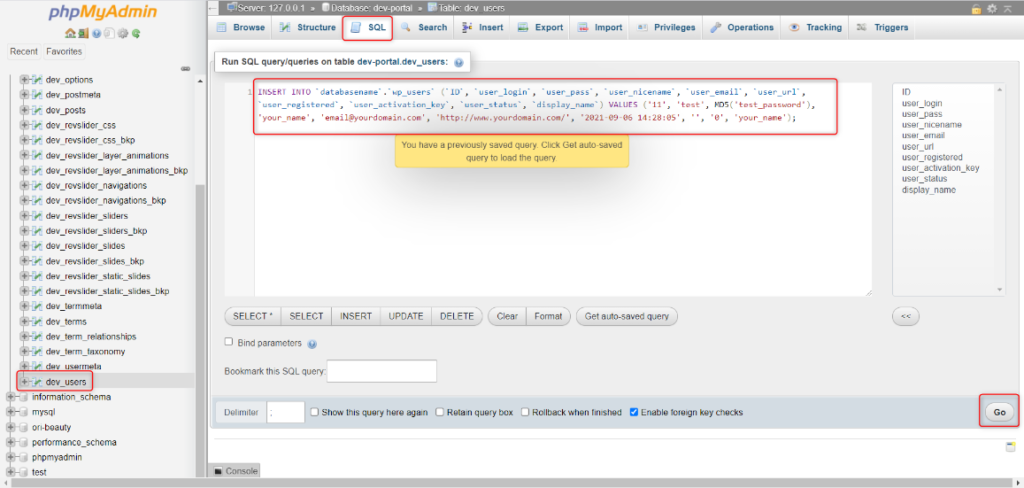
SQL QUERY TO CREATE A USER
You can also create a user by running a simple query.
- Select your desired database from the left column.
- Click on wp_users.
- Click on the SQL tab.
- Type the following query and click on the Go button
- Click on wp_usermeta.
- Click on the SQL tab.
- Type the following query and click on the Go button
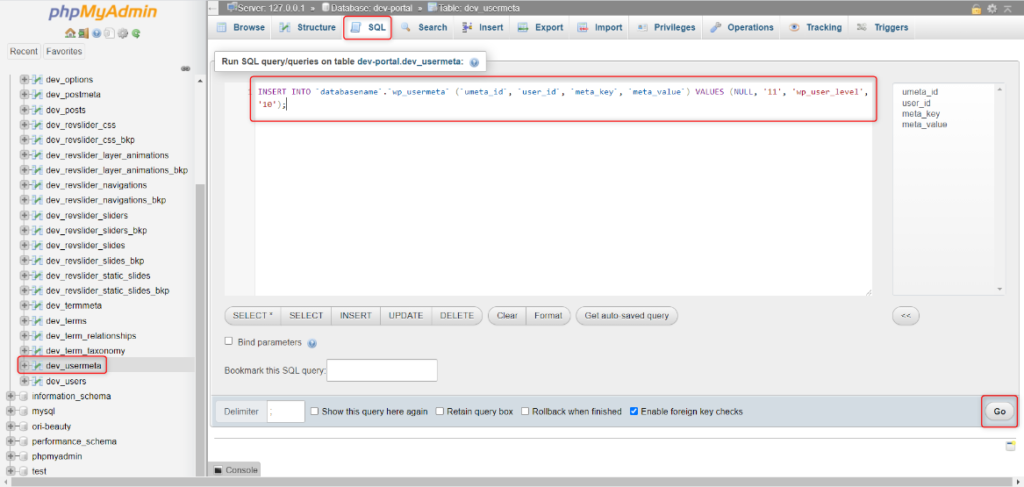
- Click on the SQL tab once again.
- Type the following query and click on the Go button
Conclusion:
You can create a new admin user with any specific role or privileges as per your requirement and change the existing user. It’s still possible to create a new WordPress admin user using phpMyAdmin to restore access.