
Maintaining a backup of your site’s database is of utmost importance. Database import and export is a basic procedure in software development. Data dumps can be used to backup and restore important information. It can also be used to migrate the data to a new server or staging environment.
Database backups can be simply exported and imported using the command line and any other database management tool. This is handy for creating personal backups of your database or if any changes are required.
This KB will explain how to export a MySQL database and import a SQL database backup to your server.
1) Export the Database
First, you must connect your server via SSH or SFTP using Master User or Application User.
Note: You can see the instructions on how to connect your application via SSH and SFTP from our knowledge base article.
a) Export via command line
- Go to cd applications/application_folder_name/public_html/
- Type the below command to take the database backup:
mysqldump -u database_username -p database_name > backup.sql
Note: It will take a few seconds or minutes, depending on the size of the database.
- To verify the database: tail backup.sql
- You will get following result:
/*!40101 SET SQL_MODE=@OLD_SQL_MODE */;
/*!40014 SET FOREIGN_KEY_CHECKS=@OLD_FOREIGN_KEY_CHECKS */;
/*!40014 SET UNIQUE_CHECKS=@OLD_UNIQUE_CHECKS */;
/*!40101 SET CHARACTER_SET_CLIENT=@OLD_CHARACTER_SET_CLIENT */;
/*!40101 SET CHARACTER_SET_RESULTS=@OLD_CHARACTER_SET_RESULTS */;
/*!40101 SET COLLATION_CONNECTION=@OLD_COLLATION_CONNECTION */;
/*!40111 SET SQL_NOTES=@OLD_SQL_NOTES */;
— Dump completed on 2021-09-15 14:53:00
- You can download the backup locally to your system via SFTP. Kindly follow our KB on how to connect your application via SSH and SFTP.
b) Export via phpMyAdmin
If your server does not have phpMyAdmin installed, kindly follow our KB on how to install and connect phpMyAdmin.
- Connect phpMyAdmin using your database credentials.
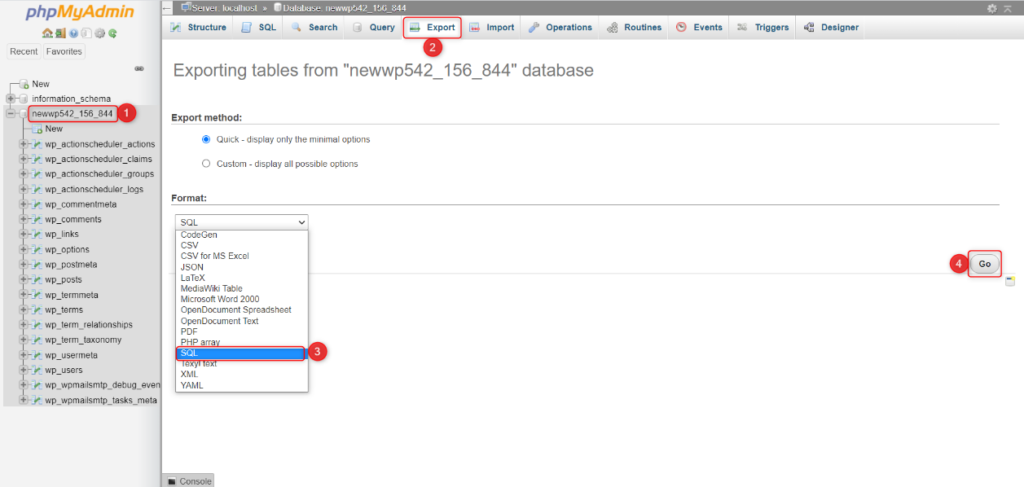
- From the left column, click on the database name.
- Click on the Export tab.
- Format: It is recommended to keep it to default SQL selection.
- Click Go.
The database will be downloaded to your local machine.
2) Importing the Database
Before importing the database, it is recommended to drop all the database tables; otherwise, you will receive an error or a duplicate table(s) message.
a) Drop Database Tables
- Connect phpMyAdmin using your database credentials.
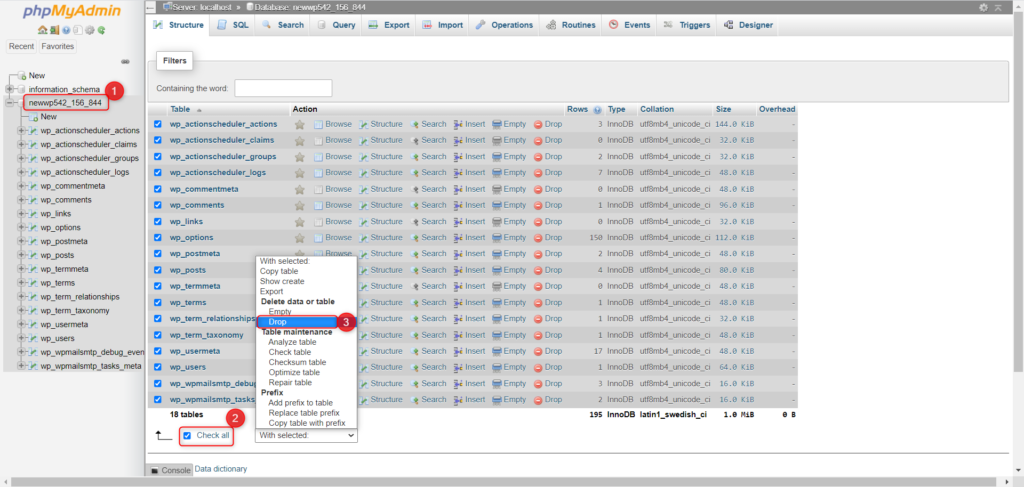
- From the left column, click on the database name.
- Click Check all
- With the Selected drop-down menu, select Drop.
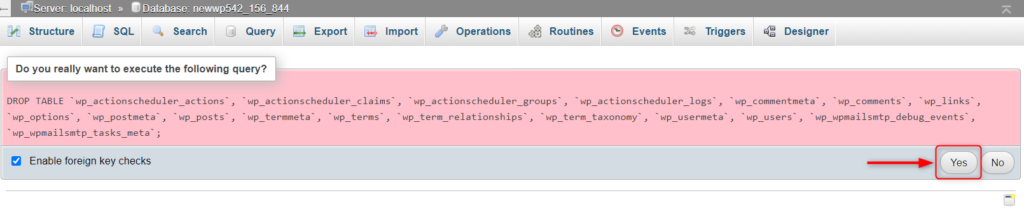
- On the next page, click Yes to execute the query.
b) Import via Command Line
- Go to cd applications/application_folder_name/public_html/
- Type the below command to import the database backup:
mysql -u database_username -p database_name < backup.sql
Note: It will take a few seconds or minutes, depending on the size of the database.
c) Import via phpMyAdmin
- Connect phpMyAdmin using your database credentials.
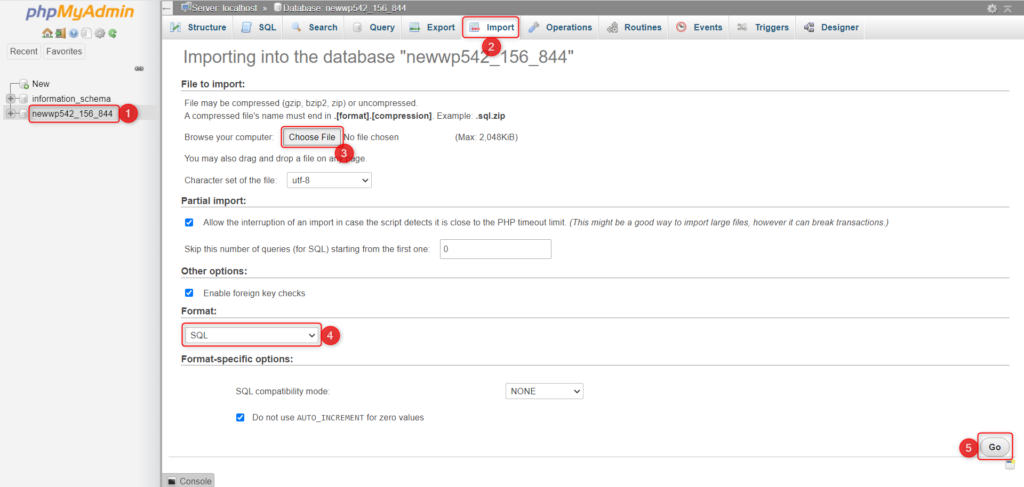
- From the left column, click on the database name.
- Click on the Import tab.
- Browser your computer and choose the database file.
- Format: Keep it to default SQL selection because you have exported the database in the .sql extension.
- Click Go.
We hope the steps mentioned above are easy to understand, and you have learned the different ways to export and import the database.