There are times when it is essential to connect to the MySQL server from a different location. For example, in a multi-domain deployment where the application runs on a different machine than the database server, you may need to connect to your local system’s remote MySQL server.
You would work with SQL queries and establish a link from multiple locations. You must grant remote MySQL access to your hosting server and whitelist the incoming link points’ IPs to allow MySQL remote connection.
Adding developers as team members at the hosting solution level is a safer option and then allowing them to link to the database remotely using MySQL support for remote connections. It provides a safe environment for remote developers to collaborate on a centralized database.
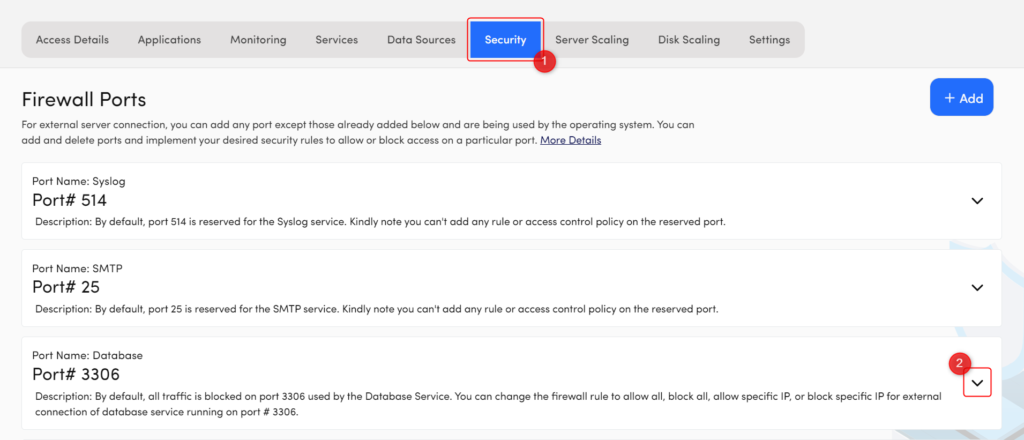
By default, all external connection with any services running on your server is blocked. To connect the database externally you need to change the access policy of the database port. The steps to change the access policy of your database services from the security section are mentioned below.
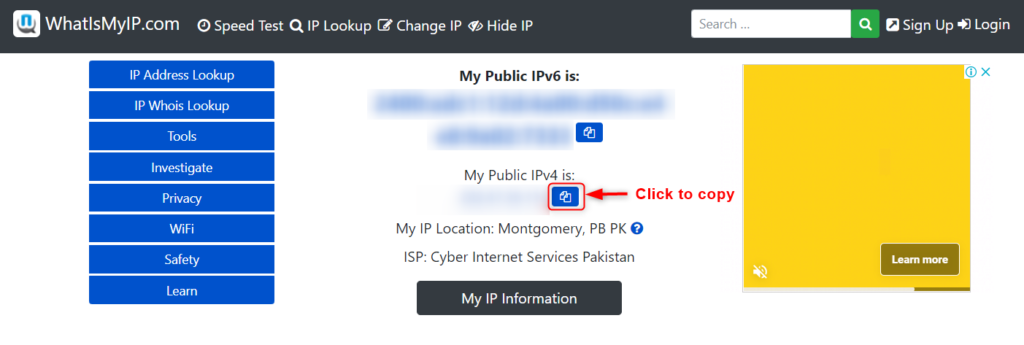
First find the IP of your local computer or your team member(s)/developer(s), kindly visit https://www.whatismyip.com/. We recommend allowing specific IPs instead of allow all IP addresses to ensure the security.
Check My Public IPv4 and click on the Copy icon.
Go to your Devrims Dashboard once again.
Go to the Security tab.
In the Firewall Ports list, you can see Database port, i.e., 3306 in the case of MySQL
Click on the drop-down arrow and click on +Add Rule.
Click on the toggle switch to Allow the remote connection.
Click on Save.
Note: You can add unlimited IP addresses depending on how many remote connections you need to share with your team members accordingly.
Once you have successfully allowed the IP(s), you may connect the database remotely using the below methods:
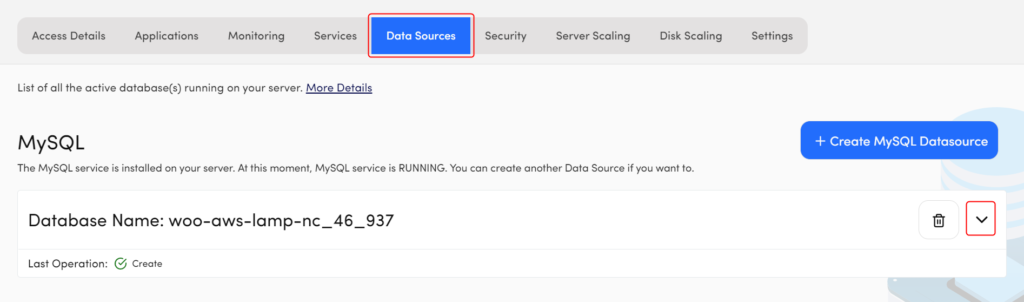
2) Get Database Credentials
Loginto your Devrims Dashboard using your credentials.
Navigate to the Data Source section
Click on the drop-down to find Database credentials.
3) Connect database using Workbench
Database Workbench is a SQL-based software framework that allows you to create and manage various relational databases with interoperability between different database systems.
Collections of data Workbench can serve several database systems, providing software developers with a common framework and programming platform for these otherwise separate database systems, as well as cross-database resources.
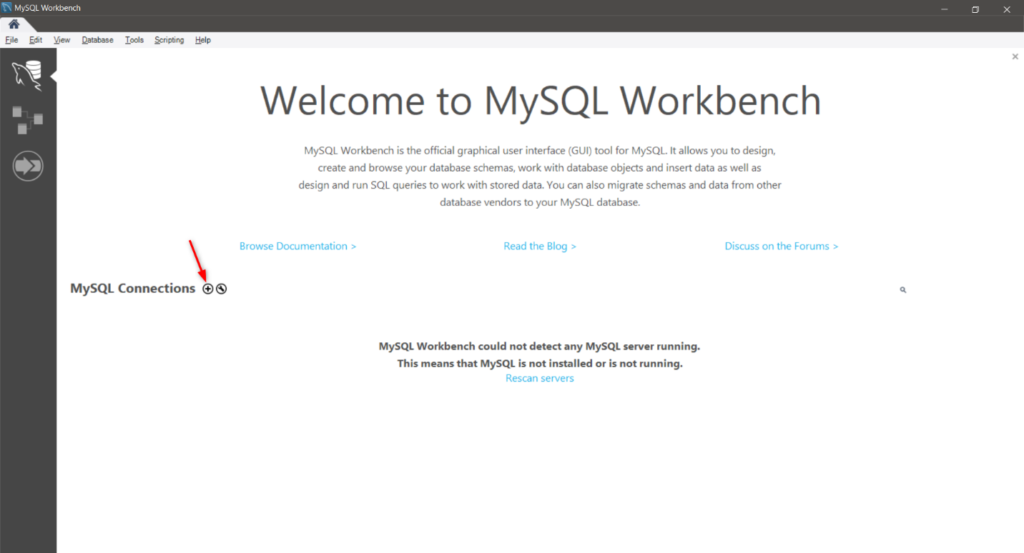
Download the MySQL Workbench depending on OS you are running and install the program.
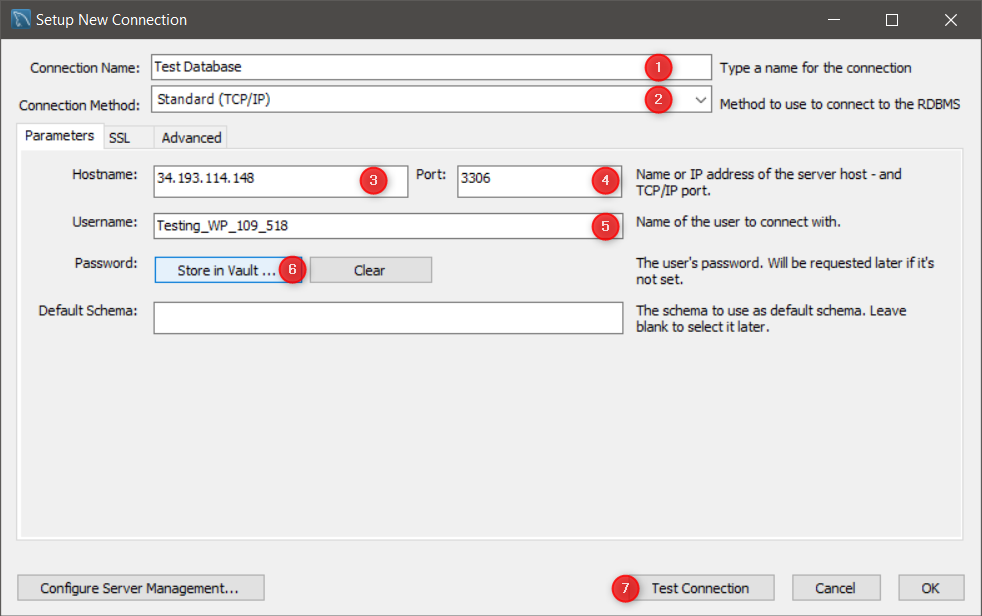
Open the software, click on the + sign to make a database connection.
Connection Name: Type any name in this field.
Connection Method: Standard TCP/IP
Hostname: Type your Devrims server IP
Port: 3306
Username: Type your database username.
Password: Click on the Store in Vault button and save the password.
Click on Test Connection.
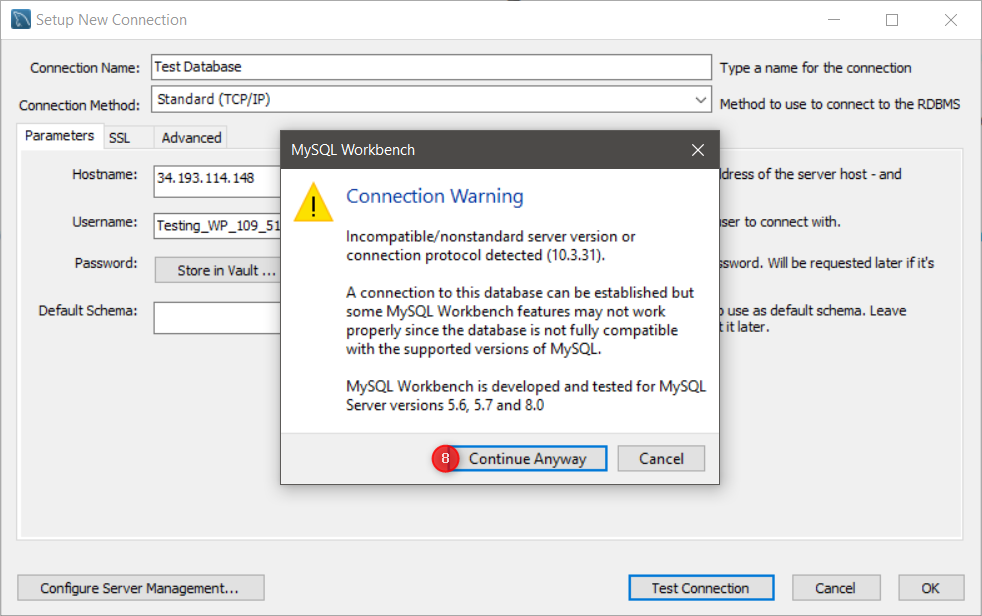
You will get a Connection Warning screen; click Continue Anyway.
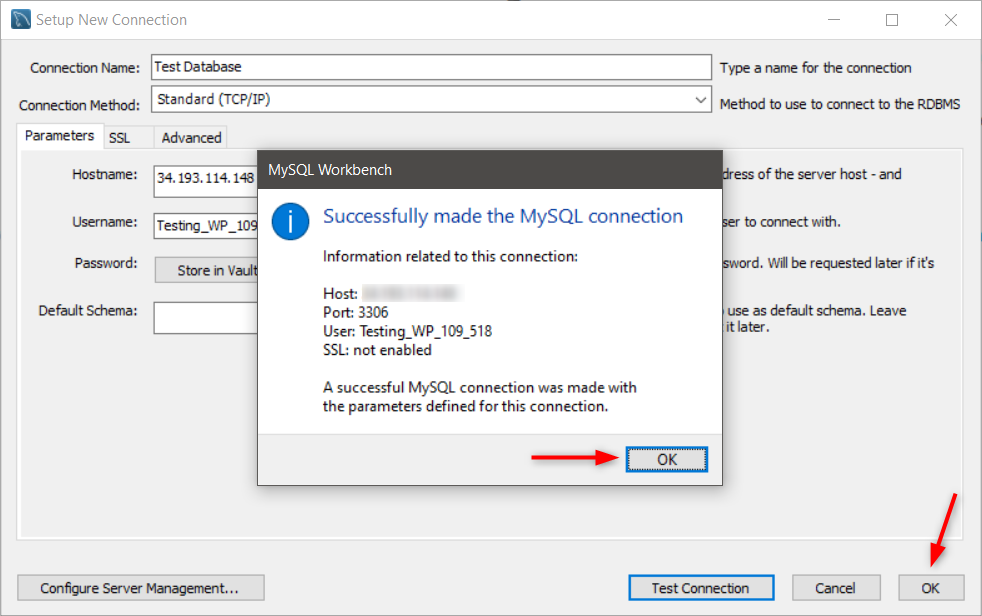
You will get a successful connection message. Click OK on both the screen.
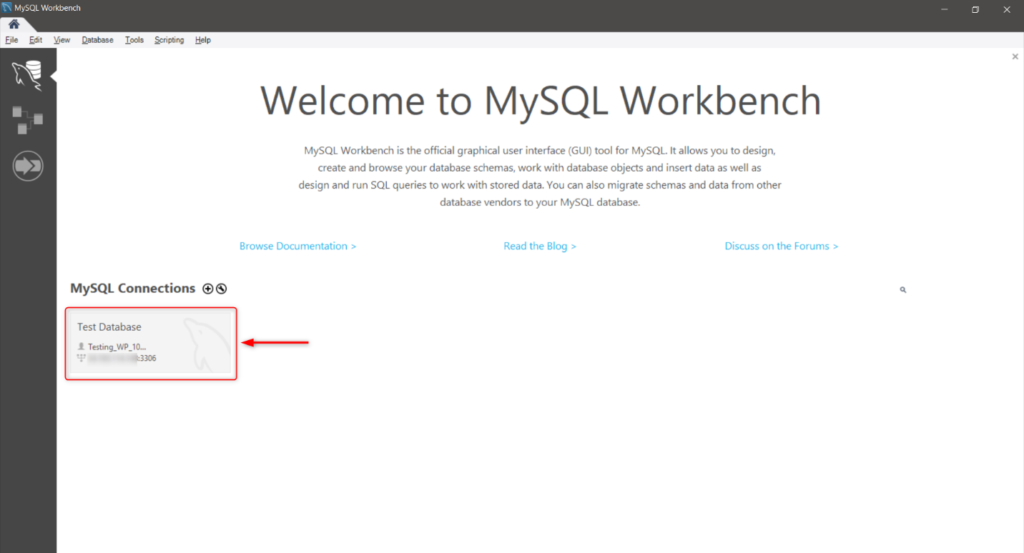
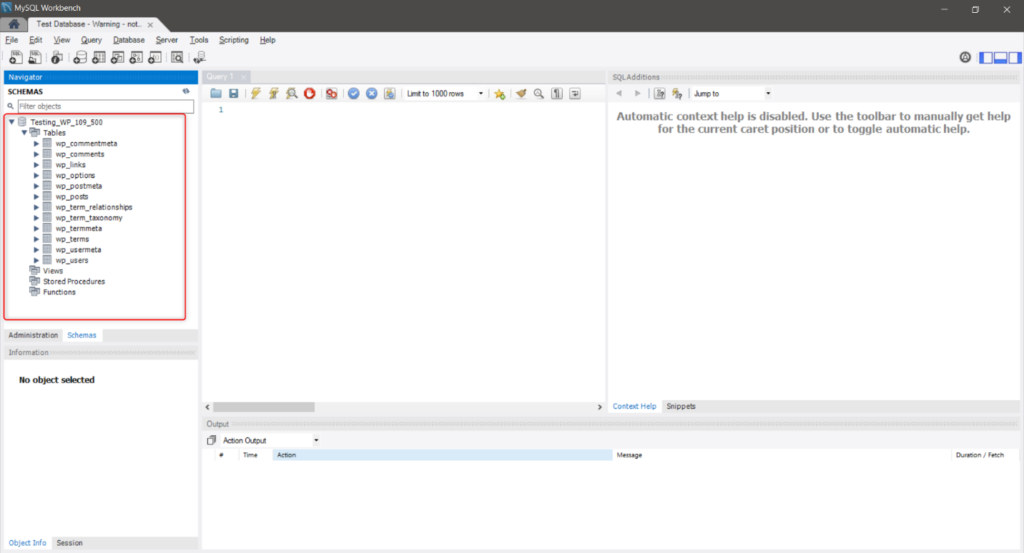
Double click on the newly created database to start working on the tables.
From the left bar, you can see the tables of your database.
Great work! You have successfully connected Workbench remotely.
Or, if you are running XAMPP, and want to connect phpMyAdmin, below are the steps:
To connect phpMyAdmin, you must have XAMPP installed on your local machine.
Once you have successfully installed the XAMPP, open the config.inc.php file from the XAMPP folder where you have installed it.
Edit the following lines:
/* Authentication type and info */
$cfg['Servers'][$i]['user'] = 'your_database_username';
$cfg['Servers'][$i]['password'] = 'your_database_password';

/* Bind to the localhost ipv4 address and tcp */
$cfg['Servers'][$i]['host'] = 'hostname_or_server_ip';
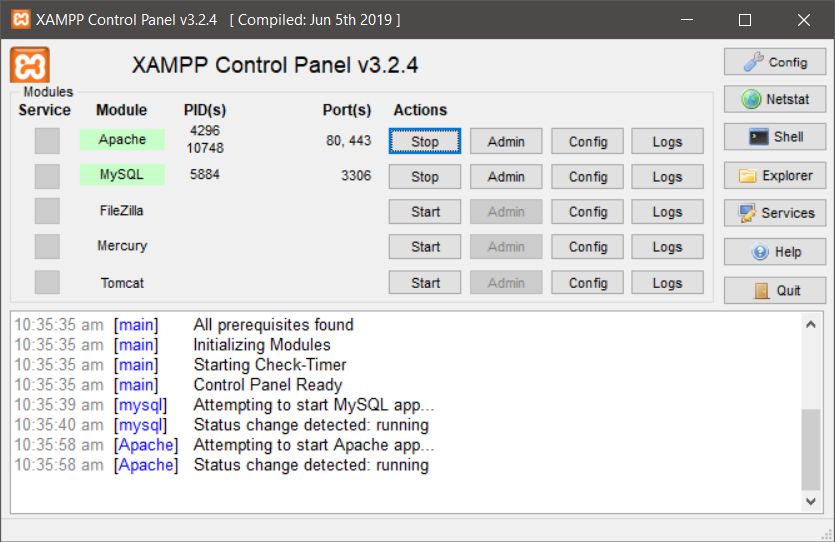
Open the XAMPP control panel and start Apache and MySQL. If the services are already running, then restart both.
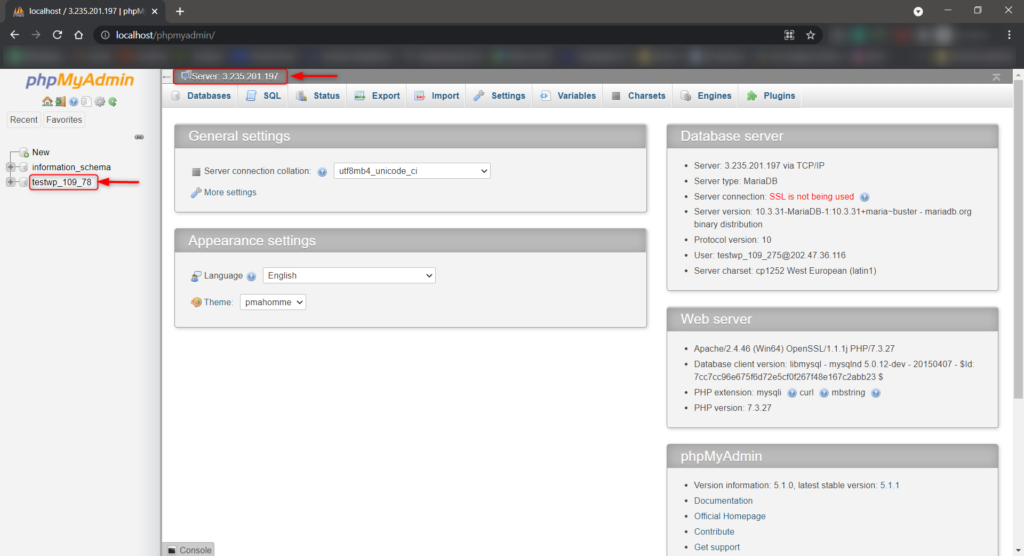
Type http://localhost/phpmyadmin/ in your browser and press Enter.
You have now successfully made the remote connection to your database.
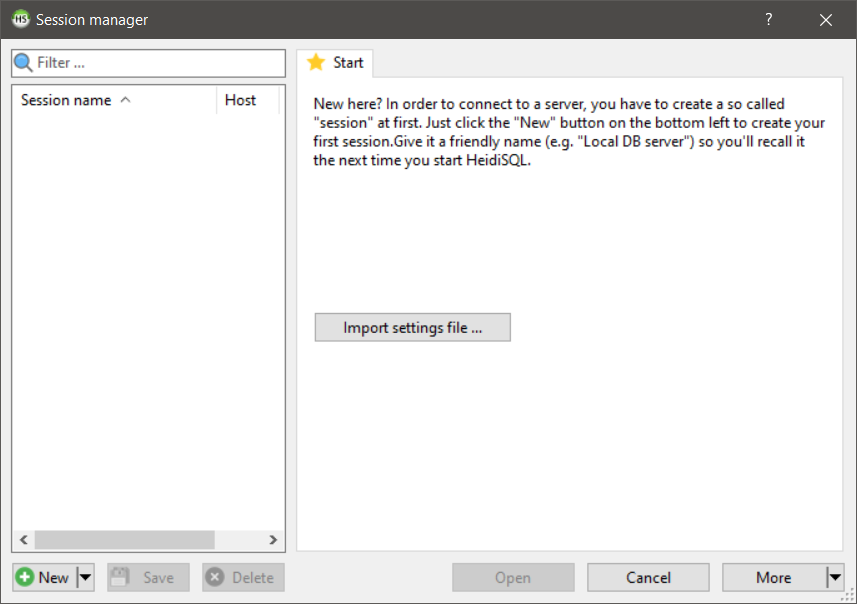
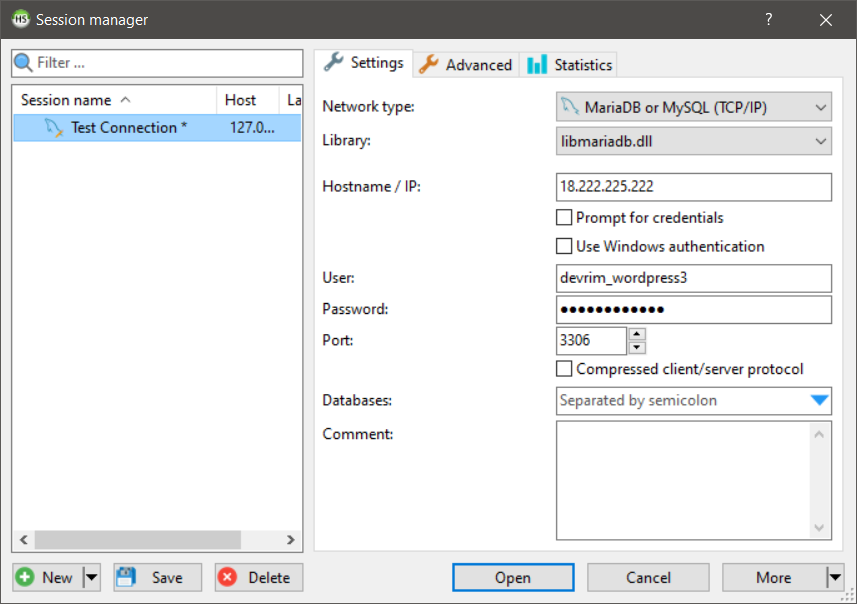
5) Connect database using HeidiSQL
HeidiSQL is a free database management system that aims to be simple to use. “Heidi” allows you to view and edit data and structures on computers running MariaDB, MySQL, Microsoft SQL, PostgreSQL, and SQLite database systems. HeidiSQL, created by Ansgar in 2002, is one of the most widely used tools for MariaDB and MySQL.
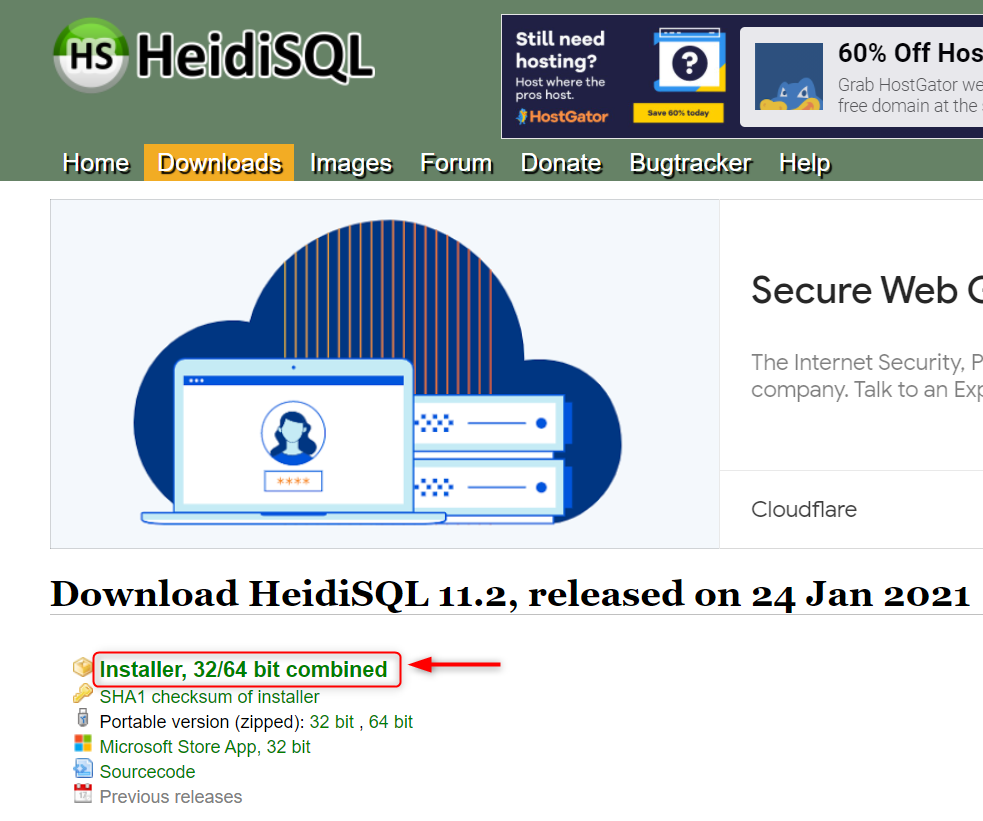
To download HeidiSQL, click here and download the latest version.
After the download, install the program and run it.
Click on New at the bottom and add your database credentials. To fetch the database details, follow the step Get Database Credentials.
Click Open after adding the details.
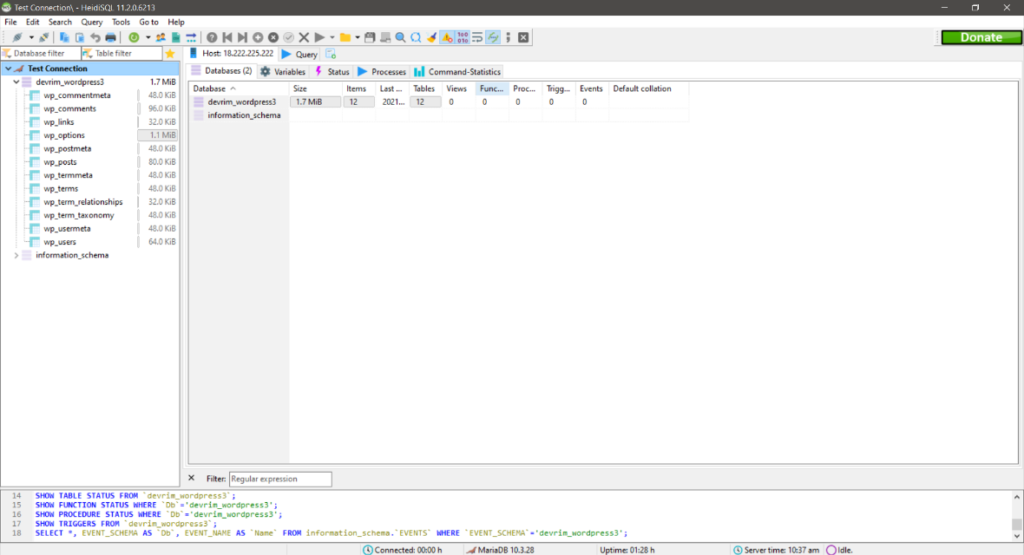
You have now successfully connected your database remotely.
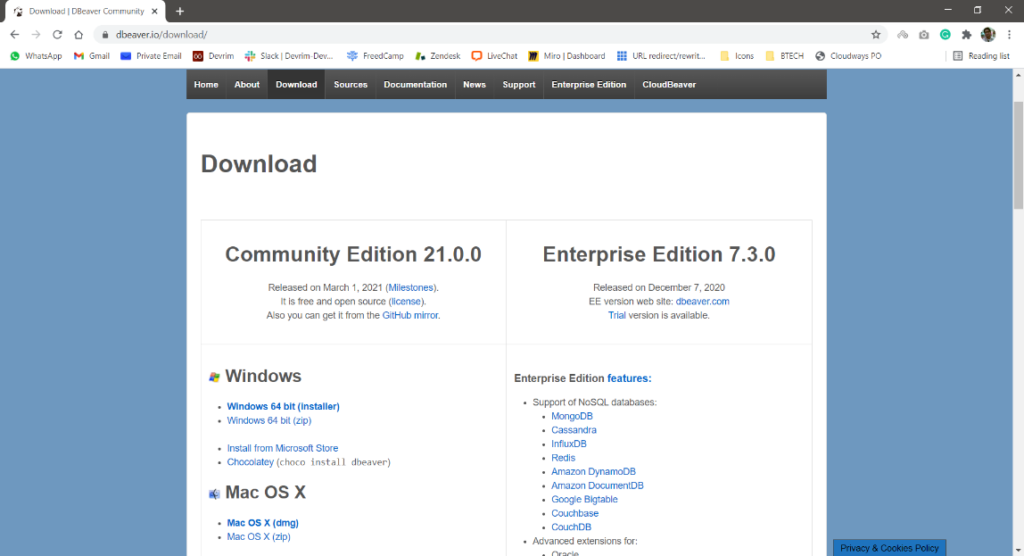
6) Connect database using DBeaver
Developers, database managers, researchers, and anyone else who needs to work with databases can use this free multi-platform database tool. MySQL, PostgreSQL, SQLite, Oracle, DB2, SQL Server, Sybase, MS Access, Teradata, Firebird, Apache Hive, Phoenix, Presto, and other common databases are supported.
To download DBeaver, click hereand download the latest version of your choice.
After the download, install the program and run it.
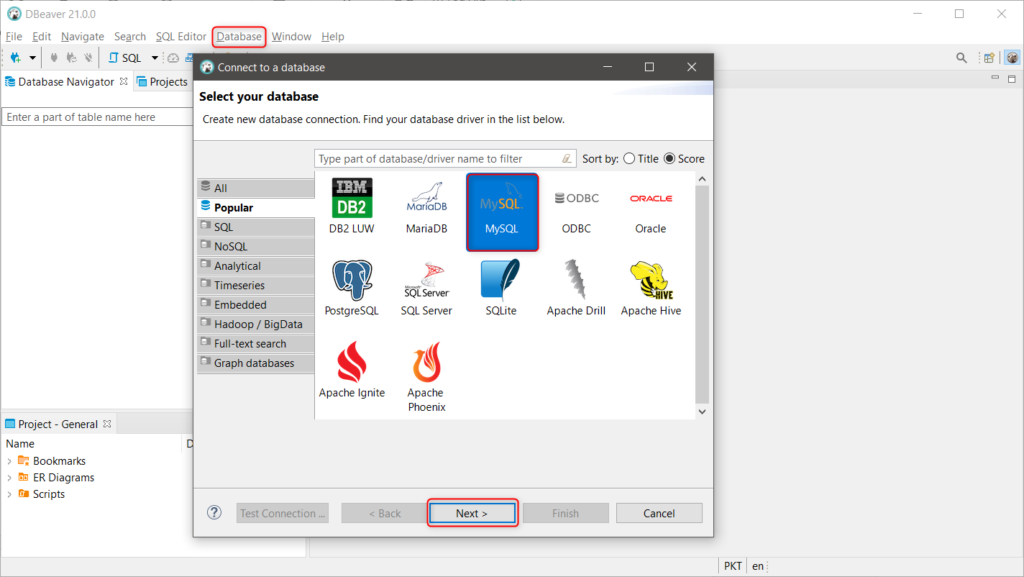
Click on Database from the top menu bar and select MYSQL and click Next.
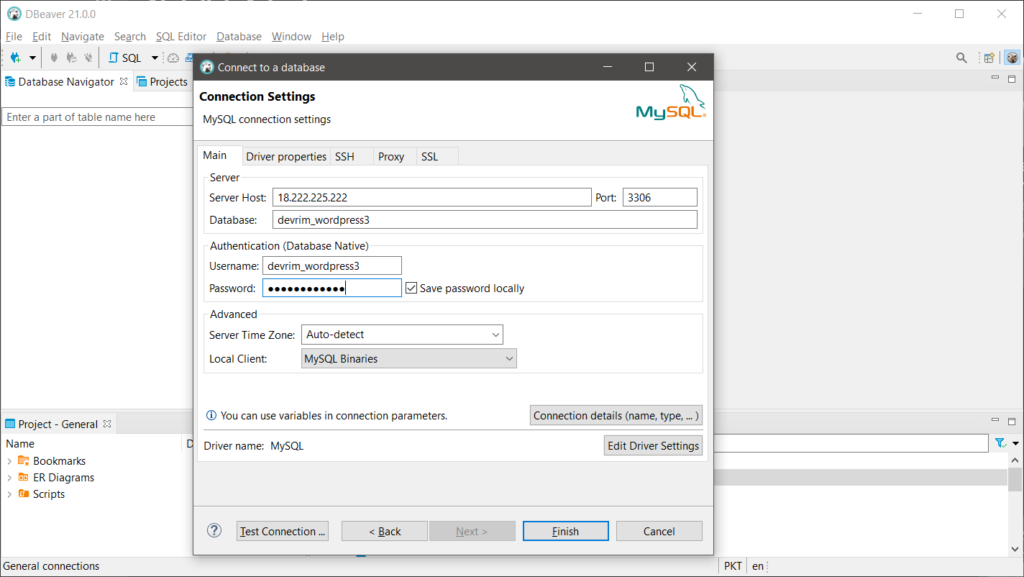
Once again, fetch the database details from Get Database Credentials and add them in the Connection Settings pop-up.
Click Finish to proceed further.
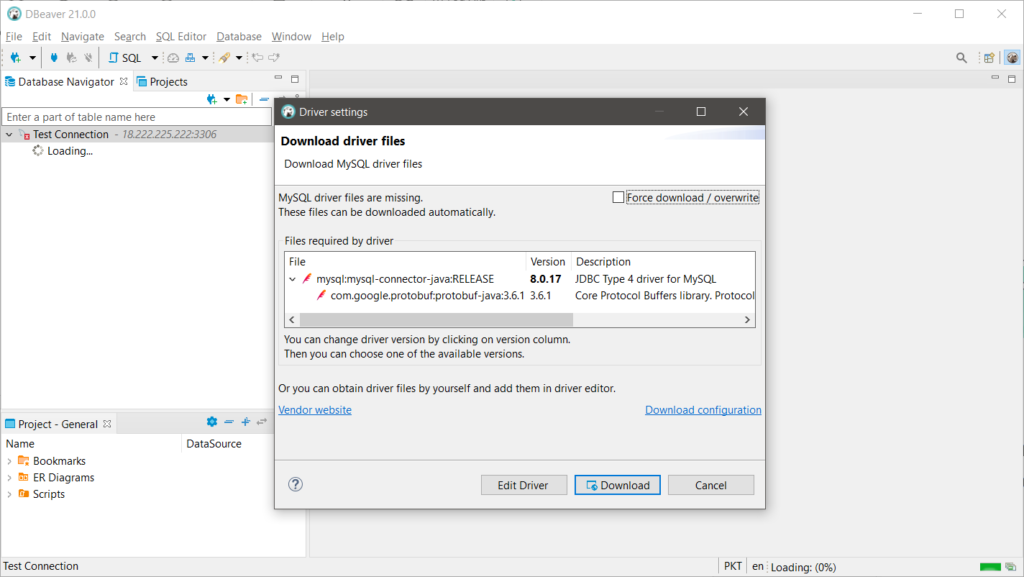
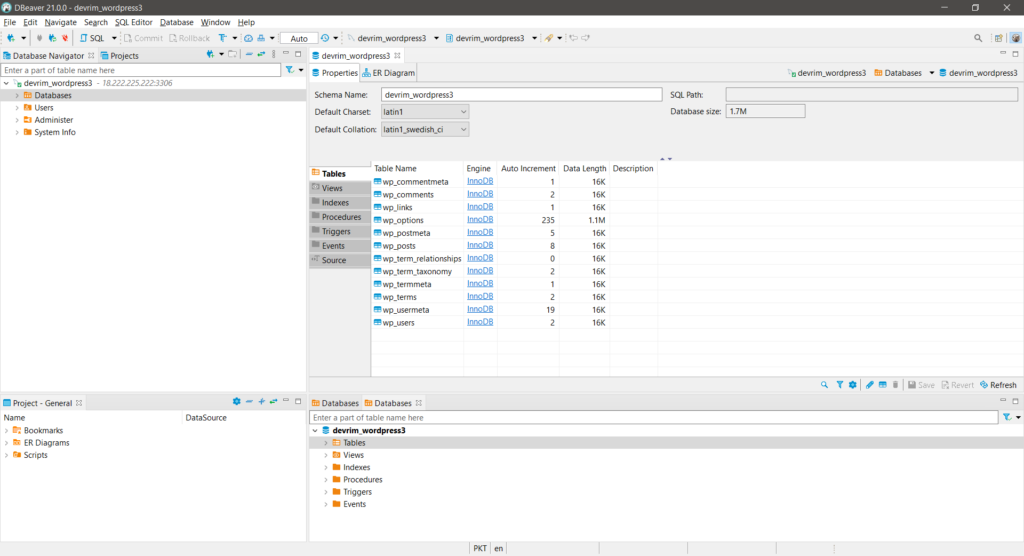
You will see the database name on the right column. Double click on it and it will ask you to download the database drivers.
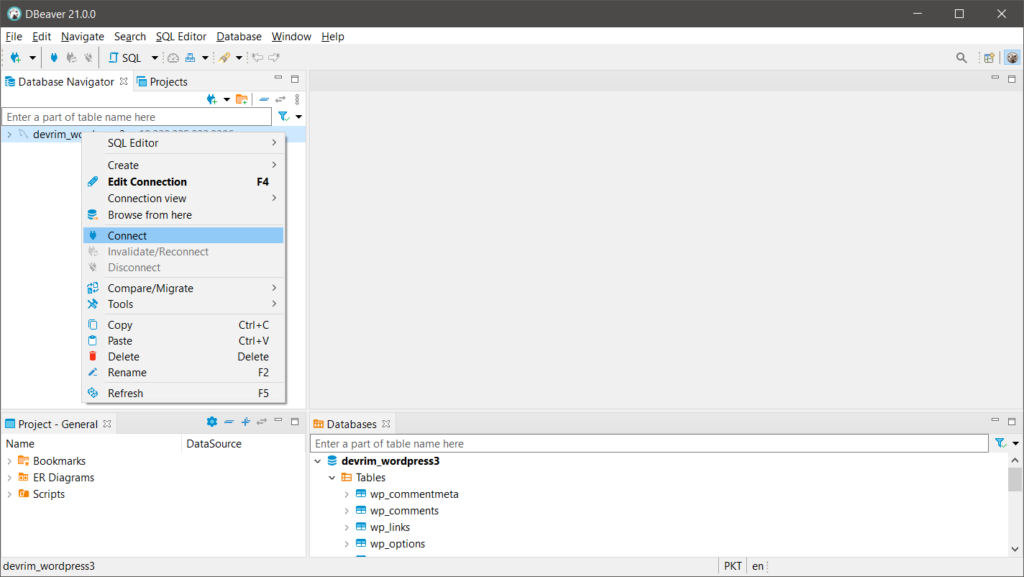
Once the drivers are installed, then right-click on the database name and click Connect.
Congrats! You have successfully connected DBeaver.
Conclusion:
We are certain that if you have followed the steps correctly, you would have connected the database successfully. If you are still having any issues understanding the steps, simply contact our 24/7 Live chat and our technical representatives will assisst you.