We are offering a Free Website Migration service to all users regardless of plan. Our expert technical support team will migrate your website. After migration, we will perform a QA test of newly migrated websites.
In this KB, we will guide you on how to take your website live and manage DNS records on different domain registrars.
1) What is DNS?
A domain name is a shortened version of an IP address that can be typed into a web browser. When people visit your website, they type the address into the browser’s URL bar, for example, www.mydomain.com.
Domain names allow us to explore the internet world more efficiently and avoid memorizing large IP addresses. Strings of numbers like 123.456.78.9 (in IPv4) or complex alphanumeric like 1234:ab00:1024:5::ab12:a1b1 are tough for humans to memorize.
Every domain is unique, and it must be registered before you use it. If you have not purchased a domain yet, you must buy it from any domain registrar available online.
2) Add Domain to your Web Application
- Login to your Devrims platform using your credentials.
- Go to your desired server from the main server listing on Devrims Dashboard.
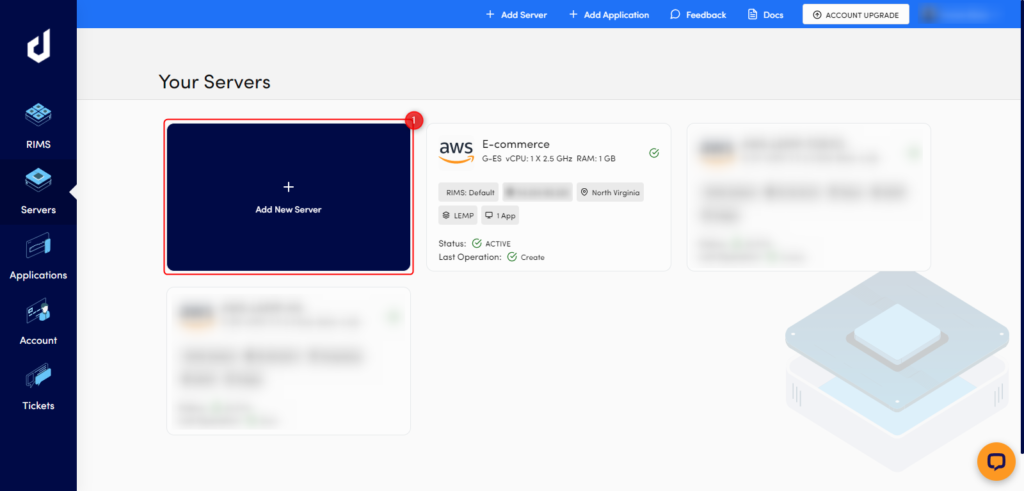
- Click on the Applications tab and select your desired application from the list.

- Click on the Domain Management tab and Add a Primary Domain.
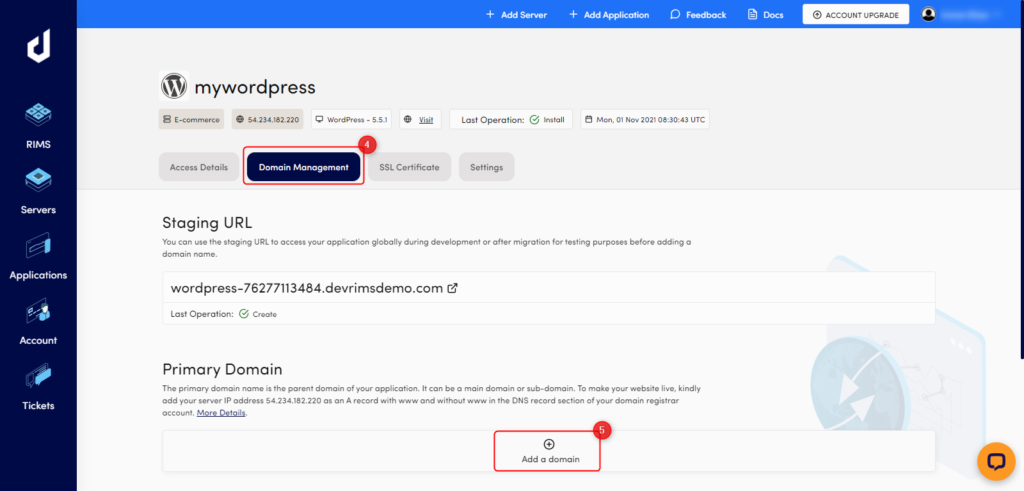
- Type your domain name in the domain field and click on Save.

Note: For detailed information, kindly visit How to add a domain name using Devrims.
3) Test Application via localhost entry
We recommend checking the website after adding the domain name via localhost entry before making it live. Devrims provides a Staging URL by default with all the applications installed in your account so you can test the application during the development stage or after migration of your existing website. The Staging URL is accessible globally once the application is installed on your server.
There is also a knowledge base article on How to test newly migrated application via localhost entry.
4) Update DNS Records
After verifying your website via localhost entry, if you are satisfied that everything is working fine as per your expectations, kindly add your server IP address as an A record with www and without www in the DNS record section of your domain registrar account.
In this KB, we will give you examples of 2 domain registrars. You can use any DNS registrar you like, but the procedure should be the same.
a) Cloudflare
Cloudflare is one of the world’s fastest and most dependable authoritative DNS providers by offering a FREE and simple-to-use DNS service. Cloudflare works as a reverse proxy with a built-in DNSSEC (Domain Name System Security Extensions).
First, you need to update your domain’s nameservers to Cloudflare’s at your domain registrar panel. Changing the nameservers does not affect where your website is hosted. It only protects your domain’s information and adds an extra security layer in the DNS lookup process.
The steps are as follows:
- Signup on Cloudflare
- Add your website to Cloudflare (non-www domain only)

- Cloudflare will auto-detect the DNS records.
- Select your desired plan and confirm
- All the DNS records will appear in a list
- Click Continue
- Cloudflare will display two nameservers
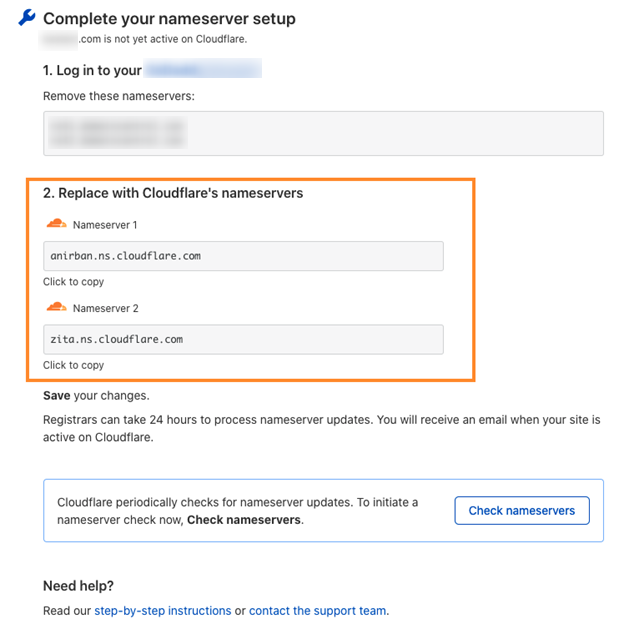
- Login to your domain registrar panel
- Copy the default nameservers from your domain registrar panel and keep it safe. In case if you need to reverse them back.
- Copy both the nameservers from Cloudflare and replace them at your domain registrar.
- Wait for 24 hours till the propagation of nameservers is completed globally.
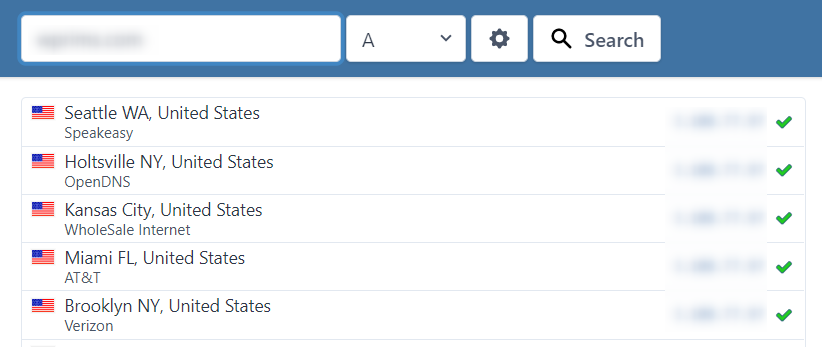
Note: You will receive an email once your domain is active on Cloudflare. - You can check the propagation on https://www.whatsmydns.net/ and select NS from the drop-down list.
Once your domain is successfully propagated globally and activated on Cloudflare, follow the steps to make your website live from Devrims.
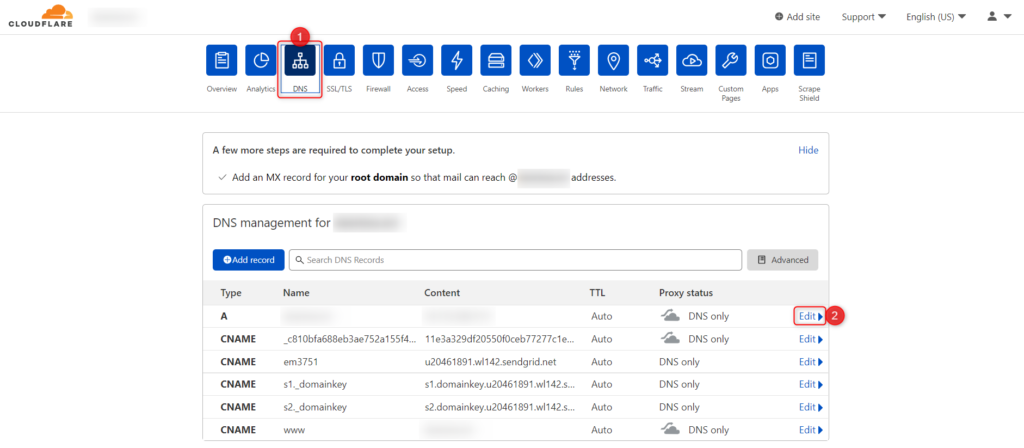
- Go to your Cloudflare Dashboard
- Click on the DNS
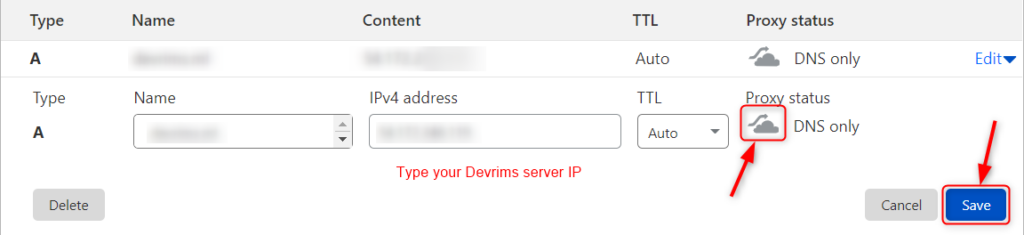
- Type: A Record (click on Edit)
- Type your Devrims server IP in IPv4 address field
- Click on the Cloud icon to enable
- Click on Save
- Wait for 24 hours till the propagation of nameservers is completed globally.
- You can check the propagation on https://www.whatsmydns.net/ and select A from the drop-down list.

b) Namecheap
Namecheap is known as the best domain name registrar that is ICANN-accredited and offers domain name registration. After purchasing the domain from Namecheap, follow the below steps to update DNS records.
- Login to Namecheap Dashboard
- Navigate to Domain List
- Select your domain
- Click on Advanced DNS
- Click on ADD NEW RECORD
- Type: A Records
- Host: @ OR www
- @ = non-www domain
- www = domain with www
- blog = for sub-domain
- * = for wildcard domain
- Value: Devrims server IP
- TTL: Leave it to default or select the lowest value
- Click SAVE ALL CHANGES

- Wait for 24 hours till the propagation of nameservers is completed globally.
- You can check the propagation on https://www.whatsmydns.net/ and select A from the drop-down list.