
There are times when you may wish to test a website you have designed or migrated from another hosting provider.
In this KB, we will provide you instructions on how to test the website functionality without making any changes to the domain’s DNS records.
1) What is Localhost?
The host file is one of the several system facilities that assist in addressing the network. The hosts file is a special file on your computer that will store IP and name information. This file is checked before DNS, so if you place an entry in this file, it will supersede anything set in DNS.
This feature is very useful in testing websites as it will allow you to control which IP your local computer will visit regardless of what is set in DNS.
The hosts file format is straightforward, and each line has an IP address and a website URL or hostname.
2) Add the domain to your web application
To test your newly migrated website, you will need to add the domain to your web application.
- Login to Devrims dashboard using your credentials.
- Go to your desired server from the main server listing of Devrims Dashboard.
- Click on the Applications tab and select your desired application from the list.
- Click on the Domain Management tab and Add a Primary Domain.

To help add a domain, kindly visit our knowledge base article on how to add a domain name using Devrims.
3) Locate your Server IP
You will need to copy your server IP address to add to the hosts file.
There are multiple ways to find your server IP. But as you were in the Domain Management section in step 2, scroll the page to the top and look for the IP.
- Click on the IP once to copy to clipboard.
Below is the screenshot for your reference.

4) Edit the Host File in Windows OS
In Windows, the hosts file is located in the directory where Windows has been installed. By default, this should be:
C:\Windows\System32\drivers\etc\hosts
You can only edit the file with the notepad with administrative privileges. To do that, below are the steps:
- Browse to the following path: C:\Windows\System32\drivers\etc\)
- Right-click on the notepad and select Run as administrator.
- Open the hosts file with a notepad.
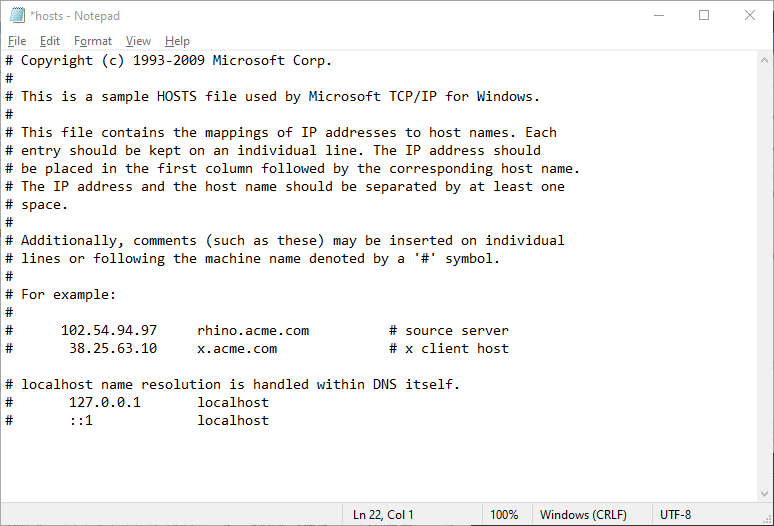
By default, there should be no entries. You can add new entries after the comment lines that start with #. Below is the screenshot of the default hosts file looks like:
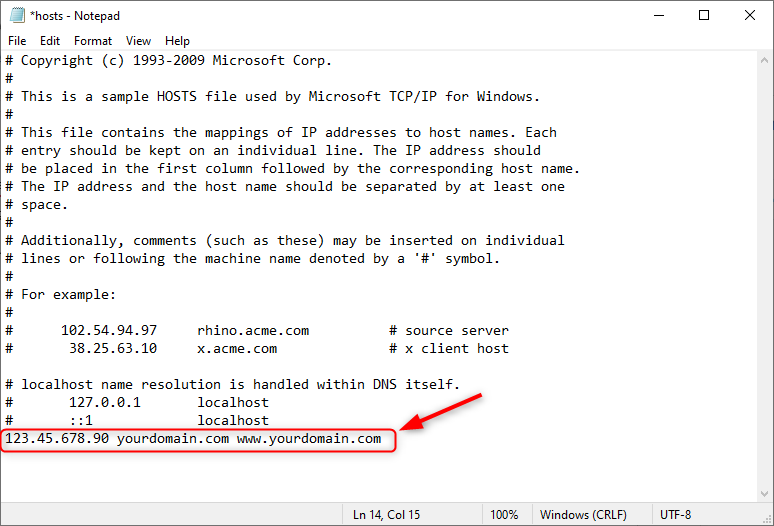
Once the hosts file is opened, then add the below line and save the file.
xxx.xxx.xxx.xxx yourdomain.com www.yourdomain.com
Note: Replace ‘X’ and yourdomain.com with your server IP and actual domain name, respectively.
After editing, the file should look like this:
4) Edit the Host File in Mac OS
Mac OS X stores the hosts file at /etc/private/hosts. The easiest way to edit this is from the Terminal. You can do this by typing “Terminal” into Spotlight or opening Finder and navigating to Applications > Utilities > Terminal. To open the hosts file for editing, type:
sudo nano /etc/private/hosts
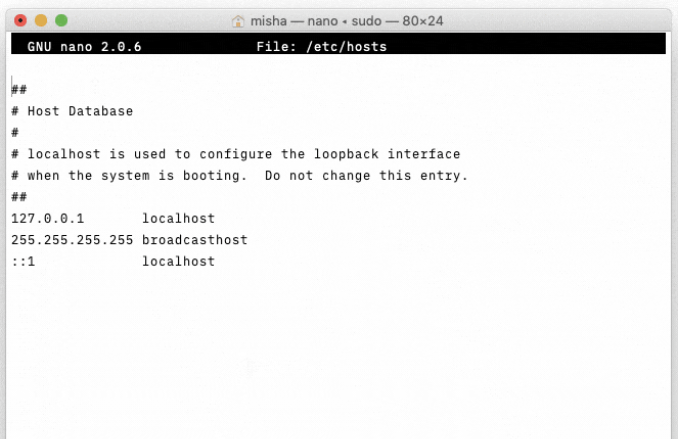
Once you connect the hosts file, then add the below line and save the file.
xxx.xxx.xxx.xxx yourdomain.com www.yourdomain.com
Note: Replace ‘X’ and yourdomain.com with your server IP and actual domain name, respectively.
After this process, either done in Windows OS or Mac OS, your local system is pointed to your Devrims server for your website domain.
Now you can test your migrated website on browser and check the functionality before updating its DNS records.
Once everything goes as per your expectations, you can update the DNS records at your local domain registrar. For further instructions, kindly follow our knowledge base article on how to take website live from Devrims.
IMPORTANT:
Don’t forget to remove the line from the hosts file from Windows OS or Mac OS, which you have added or comment on the line by adding the “#” sign before the IP address and save the changes.